Unveiling the Secrets of Realistic Art: A Comprehensive Guide

Introduction to Realistic Drawings
Realistic drawings, with their precise details and lifelike qualities, have a mesmerizing effect on viewers. These breathtaking artworks capture the essence of their subjects and evoke a sense of wonder and admiration. Whether it's a hyper-realistic portrait capturing every subtle expression or a still-life drawing that makes objects appear tangible, realistic drawings have the power to transport us into another world. When viewing a realistic drawing, we are often left amazed by the artist's ability to capture every nuance, from the reflection in an eye to the softness of a petal. These artworks push the boundaries of what is possible with a humble pencil, challenging our perception and blurring the line between art and reality.
With this comprehensive guide, we will delve into the secrets behind creating stunning realistic drawings. From capturing intricate details to mastering shading techniques, we will explore the techniques, tips, and resources that will elevate your pencil art to new heights. Get ready to embark on a journey that will unlock the secrets to creating lifelike drawings that will amaze and inspire.
Materials and Tools for Realistic Drawings
To create realistic drawings that capture intricate details and lifelike textures, you'll need the right tools and materials. Here are the essential supplies that every aspiring pencil artist should have:
High-Quality Graphite Pencils
Invest in a range of graphite pencils, including different grades from 2H to 6B. The harder pencils, like 2H, are ideal for light sketching and initial outlines, while the softer pencils, like 6B, are great for shading and adding depth.
Quality Drawing Paper
Choose acid-free, heavyweight drawing paper with a smooth surface. Look for paper specifically designed for pencil drawings to ensure that it can handle multiple layers and erasing without smudging or tearing.
Erasers
Have a variety of erasers on hand, including a kneaded eraser for gentle and precise erasing, a vinyl eraser for larger areas, and a pencil eraser for fine details. Experiment with each type to find the ones that work best for you.
Blending Tools
Blending stumps (also known as tortillons) and blending brushes are essential for achieving smooth transitions and soft gradients in your drawings. These tools help you blend and soften pencil strokes for a more realistic look.
Pencil Sharpeners and Knife
A good quality pencil sharpener will ensure that your graphite pencils are always sharp and ready to go. Consider investing in a small handheld knife as well, which can be used to create a fine, needle-like point for intricate details.
Fixative Spray
Using a fixative spray is optional but highly recommended, especially if you want to protect your finished artwork from smudging or fading. Apply the fixative according to the manufacturer's instructions to preserve the integrity of your drawing.
Remember, the quality of your materials and tools can greatly impact the outcome of your realistic drawings. Invest in the best supplies your budget allows, as they will ultimately enhance your ability to capture lifelike details and textures.
Now that you have the right tools, it's time to delve deeper into the techniques and skills needed to bring your drawings to life. In the next section, we'll explore the importance of light and shadows in creating realistic art.
Understanding Light and Shadows
In the world of realistic drawings, understanding the significance of light and shadows is crucial for creating lifelike and three-dimensional artworks. The interplay of light and shadows can dramatically enhance the realism and depth of a drawing, bringing it to life. Here are some techniques to effectively capture light and shadows in your artwork:
1. Study Light Sources
- Observe how light interacts with objects in different settings.
- Note the intensity, direction, and angle of light falling on the subject.
2. Create Contrast
- Use shading techniques to create variations in light and dark areas.
- Gradually transition from light to dark tones to depict depth.
3. Utilize Hatching and Cross-Hatching
- Use parallel lines (hatching) or intersecting lines (cross-hatching) to create shadow and texture.
- Vary the spacing and thickness of lines to indicate different shades.
4. Play with Highlights and Reflections
- Identify areas where light reflects off surfaces or highlights objects.
- Sketching these areas with lighter tones can add a sense of realism to the drawing.
5. Practice Value Studies
- Experiment with different shades and values to accurately represent the effects of light and shadows.
- Gradually build up layers of graphite or charcoal to create depth and dimension.
Remember, light and shadows are not just about adding darkness. They play a crucial role in revealing the form, texture, and volume of objects. By mastering the art of capturing light and shadows, you can elevate your pencil drawings to a whole new level of realism.
Capturing Detail and Texture
When it comes to creating realistic drawings, capturing detail and texture is crucial for bringing your artwork to life. It's the intricate details and subtle textures that add depth and authenticity to your piece. To help you master this fundamental aspect of realistic drawing, here are some valuable tips:
Use Fine Lines and Hatching:
One effective technique for depicting detail and texture is to use fine lines and hatching. Vary the length, thickness, and direction of your lines to create different textures such as fur, fabric, or rough surfaces. Experiment with cross-hatching to add depth and volume to your drawings.
Pay Attention to Lighting:
Lighting plays a significant role in emphasizing textures and details. Observe how light interacts with different surfaces and study the resulting shadows and highlights. By carefully observing and capturing these nuances, you can enhance the realism of your drawings.
Focus on Gradation and Blending:
Smooth transitions between light and dark areas are essential for creating realistic textures. Utilize shading techniques like blending, smudging, and cross-contouring to achieve seamless gradation. Brush off excess graphite to create highlights and build up layers for deeper shadows.
Reference Reliable Sources:
To accurately depict details, it's essential to refer to reliable sources. Use reference photos, books, or real-life objects to study the textures and details you want to portray. Pay attention to how different materials interact with light and how textures vary from one object to another.
Practice Patience and Precision:
Creating realistic detail and texture requires patience and precision. Take your time to carefully observe and replicate even the smallest intricacies. Use a sharp pencil or specialized tools like mechanical pencils or drawing pens to achieve fine details.
Remember, mastering detail and texture is an ongoing process that requires practice and experimentation. Embrace the challenge, and with time, you'll develop the observation skills and techniques necessary to bring your drawings to life with stunning detail and captivating textures.
Mastering Proportions and Anatomy
Understanding proportions and anatomy is fundamental to creating realistic drawings that accurately represent the human form and other subjects. By mastering these aspects, you can bring a lifelike quality to your artwork. Here's why proportions and anatomy are crucial and where you can find resources to enhance your skills:
Importance of Proportions and Anatomy
Proportions play a key role in generating a sense of realism in your drawings. By accurately depicting the relative sizes and placements of various elements, you can create a faithful representation of the subject. Understanding human anatomy is equally important, as it allows you to correctly depict the underlying bone structure, muscles, and other anatomical features. This knowledge enables you to create drawings that capture the unique characteristics and movement of your subjects.
Resources for Learning and Practice
To enhance your knowledge of proportions and anatomy, consider the following resources:
1. Anatomy Books: There are numerous anatomy books available that specifically cater to artists. These books provide detailed illustrations and explanations of the human body, helping you understand the complexities of structure and form.
2. Online Tutorials: The internet offers a vast array of tutorials and videos that focus on teaching proportions and anatomy for artists. Websites like YouTube and online art communities are treasure troves of valuable resources, providing step-by-step guidance and demonstrations.
3. Life Drawing Classes: Attending life drawing classes or workshops can greatly improve your understanding of the human form. These sessions allow you to observe live models, helping you develop a keen eye for proportions and anatomy. Many local art schools, community centers, and art studios offer life drawing classes.
4. Reference Photos: Utilize high-quality reference photos that showcase various angles, poses, and anatomical details. You can find numerous online resources that provide access to reference photos specifically tailored for artists.
Remember, practice is key to mastering proportions and anatomy. Continuously drawing from life, practicing gesture drawings, and studying anatomical references will enhance your skills over time.
By investing time and effort into learning proportions and anatomy, you'll be equipped with the necessary foundation to create realistic and captivating drawings. So, dive into the world of anatomy and watch your artwork flourish with newfound accuracy and proficiency.
Achieving Realistic Skin Tones
Capturing realistic skin tones is essential for creating lifelike drawings that truly come to life. By employing specific techniques, shading methods, and blending techniques, you can achieve remarkable results. Here are some tips to help you capture the nuances of skin tones in your pencil artwork:
1. Observe and Analyze
Take the time to closely observe and analyze different skin tones. Notice the subtle variations in color, texture, and undertones. Pay attention to how light interacts with the skin and creates highlights and shadows.
2. Layering and Blending
Build up layers of pencil strokes gradually to create depth and dimension. Start with lighter hues and gradually work your way towards darker shades. Use a light touch and blend the strokes together using a blending stump or a soft cloth. This technique helps to achieve smooth transitions and a more realistic appearance.
3. Cross-Hatching and Texturing
Experiment with cross-hatching and various texturing techniques to represent the different textures of skin, such as wrinkles, pores, or freckles. Vary the pressure and direction of your pencil strokes to simulate the natural patterns found in skin.
4. Utilize Reference Images
Refer to high-quality reference images or photographs that showcase a range of skin tones. This will assist you in accurately capturing the specific characteristics of different ethnicities and skin types.
5. Practice and Patience
Achieving realistic skin tones requires practice and patience. Don't be discouraged by initial attempts as it may take time to master this skill. Keep practicing, experiment with different techniques, and eventually, you will see improvement in your artwork.
Remember, the key to capturing realistic skin tones lies in understanding the interplay of light and shadow, using appropriate shading and blending techniques, and studying actual skin textures. With practice and perseverance, you can bring your pencil art to life with stunningly realistic skin tones.
Stay tuned for more insightful tips and techniques on creating lifelike drawings in our comprehensive guide to pencil art.
Creating Realistic Portraits
To create lifelike portraits that capture the essence of your subject, attention to detail is key. Here is a step-by-step guide to help you achieve stunning results:
1. Start with a solid foundation
Begin by sketching the basic outline of your subject's face using light, loose lines. Pay attention to the proportions and overall structure, ensuring accuracy from the start.
2. Focus on the eyes
The eyes are often the focal point of a portrait. Start by drawing the basic shapes of the eyes, then add details such as the iris, pupils, and eyelashes. Remember to observe the unique characteristics of your subject's eyes to capture their individuality.
3. Capture facial features
Move on to the nose and mouth, paying close attention to their shapes and proportions. Observe the subtle variations in curves, shadows, and highlights to bring realism to these features. Take your time and make adjustments as needed.
4. Convey expressions and emotions
A portrait is more than just a likeness; it should also convey the subject's emotions and personality. Pay attention to subtle facial expressions, such as slight smiles or furrowed brows, and use shading and lines to depict these nuances.
5. Gradually build up shading and tone
To create the illusion of three-dimensional form, add shading and layers of tone gradually. Study the play of light and shadow on your subject's face and replicate it in your portrait. Start with lighter tones and gradually build up darker shades for depth and realism.
6. Pay attention to details
As you progress, focus on capturing smaller details such as skin texture, wrinkles, and hair. Use light strokes and observation to replicate the unique qualities of your subject's skin and hair.
Remember, practice and patience are essential for mastering the art of creating realistic portraits. Study the work of accomplished artists, take inspiration from their techniques, and continue to refine your skills. With dedication and perseverance, you can capture the essence of your subjects and create stunning lifelike portraits.
Adding Depth and Dimension: Techniques for Captivating Realism
To make your pencil drawings truly come to life, incorporating depth and dimension is essential. By mastering techniques that emphasize perspective and foreground-background relationships, you can infuse your art with a captivating sense of realism. Here are some valuable techniques to bring depth and dimension to your realistic drawings:
1. Understand the Power of Perspective
Perspective plays a crucial role in creating depth in your drawings. Learn about one-point, two-point, and three-point perspective to accurately depict objects in space. By skillfully manipulating vanishing points and horizon lines, you can create the illusion of depth and distance.
2. Utilize Foreground-Background Relationships
To add depth to your drawings, consider the relationships between foreground and background elements. By using lighter values and less detail in the background, you can push it further away and highlight the main subject in the foreground. This technique enhances the visual impact and creates a sense of depth in your artwork.
3. Experiment with Overlapping and Size Variation
Objects that overlap one another can contribute to a more convincing sense of depth. Additionally, varying the sizes of objects in relation to their position within the drawing further enhances the perception of depth. Experiment with these techniques to add depth and create a visually engaging composition.
Remember, practice makes perfect. Incorporate these techniques into your drawings and continue to refine your skills. With time and dedication, you'll succeed in adding breathtaking depth and dimension to your realistic pencil art.
Bringing Still Life to Life
When it comes to creating realistic still life drawings, attention to detail is key. By capturing textures and arranging compositions effectively, you can bring your artwork to life. Here are some tips and techniques to enhance your still life drawings:
1. Choose Interesting Objects
Select objects that have a variety of shapes, sizes, and textures. This will add visual interest to your composition and challenge your artistic skills.
2. Observe Lighting and Shadows
Pay close attention to the lighting and shadows cast on the objects. Understand how light interacts with different surfaces and use shading techniques to create realistic effects.
3. Focus on Texture
Textures play a crucial role in still life drawings. Whether it's the roughness of a bark, the smoothness of a glass surface, or the fuzziness of a fruit, strive to accurately depict the textures and make them visually appealing.
4. Create Depth and Perspective
Use techniques like overlapping, size variation, and linear perspective to create a sense of depth and make your art appear three-dimensional.
5. Arrange Composition Thoughtfully
Consider the arrangement of objects within your still life setup. Experiment with different placements and perspectives to create a visually pleasing composition that draws the viewer's attention.
6. Pay Attention to Details
Focus on the small details that make each object unique. Take the time to capture intricate patterns, reflections, and subtle nuances that bring your still life drawing to life.
Remember, practice is key to improving your skills in creating realistic still life drawings. Experiment with different objects and compositions, and don't be afraid to push your boundaries as an artist.
Overcoming Challenges in Realistic Drawings
Creating realistic drawings can be a rewarding yet challenging endeavor. As an artist, you may encounter common hurdles along the way. However, with the right techniques and mindset, you can overcome these challenges and elevate your pencil art to new heights. Here are some tips and solutions for tackling the obstacles often faced in realistic drawing:
1. Achieving Accurate Proportions
- Use measuring techniques such as sighting and comparative measurements to ensure accurate proportions.
- Break down complex subjects into basic shapes to simplify the process of capturing proportions.
- Practice regularly with figure drawing and anatomy studies to develop a good understanding of human proportions.
2. Depicting Realistic Textures
- Experiment with different pencil grades to create a range of textures, such as smooth gradients for shiny surfaces and cross-hatching for rough textures.
- Utilize techniques like stippling, hatching, and blending to achieve realistic textures in your drawings.
- Observe and study real-life textures to understand how light interacts with different surfaces.
3. Handling Light and Shadows
- Study the principles of light and shadow to create depth and dimension in your drawings.
- Practice observing how light falls on objects and how shadows are cast.
- Experiment with different shading techniques, such as blending, cross-hatching, and stippling, to accurately represent light and shadow.
4. Conveying Realistic Skin Tones
- Gradually build up layers of shading and blending to create smooth transitions in skin tones.
- Pay attention to the underlying undertones and variations in skin color.
- Observe the interplay of light and shadow on different skin tones to add depth and realism.
Remember, mastering realistic drawing takes time and practice. Don't be discouraged by initial challenges. Embrace them as opportunities to grow and develop your skills. By implementing these tips and techniques, you'll be on your way to creating lifelike pencil art that captures the attention and imagination of viewers.
Conclusion
In conclusion, the world of realistic drawings offers endless possibilities and a captivating visual experience. By delving into the techniques and principles shared in this comprehensive guide, you can elevate your pencil art to new heights.
Throughout this guide, we explored the importance of capturing intricate details and mastering shading techniques to create lifelike drawings that leave a lasting impression on the viewer. We discussed the essential tools and materials needed for realistic drawings, as well as the significance of understanding light and shadows in capturing a sense of depth and realism.
Moreover, we delved into the art of capturing detail and texture, mastering proportions and anatomy, and achieving realistic skin tones. We also provided a step-by-step guide on creating lifelike portraits and shared tips and techniques for adding depth and dimension to your drawings.
While the journey towards mastering realistic drawings may come with challenges, it is important to remember that practice and perseverance are key. As you continue to explore this fasc

Be the first to like this.
You may also be interested in
You may also be interested in


Discover more blogs
Discover more blogs

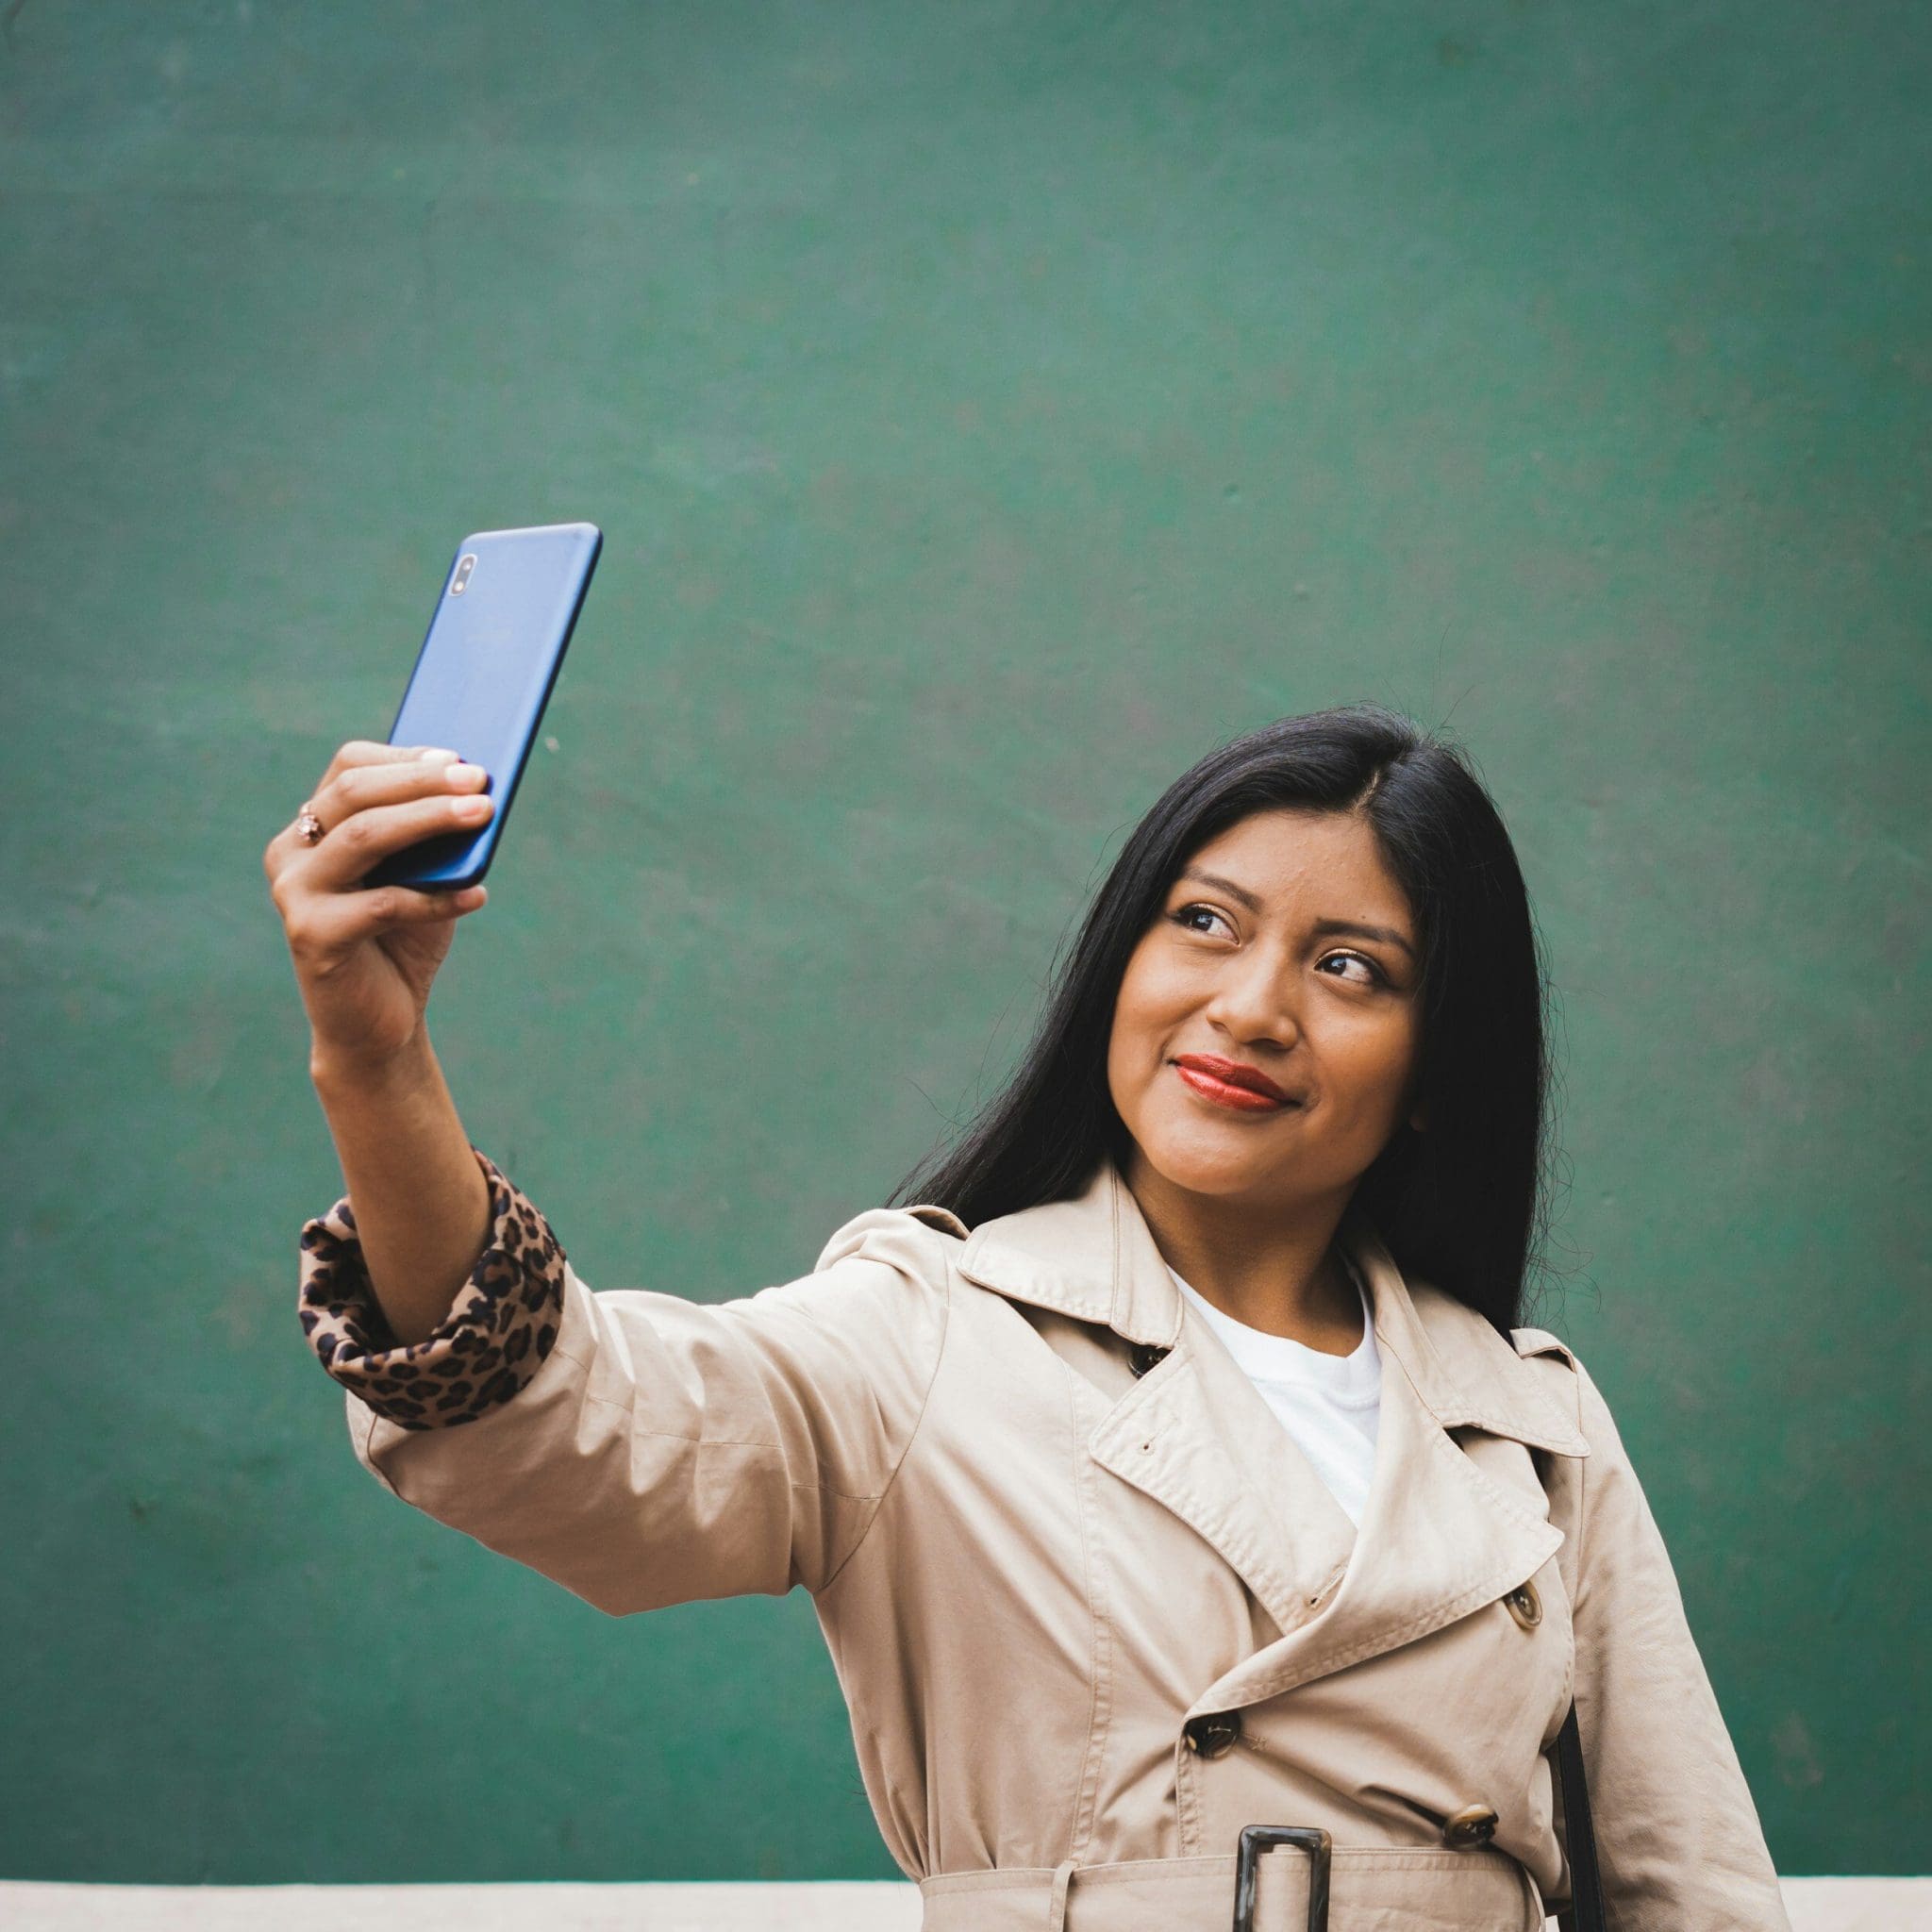
Free Face Swap: Change faces in a few clicks
Have you always dreamed of stepping into the shoes of a celebrity, surprising your friends, or creating hilarious videos with your face on someone else's? Thanks to free face swap tools, it is now possible to change the face in a photo in the blink of an eye — it’s fast, fun, and incredibly effective!
In this article, discover how to transform a simple photo or an ordinary video into an unforgettable moment. We introduce you to the best tools, tips for realistic results, and most importantly, how to change faces for free right from your browser or smartphone.
What is a Face Swap? (And why is it so fun!)
Face swap, or "face replacement," is a technology based on artificial intelligence that allows you to swap one face with another in an image or video. Whether it's to laugh with friends, create content for social media, or even for marketing use, free face swap has become a must-have.
While these edits used to be clumsy and easily detectable, new AI face replacement technologies now offer results that are stunningly realistic. And good news: you don't need to be an editing pro to have fun!
Change Faces: Easy as Pie!
Want to see your head on an astronaut's body? Or swap faces with your cat? Thanks to a free face swap tool, all of this becomes child's play. APOB AI allows you to change faces on photos or videos with ease. APOB AI stands out with its proprietary AI face replacement technology, capable of perfectly aligning faces for a natural and smooth result. Ideal for corporate videos, parodies among friends, or family memories.
Here is how to do it:
Sign up on APOB AI, click on "Create Portrait Model," and upload your original photo.
Choose the style and theme that inspires you — and for perfectionists, you can even enter a prompt to create exactly the image you have in mind. Already have a face to integrate? Go to the "Image face swap" section to directly upload the face you want to use.
First create a fun AI video with APOB AI (or skip this step if you already have a video). Then go to "Video face swap," upload the video, and in a few seconds, the face is replaced!
Tip: For a more natural result, choose two faces that are well-lit, facing forward, and without obstructing accessories (glasses, hats...).
You can then save your edit and share it in one click on your social networks!
Advantages of the APOB AI Tool
Easy to use: A few clicks are enough, no technical know-how required.
Multi-format: Works with HD photos and videos.
Fast processing: Instant generation via the cloud, no queue.
Attractive free offer: After registration, receive 80 points/day, which means 4 photo face swaps and 1 video (4 seconds) for free.
Realistic results: Photo-realistic rendering, intuitive interface, and fun filters for quality editing.
Free Video Face Swap: Create Unforgettable Moments
Creating a video with a face change might seem complex, but with the right tools, it’s almost magic.
What you can do:
Make a fake movie trailer with your face on the hero.
Send a totally personalized birthday video.
Create marketing content without hiring a professional model.
Thanks to platforms like APOB AI, the final output is cinematic, with perfect facial alignment and synchronized expressions.
Change Face Online for Free: Key Advantages
Why opt for a free online face swap tool rather than heavy software to install?
No download required;
Compatible with all modern browsers;
Fast results, often without watermarks;
Ideal for personal, pro, or promotional videos.
These platforms allow you to change the face of a photo in just a few seconds, without technical skills. The AI used by these tools has progressed so much that even experts sometimes struggle to distinguish an edit from a real face. This is why these solutions now fit just as well into playful uses as they do professional ones.
Conclusion
Who is Free Face Swap for? Absolutely everyone! Whether you are a content creator, a business owner, or just someone who likes to laugh, a good free face swap can transform your day. It’s a modern and funny way to express yourself, surprise others, and create connections.
So, what are you waiting for? Test a free video face swap tool, change faces in a few seconds, and let the magic happen. Your future self in GIF form is already waiting for you!
FAQ
Q1: How does AI face changing work?
A1:AI face changing uses algorithms to identify facial features, map them onto another face, and create a natural transition. This requires neural networks to adjust shadows and lighting.
Q2: How to change the face in a photo?
A2:To change the face in a photo, use an online tool like APOB AI or Fotor. Upload the source and target photos, then start the face swap process. The AI merges the faces realistically.
Q3: Is face swapping legal?
A3:Face swapping is perfectly legal as long as you use free face swap apps or tools to modify your own content or have obtained permission from the owner of the original content. It is important to ensure that the use of face swap AI is done in an appropriate and responsible manner.
Q4: What can I do with the APOB AI face changer tool?
A4:You can have fun creating original images or videos: change gender, test different hairstyles or clothing styles, insert yourself into cult movie scenes, replace a face in a video, or design crazy memes. The possibilities are numerous — let your imagination run wild and have fun!
10 Creative Hacks for Customizing Your Selfies with AI Technology
Are you tired of the same old selfies flooding your social media feed? Imagine being able to effortlessly elevate your selfie game with just a tap of your phone screen. Say hello to the world of AI technology and its fascinating ability to transform your ordinary selfies into personalized works of art.
Want to stand out among the crowd with your selfies? Look no further, our blog on '10 Creative Hacks for Customizing Your Selfies with AI Technology' is here to revolutionize the way you capture and share your moments online.
Discover how AI technology can help you unleash your creativity and take your selfie game to the next level. From subtle enhancements to out-of-this-world transformations, we've got you covered with a range of innovative hacks and techniques that will leave your followers in awe.
Get ready to explore the endless possibilities of AI-powered selfie customization as we dive into tips, tricks, and tools that will help you express your unique style and personality like never before. Join us on this exciting journey of self-expression and creativity through the lens of AI technology.
Short Summary
Discover the world of AI technology and its transformative impact on selfie customization. Learn about advanced filters, effects, and background tools that can enhance your selfies. Explore how AI can fine-tune facial features, improve lighting, and elevate colors in your photos. Unleash your creativity with AI-powered makeup tools, pose suggestions, customizable text, and stickers for unique and personalized selfies.
Exploring AI Selfie Customization Apps
1. Introducing AI Selfie Customization Apps
In today's digital age, the realm of selfie-taking has been revolutionized by the advent of Artificial Intelligence (AI) technology. AI selfie generator apps have taken center stage, offering users a myriad of creative tools to customize their self-portraits in innovative ways. Let's delve deeper into exploring the fascinating world of AI selfie customization apps.
Understanding AI Selfie Generation
AI selfie generators leverage the power of artificial intelligence to enhance facial features, apply various artistic styles, and provide instant portrait transformations. By analyzing user input and employing advanced algorithms, these apps can generate personalized selfie images that cater to individual user preferences.
Key Features and Benefits
Ease of Use: AI selfie apps typically offer a user-friendly interface, allowing both tech-savvy individuals and beginners to effortlessly navigate through the customization options.
Wide Range of Styles: From classic filters to avant-garde artistic renderings, AI selfie generators provide a diverse spectrum of styles to choose from, catering to users with specific needs and preferences.
Lensa AI: A Game-Changer in Selfie Customization
One standout example in the realm of AI selfie customization is the Lensa AI app. With its cutting-edge technology and innovative features, Lensa AI has gained popularity among content creators, social media influencers, and everyday users looking to elevate their online presence with unique, AI-generated selfies.
The Future of Self-Expression
As AI technology continues to evolve, so do the possibilities for self-expression through selfies. By embracing AI selfie customization apps, individuals can explore a whole new realm of creativity and present themselves in a unique light on various social media platforms.
Key Takeaway: AI selfie customization apps powered by AI technology offer a seamless and innovative way for users to personalize their self-portraits, enhancing their online presence and self-expression.
Understanding AI Technology in Selfie Editing
2. Understanding AI Technology in Selfie Editing
In today's rapidly evolving digital landscape, artificial intelligence (AI) is revolutionizing the way we capture and customize our photos, particularly in the realm of selfie editing. AI technology in selfie editing goes beyond mere filters and effects; it delves deep into facial features, enhancing individual user experiences with a touch of innovation and creativity.
The Power of AI Selfie Generator Apps
AI selfie generator apps leverage the capabilities of artificial intelligence to analyze and manipulate face images in real-time. By understanding facial expressions and specific needs of users, these apps offer a wide range of style options to cater to diverse preferences. Lensa AI, for example, stands out for its user-friendly interface and instant portrait transformations, making it a popular choice among content creators seeking a unique look.
The Innovation Behind AI Photo Editors
AI photo editors have redefined the way we approach selfie customization. By incorporating advanced algorithms and user input, these tools generate AI-generated selfies that are not only visually captivating but also reflect an individual's personal image. The best AI selfie generators on the market today provide ease of use and a plethora of innovative features, such as text prompts and varied styles, to elevate your online presence on social media platforms.
Unlocking Creativity with AI Technology
One of the key features of AI technology is its ability to offer an innovative way to edit selfies. Whether you prefer a more natural look or wish to experiment with different styles, AI selfie generator tools can transform your selfies into artistic masterpieces. With the app store brimming with options, finding the best AI photo editor to suit your needs has never been easier.
Embracing the Future of Selfie Editing
As AI continues to shape the future of photography, embracing AI technology in selfie editing is essential for staying ahead in the digital age. From enhancing facial features to customizing facial expressions, the innovative capabilities of AI selfie generators are paving the way for a new era of personalized image editing.
💡 Key Takeaway: AI technology in selfie editing offers a cutting-edge approach to customizing your selfies, providing a seamless blend of innovation and personalization to elevate your online presence.
Advanced Filters and Effects for Selfies
Advanced Filters and Effects for Selfies
In the world of AI-driven selfie customization, advanced filters and effects play a pivotal role in enhancing the overall appeal of your self-portraits. These innovative tools offer a plethora of options to transform your selfies into unique masterpieces that stand out on social media platforms. Let's delve into some exciting features that you can explore to take your selfie game to the next level.
Enhancing Facial Features
Utilize AI technology to accentuate your facial features with precision and finesse. From smoothing skin texture to enhancing eye brightness, these filters ensure that your selfies radiate perfection.
Adding Artistic Touches
Get creative with AI-generated filters that can turn your selfies into stunning works of art. Experiment with different styles and effects to create one-of-a-kind masterpieces that showcase your individuality.
Exploring Different Styles
With a wide range of styles and effects at your disposal, you can effortlessly switch up the mood and tone of your selfies. Whether you prefer a vintage aesthetic or a modern pop art look, AI selfie generators offer endless possibilities.
Customizing Facial Expressions
Make your selfies truly expressive by using AI filters that can enhance or alter your facial expressions. From creating a subtle smile to adding a touch of whimsy, these effects allow you to convey a range of emotions in your self-portraits.
Quoting an AI enthusiast: “The ability to customize selfies using advanced filters and effects not only adds a fun element to the process but also empowers users to unleash their creativity in innovative ways.”
Key Takeaway:
Integrating advanced filters and effects into your selfies with AI technology opens up a world of creative possibilities, allowing you to personalize your self-portraits like never before.Incorporating Background Effects Using AI
Incorporating Background Effects Using AI
AI technology has revolutionized the way we interact with our selfies, offering a myriad of creative possibilities to enhance our images. When it comes to incorporating background effects using AI, you can take your selfie customization to the next level. Let's explore some innovative ways to leverage AI for captivating background effects:
Virtual Locations: Transport yourself to exotic destinations or iconic landmarks by adding virtual backgrounds to your selfies. Whether you dream of posing in front of the Eiffel Tower or relaxing on a tropical beach, AI technology can make it a reality.
Artistic Filters: Experiment with artistic filters that seamlessly blend your selfie with unique background effects. From watercolor landscapes to abstract patterns, these filters can add a touch of artistry to your selfies.
Time Travel Themes: Go back in time or fast-forward to the future with AI-generated background effects that set the scene for your selfie. Immerse yourself in vintage settings or futuristic landscapes for a truly captivating visual experience.
Seasonal Celebrations: Embrace the spirit of different seasons and holidays by incorporating themed background effects into your selfies. From snow-covered winter wonderlands to vibrant spring blooms, these effects can add a festive touch to your photos.
Fantasy Worlds: Let your imagination run wild by exploring fantasy worlds through AI-generated background effects. Transform your selfies into magical realms inhabited by mythical creatures and enchanting landscapes.
Celestial Skies: Immerse yourself in the ethereal beauty of celestial skies with AI-enhanced background effects featuring breathtaking sunsets, starry nights, and mesmerizing cosmic scenes.
Urban Landscapes: Showcase your urban flair by setting your selfies against dynamic cityscapes, bustling streets, or architectural marvels. AI technology can seamlessly integrate these urban backgrounds for a modern and sophisticated touch.
Nature Escapes: Connect with nature by adding serene natural landscapes as background effects to your selfies. Whether you prefer panoramic mountain views, tranquil forests, or sun-kissed beaches, AI can bring the beauty of nature to your photos.
Abstract Patterns: Create eye-catching visual contrasts by overlaying your selfies with abstract patterns and geometric motifs. These background effects can add a contemporary and avant-garde aesthetic to your images.
Customizable Options: Explore customizable background effects that allow you to tailor the mood and style of your selfies according to your preferences. From subtle enhancements to bold enhancements, AI-powered background effects offer endless possibilities.
Fine-Tuning Facial Features with AI
Fine-Tuning Facial Features with AI
In the realm of selfie customization, AI technology has revolutionized how users can manipulate and enhance their facial features like never before. By leveraging cutting-edge algorithms and advanced image processing capabilities, AI selfie generators offer a plethora of tools to fine-tune every aspect of your face with remarkable precision.
Key Features for Facial Customization:
Facial Symmetry Adjustment: AI algorithms can analyze your facial structure and intelligently adjust symmetry to create a more balanced look.
Skin Tone Enhancement: With AI-powered skin tone enhancement, you can achieve a flawless complexion by smoothing out imperfections and enhancing your natural glow.
Eye Brightening and Enlargement: Enhance the allure of your selfies by brightening your eyes and making them appear larger and more captivating.
Lip Plumping and Color Enhancement: Customize your lip size and color with AI tools that can deliver natural-looking enhancements tailored to your preferences.
Facial Contouring: Define and sculpt your facial features by adjusting contours and shadows to highlight your best angles.
The Ease of Use and Realistic Results:
AI selfie generators prioritize user-friendly interfaces that make it simple for individuals to modify their facial features effortlessly. Despite the advanced technology at play, these tools are designed to be intuitive, ensuring that users of all skill levels can achieve professional-looking results without extensive training or expertise.
Embracing Diversity and Personal Expression:
AI technology empowers users to experiment with a wide range of styles and looks to express their individuality. Whether you're aiming for a subtle touch-up or a dramatic transformation, AI selfie generators provide the versatility needed to cater to specific preferences and creative visions.
Unlock Your Perfect Selfie with AI Precision:
Through the innovative capabilities of AI technology, individuals can now engage in self-expression and customization like never before. Fine-tuning facial features using AI not only enhances the visual appeal of selfies but also allows users to explore their creativity and present their best selves to the world.
💡 Key Takeaway: AI selfie generators offer advanced tools for fine-tuning facial features with precision and ease, empowering users to create personalized and captivating selfies effortlessly.
Enhancing Lighting and Colors with AI
Enhancing Lighting and Colors with AI
When it comes to taking the perfect selfie, lighting and colors play a significant role in enhancing the overall look and feel of the image. Thanks to advancements in AI technology, you can now easily manipulate and improve the lighting and color settings of your selfies to create stunning visuals that stand out on social media platforms.
1. Understanding the Impact of Lighting:
Good lighting is essential for capturing a high-quality selfie. AI-powered tools can analyze the lighting conditions in your photo and make adjustments to ensure optimal brightness and clarity. By enhancing the lighting, you can highlight your facial features and create a more polished appearance.
2. Adjusting Color Balance:
With AI-driven color correction features, you can fine-tune the color balance of your selfies to achieve a more vibrant and balanced look. Whether you want to make colors pop or add a subtle hue to your photo, AI technology can help you achieve the desired effect with ease.
3. Utilizing Filters and Effects:
AI selfie generators offer a wide range of filters and effects that can instantly transform the mood and vibe of your selfies. From vintage tones to modern aesthetics, these tools allow you to experiment with different styles and create unique looks that reflect your personal taste.
4. Enhancing Skin Tone:
Achieving the perfect skin tone in a selfie can be challenging, but AI technology simplifies the process by automatically adjusting skin tones for a natural and flattering finish. Say goodbye to unwanted blemishes and imperfections, as AI algorithms work their magic to give you a flawless complexion.
5. Creating Depth and Dimension:
By manipulating the lighting and color settings in your selfies, AI can help you add depth and dimension to your images, making them more visually engaging and dynamic. Whether you prefer a soft, romantic glow or a bold, dramatic style, AI tools allow you to unleash your creativity and experiment with different effects.
6. Preserving Authenticity:
While AI technology offers endless possibilities for enhancing your selfies, it's important to strike a balance between enhancement and authenticity. Avoid over-editing your photos to the point where they no longer represent your true self. Use AI tools to enhance your natural beauty and highlight your best features while staying true to your unique look.
💡 Key Takeaway: Enhancing lighting and colors with AI technology allows you to elevate the quality of your selfies, create visually appealing images, and make a lasting impression on your online audience. By leveraging AI-driven tools, you can enhance your selfies in unique and striking ways.
AI-Powered Makeup and Beauty Tools
AI-Powered Makeup and Beauty Tools
In the realm of selfie customization, AI technology has revolutionized the way we experiment with makeup and beauty styles. These sophisticated tools utilize artificial intelligence to enhance facial features and create stunning looks, making them a must-have for anyone looking to elevate their selfie game.
1. Enhance Your Features with Precision
AI-powered makeup and beauty tools are designed to analyze your facial structure and apply makeup in a way that enhances your natural beauty. Whether you want to highlight your eyes, define your cheekbones, or create the perfect pout, these tools offer precision and accuracy that traditional makeup techniques can't match.
2. Experiment with Various Styles
One of the key features of AI-powered makeup tools is the ability to experiment with a wide range of makeup styles and looks. From glamorous evening looks to fresh daytime makeup, these tools allow you to try out different styles and find the perfect look for any occasion.
3. Achieve a Professional Finish
By leveraging AI technology, these tools enable users to achieve a professional finish without the need for advanced makeup skills. The tools analyze your face image and apply makeup in a way that enhances your features while maintaining a natural look, giving you the confidence of a professional makeup artist at your fingertips.
4. Instantly Transform Your Selfies
With AI-powered makeup and beauty tools, you can instantly transform your selfies from ordinary to extraordinary. Whether you want to add a touch of glamour or experiment with bold new looks, these tools offer instant portrait enhancements that are sure to impress your followers on social media.
5. Customize Your Look with User Input
These AI tools also allow for personalized customization based on user input. You can adjust the intensity of makeup, choose specific features to enhance, and tailor the look to suit your individual style preferences. It's like having your own virtual makeup artist on hand whenever you need it.
6. Stand Out on Social Media Platforms
By leveraging AI technology for makeup customization, you can create unique and eye-catching selfies that will set you apart on social media platforms. Whether you're a content creator, influencer, or simply looking to boost your online presence, AI-powered makeup tools offer a creative edge that can elevate your social media presence.
7. The Future of Selfie Customization
AI-powered makeup and beauty tools represent the cutting edge of innovation in the beauty industry. With their user-friendly interface, wide range of styles, and ability to create stunning and unique
Creative Pose Suggestions by AI
Creative Pose Suggestions by AI
In the world of AI-powered selfies, creativity knows no bounds. AI technology has revolutionized the way we capture and customize our self-portraits, offering a myriad of innovative pose suggestions to elevate your selfie game.
Unlocking the Art of Poses with AI Technology
Embrace the endless possibilities of AI-generated pose suggestions that cater to your individual style and preferences. Let AI be your creative guide, shaping your selfie narrative with a touch of uniqueness and flair.
Innovative Pose Ideas at Your Fingertips
Transform your selfies with dynamic poses that reflect your personality and mood.
Experiment with avant-garde angles and compositions to add a touch of artistry to your self-portraits.
Emulate popular trends or create your signature pose that sets you apart on social media platforms.
Harnessing the Power of Facial Expressions
AI technology goes beyond just capturing a moment; it delves into the nuances of facial expressions and emotions, enriching your selfie experience. From subtle smiles to dramatic gazes, let your expressions speak volumes through AI-guided poses.
Creating Memorable Selfie Moments
Each pose suggestion by AI is a doorway to self-expression and storytelling. Capture the essence of the moment with poses that resonate with your unique style, leaving a lasting impression on your online presence.
Embracing AI-Driven Personalization
With AI's intuitive understanding of facial features and styles, the possibilities for personalizing your selfies are endless. Engage with AI to curate a visual narrative that reflects the essence of who you are, one pose at a time.
Elevating Your Selfie Game with AI Pose Suggestions
As you dive deeper into the realm of AI-generated pose suggestions, embrace the opportunity to showcase your creativity and individuality. Let every selfie you capture be a masterpiece in its own right, enriched by the innovative touch of AI technology.
💡 Key Takeaway: Immersing yourself in the world of AI pose suggestions opens up a realm of creative possibilities to enhance your selfie experience and storytelling on social media platforms.
Customizable Text and Stickers Using AI
Customizable Text and Stickers Using AI
In the realm of AI-powered selfie customization, one intriguing feature that stands out is the ability to add customizable text and stickers to your selfies, elevating them to a whole new level of creativity and personalization.
Utilizing AI for Text Enhancement
AI technology allows users to enhance their selfies with text overlays that seamlessly blend with the image. Whether it's adding a quirky caption, a motivational quote, or simply labeling elements in the photo, AI-powered tools provide a variety of fonts, sizes, and styles to choose from. This feature enables users to express themselves in a unique and visually compelling way, making their selfies not just visually appealing but also meaningful.
Sticker Fun with AI
Another exciting aspect of AI selfie customization is the array of stickers available for users to play with. From cute emojis to trendy symbols, AI-powered sticker libraries offer endless options to add personality and flair to your selfies. Whether you want to convey a specific emotion, celebrate an occasion, or simply jazz up your photo, there's a sticker for every mood and moment.
Personalization and Creativity
The beauty of customizable text and stickers lies in their ability to enhance personalization and creativity. Users can tailor their selfies to reflect their individual style and personality, whether it's through witty captions, playful emojis, or custom-designed stickers. By leveraging AI technology, users can unleash their creativity and make their selfies truly unique and memorable.
Enhancing Engagement on Social Media
Customizable text and stickers not only make selfies more visually appealing but also increase engagement on social media platforms. Eye-catching text overlays and playful stickers are more likely to capture the attention of followers and encourage them to like, comment, and share the post. This, in turn, helps users grow their online presence and connect with their audience in a meaningful way.
The Future of Selfie Customization
As AI technology continues to evolve, so too will the possibilities for selfie customization. With customizable text and stickers becoming increasingly sophisticated and user-friendly, the future of selfie editing is bound to be filled with even more creativity and innovation. Whether it's adding augmented reality effects, interactive animations, or immersive 3D elements, the sky's the limit when it comes to AI-powered selfie customization.
Key Takeaway:
Customizable text and stickers offer a fun and creative way to personalize your selfies and make them stand out on social media. By leveraging AI technology, users can express themselves in unique and meaningful ways, enhancing engagement and fostering connections with their audience.
10 Empowering Self Discovery Moments with AI Selfie Generators
Try Latest AI Selfie Generator
Have you ever wondered how technology can aid in your journey of self-discovery? Imagine unlocking hidden facets of your personality through AI-powered selfie generators. In today's digital age, exploring your true self takes on a whole new dimension with innovative tools at your fingertips.
Here's a glimpse of what we'll explore in this blog:
Unveiling the power of AI algorithms in analyzing your selfies and providing insights.
How AI selfie generators can offer valuable reflections on your emotions, personality traits, and more.
Exploring the intersection of technology and self-awareness through fun and insightful self-discovery moments.
Tips on making the most out of AI selfie generators for personal growth and empowerment.
Real-life examples of individuals experiencing transformative self-discovery through AI technology.
Embark on a journey of self-exploration like never before. Discover how AI selfie generators can be your companions in unveiling the layers of your authentic self. Let's delve into ten empowering self-discovery moments waiting to be unraveled through the lens of artificial intelligence.
Short Summmery
AI-powered selfie generators utilize advanced algorithms to analyze and provide insights into your personality traits and emotions. Embrace the intersection of technology and self-awareness through fun and insightful self-discovery moments, unlocking hidden facets of your true self. Discover the transformative power of AI selfie generators in fostering self-confidence, emotional well-being, and personal growth. Harness the potential of AI technology for self-exploration, empowerment, and embracing the layers of your authentic self through innovative tools.
1. Understanding AI Selfie Generators
In today's digital age, AI selfie generators have revolutionized the way we interact with technology and ourselves. Let's delve into the fascinating world of AI-powered tools and their impact on self-discovery moments.
What Are AI Selfie Generators?
AI selfie generators are innovative tools that utilize artificial intelligence algorithms to enhance and transform selfies. By analyzing facial features, expressions, and lighting, these generators create personalized and sometimes whimsical variations of your self-portraits.
The Role of AI in Self-Discovery
AI selfie generators play a crucial role in self-discovery by allowing individuals to explore different facets of themselves. Through filters and effects, users can experiment with various styles, colors, and moods, leading to a deeper understanding of their true selves.
Embracing Authenticity
In a world often dictated by societal norms and expectations, AI selfie generators provide a platform for self-expression and authenticity. By embracing their unique traits and characteristics, individuals can break free from conformity and celebrate their true essence.
Quotes on Self-Expression
"Self-love is not a game of comparison, but a journey towards self-acceptance and inner peace." Unknown
"True happiness begins when you embrace your authentic self with open arms."
The Impact on Mental Health
AI selfie generators offer a safe space for individuals to explore their identities and boost their self-esteem. By encouraging self-reflection and self-expression, these tools contribute to promoting positive mental health and well-being.
Empowering Self-Love Tips
Start your day with a daily ritual of self-reflection to connect with your true self.
Use your Instagram posts as a canvas for self-expression by capturing moments of stillness and vibrancy.
Craft well-crafted captions that resonate with your core values and beliefs.
Bridging the Gap
AI selfie generators bridge the gap between the bustle of everyday life and the essence of self-acceptance. They symbolize a journey of mindfulness where individuals can express their unique selves authentically.
2. The Rise of AI Selfie Generators
In the fast-paced digital age, technology continues to revolutionize how we interact with the world around us. AI selfie generators are no exception, with their ability to transform ordinary self-portraits into captivating works of art. Let's delve into how these innovative tools are reshaping the landscape of self-expression and personal branding.
Empowering Self-Discovery through AI Enhancement
AI selfie generators empower individuals to explore different facets of their identity through enhanced digital filters and effects. This newfound creative freedom allows for a deeper reflection on one's true self and personal journey of self-discovery.
The Intersection of Technology and Self-Love
By leveraging AI technology, individuals can transcend societal norms and embrace their authentic selves. AI-enhanced selfies provide a platform for self-expression and self-acceptance, encouraging users to step outside their comfort zones and redefine traditional beauty standards.
Crafting a Narrative with AI-Generated Captions
From well-crafted captions to inspirational quotes, AI selfie generators offer a unique way to narrate one's self-love journey. Users can explore different themes and emotions, aligning their images with meaningful text that resonates with their core values and beliefs.
Meghan Markle and the Self-Love Movement
Celebrities like Meghan Markle have embraced the power of self-love and mental health awareness, using social media platforms to amplify messages of positivity and self-empowerment. Their influence has sparked a global conversation on the importance of self-care and self-acceptance in today's fast-paced world.
Navigating the Path to Authenticity
In a digital era filled with curated content and social media personas, AI selfie generators provide a safe space for individuals to express their true selves. By embracing the concept of authenticity, users can embark on a symbolic journey of mindfulness and self-discovery, leading to true happiness and vibrant life experiences.
3. Benefits of Using AI Selfie Generators
Embracing advanced technology like AI selfie generators can offer a plethora of benefits that enhance your self-discovery journey and promote self-love. Let's delve into the advantages that these innovative tools bring to the table:
1. Facilitation of Self-Exploration
By generating diverse, AI-enhanced selfies, individuals can explore different looks, styles, and expressions that may resonate with their true selves. This process can spark introspection and help in uncovering aspects of one's identity that were previously unexplored.
2. Encouragement of Self-Acceptance
AI selfie generators provide a safe space for individuals to experiment with their self-image without fear of judgment. This experimentation can lead to greater self-acceptance by allowing individuals to appreciate and embrace their unique features and expressions.
3. Amplification of Self-Expression
Through AI-generated selfies, individuals can express their creativity and personality in unique ways. The ability to create and share visually captivating images fosters self-expression and empowers individuals to communicate their inner selves through their outward appearance.
4. Promotion of Mental Wellness
Engaging with AI selfie generators can foster a sense of self-confidence and self-worth. By exploring different facets of their identity and celebrating their individuality, individuals can boost their self-esteem and overall mental well-being.
5. Enhancement of Personal Branding
For social media influencers and individuals looking to curate their online presence, AI selfie generators offer a convenient way to create visually appealing content. By using AI-enhanced selfies with well-crafted captions, individuals can develop a cohesive personal brand that resonates with their audience.
6. Cultivation of Self-Love Practices
AI selfie generators can serve as a tool for cultivating self-love practices through daily rituals of self-reflection and appreciation. By capturing moments of stillness and self-care, individuals can reinforce the importance of self-love in their lives.
In the words of Meghan Markle, "Self-love means taking care of yourself like you would of your favorite self-love quote." Embrace the transformative power of AI selfie generators on your journey towards self-discovery and self-acceptance.
4. Exploring Different AI Selfie Generator Platforms
In the digital age, AI technologies have revolutionized the way we interact with images and the concept of self-expression. Exploring diverse AI selfie generator platforms can offer a unique lens through which individuals can discover more about themselves and cultivate self-appreciation.
Unleashing Your True Self with AI Technology
Self-discovery through AI selfie generators goes beyond mere visual enhancements. It allows you to delve into facets of your personality that may remain unexplored in daily interactions. By leveraging AI technology, users can capture their essence and portray their true selves authentically.
Navigating Societal Norms with AI Filters
AI selfie generators provide a safe space for individuals to challenge societal norms and redefine beauty standards. By experimenting with various filters and effects, users can break free from conventional expectations and celebrate their unique features without conforming to external pressures.
Crafting Captions for Self-Love Expression
Pairing AI-generated selfies with a well-crafted caption can amplify the message of self-love and empowerment. Each selfie becomes a canvas for personal reflection and self-affirmation, allowing individuals to express their core values and emotions through concise yet impactful captions.
Embracing Authenticity in the Digital Realm
As social media platforms continue to shape modern interactions, maintaining authenticity becomes paramount in cultivating genuine connections. AI selfie generators can complement your digital presence by capturing the essence of your true self, standing out amidst the bustle of everyday life.
Quote:
"True happiness comes from embracing your unique self and radiating self-love into the world."
Meghan Markle5. Impact of AI Selfie Generators on Self-Discovery
5. Impact of AI Selfie Generators on Self-Discovery
In the realm of self-discovery, AI selfie generators have emerged as powerful tools for individuals seeking to delve deeper into their true essence. Let's explore how these innovative technologies are influencing the journey towards self-awareness and personal growth:
Enhanced Reflection through AI-Generated Selfies
Utilizing AI selfie generators enables a heightened level of self-reflection by presenting individuals with visual representations of themselves they may not have observed before. This newfound perspective can prompt introspection and encourage individuals to explore facets of themselves that may have been previously overlooked.
Breaking Societal Norms with AI-Enhanced Images
AI selfie generators have the potential to challenge societal norms and conventional beauty standards by allowing individuals to experiment with different looks and styles in a safe and virtual environment. This liberation from societal expectations can empower individuals to embrace their unique qualities and redefine their sense of self.
Crafting a Narrative with AI-Generated Captions
Pairing AI-generated selfies with well-crafted captions can elevate the self-discovery process by enabling individuals to express their thoughts, feelings, and personal experiences in a succinct and impactful manner. By curating their self-reflections through thoughtful captions, individuals can deepen their understanding of themselves and communicate their authentic selves to the world.
Embracing Authenticity in the Digital Sphere
In a digital landscape dominated by curated images and filtered realities, AI selfie generators offer individuals a platform to explore and embrace their authentic selves without the pressure to conform to external expectations. This shift towards authenticity fosters a sense of empowerment and self-acceptance, paving the way for genuine connections and meaningful self-discovery.
Key Takeaway: AI selfie generators play a transformative role in enhancing self-discovery by offering individuals a unique opportunity to explore and celebrate their true selves in a digitally-driven world.
6. Harnessing Empowerment Through AI Selfies
6. Harnessing Empowerment Through AI Selfies
In today's digital age, technology has introduced innovative ways for individuals to engage in self-dis
covery and empowerment. AI selfie generators are at the forefront of this movement, offering a unique opportunity for users to explore and embrace their true selves.
The Power of Self-Reflection
One of the most empowering aspects of AI selfies is the ability to reflect on oneself in a new light. By capturing moments of stillness through self-portraits, individuals can delve into their innermost thoughts and emotions, fostering a deeper connection with their authentic self.
Embracing Authenticity
AI selfie generators encourage users to break free from societal norms and embrace their unique identity. By presenting oneself authentically in photos, individuals can create a safe space for self-expression and self-acceptance, free from the pressures of conforming to external standards.
Crafting a Meaningful Narrative
Each AI-generated selfie becomes a canvas for self-expression. By pairing these images with a well-crafted caption that reflects personal values and experiences, users can communicate their journey of self-discovery to the world, inspiring others to do the same.
Quotes to Inspire Empowerment
"True happiness comes from embracing your unique self with open arms."
"Self-love is not a game; it's a crucial role we play in our own happiness."
"Embrace the thorny path of self-discovery, for it leads to a vibrant life's journey."
By harnessing the power of AI selfie generators, individuals can embark on a symbolic journey of mindfulness and empowerment, cultivating a deeper sense of self-love and acceptance.
7. Ethical Considerations of AI Selfie Generators
7. Ethical Considerations of AI Selfie Generators
In the fast-evolving landscape of technology-driven self-discovery, it's essential to delve into the ethical considerations surrounding the use of AI selfie generators. As society becomes increasingly reliant on artificial intelligence for personal enhancement, it's crucial to navigate this terrain with mindfulness and awareness.
Privacy Protection
One of the primary ethical concerns related to AI selfie generators is the safeguarding of personal data and privacy. Users must be cautious about the information they provide to these platforms, as their images and other data could potentially be misused or compromised. It's imperative to choose reputable and secure AI tools to protect one's digital footprint.
Algorithmic Bias
Another critical aspect to consider is the presence of algorithmic bias within AI programs. These generators may inadvertently perpetuate societal norms and stereotypes, influencing how individuals perceive themselves based on preconceived notions of beauty or appearance. Users should be aware of the potential biases embedded in these systems and strive for diversity and inclusivity in their self-discovery journey.
Transparency and Accountability
Ethical AI selfie generators should prioritize transparency and accountability in their operations. Users have the right to know how their data is being collected, stored, and utilized. Platforms that adhere to ethical standards will provide clear explanations of their processes and give users control over their information.
Empowerment vs. Dependency
While AI selfie generators can empower individuals to explore different facets of themselves, there's a fine line between self-discovery and dependency on external validation. It's essential for users to maintain a healthy balance and remember that authentic self-love and acceptance come from within, rather than seeking validation from AI algorithms.
Quotes:
"Ethical considerations guide our journey of self-discovery, ensuring that personal growth is rooted in integrity and respect for oneself."
Unknown"Transparency in technology builds trust and empowers users to engage in self-discovery with confidence and autonomy."
Tech Ethics Institute8. Cognitive Behavioral Insights from AI Selfies
8. Cognitive Behavioral Insights from AI Selfies
In the realm of self-discovery, AI selfie generators are revolutionizing the way we view ourselves and understand our inner workings. By harnessing the power of artificial intelligence, these tools can offer profound insights into our cognitive behavior, shedding light on patterns and tendencies we may not have been aware of. Let's delve into the cognitive behavioral aspects revealed through the lens of AI selfies.
Unveiling Behavioral Patterns
Through the analysis of facial expressions and subtle cues, AI selfie generators can provide valuable insights into our emotional tendencies and behavioral patterns. By capturing micro-expressions that reflect our inner feelings, these tools can help us better understand how our thoughts, emotions, and behaviors intertwine in shaping our self-perception.
Breaking Societal Norms
One intriguing aspect of AI selfie generators is their ability to challenge societal norms and stereotypes by offering a fresh perspective on individuality and authenticity. In a world where conformity often reigns, these tools encourage users to embrace their unique traits and characteristics, fostering a sense of empowerment and self-acceptance.
Crafting the Perfect Caption
With AI-enhanced selfies, individuals have the opportunity to create a well-crafted caption that captures the essence of their true selves. By reflecting on personal experiences and core values, users can leverage AI insights to craft a concise and impactful caption that resonates with their journey of self-discovery.
Quote:
"The journey to true happiness begins with accepting your authentic self."
Meghan MarkleBy embracing AI-generated insights, users can embark on a journey of self-reflection and personal growth, ultimately leading to a more profound understanding of themselves and the world around them.
9. AI Selfies and Emotional Intelligence
9. AI Selfies and Emotional Intelligence
In the realm of self-discovery, emotional intelligence plays a crucial role in understanding ourselves and navigating the complexities of human relationships. AI selfie generators offer a unique opportunity to enhance emotional intelligence by providing insights into our emotions, facial expressions, and interpersonal dynamics. Let's explore the intersection of AI selfies and emotional intelligence.
Emotional Awareness
By analyzing facial expressions and emotional cues, AI selfie generators can help individuals develop a deeper awareness of their own emotions. Through self-reflection and introspection, users can gain insights into their emotional states and learn to regulate their feelings more effectively.
Empathy and Compassion
AI selfie generators can also foster empathy and compassion by encouraging users to consider the perspectives and emotions of others. By exploring different facial expressions and moods, individuals can develop a greater understanding of the range of human emotions and cultivate empathy in their interactions with others.
Self-Reflection and Growth
Through the lens of AI selfies, individuals can engage in meaningful self-reflection and personal growth. By examining their facial expressions and reactions, users can gain insights into their behavioral patterns and tendencies, empowering them to make positive changes in their lives.
Building Meaningful Connections
By sharing AI-generated selfies and insights with others, individuals can build meaningful connections and strengthen interpersonal relationships. By expressing vulnerability and authenticity, users can foster deeper connections with others and create a sense of belonging in their communities.
By leveraging the power of AI selfies, individuals can enhance their emotional intelligence and embark on a journey of self-discovery and personal growth.
10. Tips for Maximizing Self-Discovery with AI Selfies
10. Tips for Maximizing Self-Discovery with AI Selfies
Embarking on a journey of self-discovery with AI selfies can be an enriching and empowering experience. Here are some tips for maximizing your self-discovery journey with AI selfie generators:
1. Be Open to Exploration:
Approach AI selfie generators with an open mind and a willingness to explore different facets of yourself. Embrace the opportunity to experiment with various filters, effects, and styles to uncover new dimensions of your identity.
2. Reflect on Your Reactions:
Take time to reflect on your reactions to AI-generated selfies and the insights they provide. Pay attention to how certain images make you feel and what they reveal about your preferences, emotions, and self-perception.
3. Use Captions to Express Yourself:
Pair AI-generated selfies with well-crafted captions that reflect your thoughts, feelings, and personal experiences. Use this opportunity to communicate your journey of self-discovery and share meaningful insights with others.
4. Share Your Journey:
Don't be afraid to share your AI-generated selfies and insights with others. By expressing vulnerability and authenticity, you can foster deeper connections with others and inspire them to embark on their own journey of self-discovery.
5. Practice Self-Compassion:
Be kind to yourself throughout your self-discovery journey with AI selfies. Embrace your imperfections and celebrate your unique qualities, knowing that self-acceptance is the key to true happiness and fulfillment.
6. Set Boundaries:
Maintain boundaries when using AI selfie generators and sharing your personal data online. Protect your privacy and security by choosing reputable platforms and being mindful of the information you disclose.
7. Seek Support When Needed:
If you find yourself struggling with self-discovery or emotional challenges, don't hesitate to seek support from friends, family, or mental health professionals. Remember that you're not alone on your journey, and there's always help available when needed.
Quote:
"The journey of self-discovery is not always easy, but it is always worth it. Embrace the process, and you'll uncover treasures beyond your wildest dreams." Unknown
By following these tips, you can maximize your self-discovery journey with AI selfies and unlock new levels of self-awareness, empowerment, and personal growth.
Conclusion
In conclusion, AI selfie generators offer a transformative tool for individuals to explore and embrace their true selves in a digitally-driven world. From enhancing self-reflection and challenging societal norms to fostering emotional intelligence and personal growth, these innovative technologies empower users to embark on a journey of self-discovery and authenticity. By leveraging the power of AI selfies, individuals can cultivate self-love, celebrate their uniqueness, and build meaningful connections with others. As technology continues to evolve, the possibilities for self-discovery and empowerment are limitless, paving the way for a brighter and more fulfilling future.
10 Genius AI Selfie Editing Hacks for Picture Perfect Results
Try Latest AI Selfie Generator
1. Understanding AI Selfie Editing
In today's fast-paced digital world, AI technology has revolutionized the way we edit and enhance our photos, especially when it comes to taking perfect selfies. Let's delve into the fascinating world of AI selfie editing and how it can elevate your photography skills to the next level.
Evolution of Selfie Editing
AI selfie editing tools have come a long way from simple filters to complex algorithms that can automatically enhance various aspects of your selfie. These tools analyze facial features, lighting, skin tones, and more to deliver professional-level editing results with just a few clicks.
How AI Enhances Selfies
AI utilizes machine learning algorithms to recognize patterns and make intelligent adjustments to your photos. From skin smoothing and blemish removal to background blurring and color correction, AI can transform a basic selfie into a work of art with stunning visual appeal.
Benefits of AI Selfie Editing
Efficiency: AI-powered tools save time by automating repetitive editing tasks, allowing you to focus on capturing great selfies.
Consistency: AI ensures that your edited selfies maintain a consistent style and quality across all your photos.
Professional Results: With AI's advanced editing capabilities, you can achieve professional-grade editing without the need for extensive technical knowledge.
Importance of Understanding AI Algorithms
It's crucial to have a basic understanding of how AI algorithms work in selfie editing to maximize their potential. By knowing the key features and functions of AI tools, you can make informed decisions on which editing techniques to apply to your photos.
Embracing AI for Picture-Perfect Selfies
AI selfie editing isn't just a trend; it's a powerful tool that can help you enhance your photography skills and create stunning selfies that stand out on social media platforms. Embrace the capabilities of AI technology to unlock your creative potential and take your selfie game to new heights.
2. Importance of Advanced Selfie Editing Techniques
In the realm of selfie culture, mastering advanced editing techniques is a game-changer for achieving picture-perfect selfies that stand out from the crowd. Let's delve into the significance of embracing these advanced methods for enhancing your selfie game:
Enhancing Facial Features
By utilizing advanced editing tools, you can seamlessly enhance your facial features to achieve a flawless look. From smoothing out skin imperfections to adjusting lighting and contrast, these techniques empower you to highlight your best features and present your most polished self in every selfie.
Creating a Consistent Aesthetic
Advanced selfie editing techniques enable you to establish a consistent and visually appealing aesthetic across your selfies. Whether you prefer a vibrant and colorful style or a more muted and minimalist vibe, these tools allow you to curate a cohesive feed that captivates your audience and reinforces your personal brand.
Achieving Professional-Quality Results
With the right editing techniques at your disposal, you can elevate your selfies to professional-quality standards. By refining details such as sharpness, exposure, and color balance, you can produce images that rival those of professional photographers, showcasing your creativity and attention to detail.
Boosting Engagement and Followers
In today's social media landscape, captivating visuals are key to engaging your audience and attracting new followers. Advanced selfie editing techniques give you the power to create stunning visuals that grab attention and spark conversation, ultimately boosting your engagement metrics and expanding your follower base.
Staying Ahead of Trends
Embracing advanced selfie editing techniques demonstrates your commitment to staying ahead of the curve and embracing the latest trends in visual content creation. By incorporating innovative editing tools and effects into your selfies, you position yourself as a trendsetter in the digital sphere, garnering admiration and recognition from your peers and followers.
Embracing Creativity and Self-Expression
Above all, mastering advanced selfie editing techniques opens up a world of creative possibilities and self-expression. Whether you enjoy experimenting with filters, textures, or artistic effects, these techniques empower you to transform your selfies into unique works of art that reflect your personality and vision.
Incorporating these advanced editing techniques into your selfie workflow can elevate your content creation process and help you stand out in the crowded digital landscape. By honing your skills and exploring new editing tools, you can unleash your creativity, enhance your visual storytelling, and leave a lasting impression on your audience.
3. How AI Enhances Selfie Editing
In the realm of selfie editing, AI technology has revolutionized the way individuals enhance their self-portraits. By harnessing the power of artificial intelligence, selfie editing tools can now provide unparalleled precision and creativity in achieving picture-perfect results.
1. Advanced Facial Recognition
AI-powered selfie editing tools leverage sophisticated facial recognition algorithms to accurately detect facial features such as eyes, nose, mouth, and skin texture. This enables users to make precise adjustments to individual facial elements for a more refined and natural-looking result.
2. Skin Smoothing and Blemish Removal
With AI capabilities, selfie editing apps can intelligently analyze skin imperfections and apply customized skin smoothing techniques. By automatically identifying and removing blemishes, wrinkles, and uneven skin tones, AI enhances the overall complexion in a seamless and realistic manner.
3. Background Blur and Depth Effects
AI technology allows for the integration of background blur and depth effects into selfie editing processes. By creating a bokeh effect or adjusting depth perception, users can effortlessly enhance the focus on the subject while creating a professional-looking depth-of-field effect in their selfies.
4. Automatic Lighting Adjustments
AI algorithms in selfie editing software dynamically adjust lighting conditions to improve the overall illumination and contrast in selfies. By automatically enhancing brightness, shadows, and highlights, AI technology ensures that selfies appear well-lit and visually appealing without manual adjustments.
5. Style Transfer Filters
AI-driven selfie editing tools offer innovative style transfer filters that allow users to apply artistic effects inspired by famous paintings, photography styles, or visual aesthetics. By incorporating artistic elements into selfies, users can create unique and captivating self-portraits with a touch of creativity.
6. Emotion Recognition and Enhancement
AI-powered selfie editing tools can detect and enhance emotions captured in selfies, enabling users to emphasize expressions such as smiles, frowns, or gazes. By intelligently enhancing emotional cues, AI adds depth and personality to selfies, making them more engaging and expressive.
4. Mastering Skin Retouching with AI
Improving the quality of your selfies through skin retouching with the help of AI technology can be a game-changer. Here are some expert tips and hacks to master skin retouching like a pro:
Understanding Skin Tone Enhancement: AI-powered editing tools can analyze your skin tone and suggest enhancements to achieve a natural look. Utilize features like automatic blemish removal, skin smoothening, and color correction to enhance your skin tone effortlessly.
Customizing Skin Texture: One key advantage of AI is the ability to customize skin textures. Experiment with different settings to find the perfect balance between achieving a flawless look and maintaining a natural skin texture. Avoid over-editing to ensure a realistic result.
Targeting Specific Areas: AI tools allow you to target specific areas of your skin for retouching. Focus on areas that may need extra attention, such as fine lines, dark spots, or uneven skin tones. Use the tools precisely to refine these areas without overdoing it.
Utilizing Preset Filters: Many AI editing platforms offer preset filters specifically designed for skin retouching. Explore these options to quickly enhance your skin tone without manual adjustments. Remember to adjust the intensity of the filter to ensure a subtle yet effective enhancement.
Embracing Natural Beauty: While AI technology can help enhance your selfies, it's important to embrace your natural beauty. Avoid excessive editing that alters your features drastically. Aim for a balance between enhancement and authenticity to create a picture-perfect result that still looks like you.
Regular Practice and Experimentation: Like any skill, mastering skin retouching with AI requires practice and experimentation. Spend time exploring different tools, techniques, and settings to understand how they work best for your skin type and desired outcome.
Seeking Feedback and Advice: Don't hesitate to seek feedback from trusted sources or professionals in the field of photography and editing. Their insights can provide valuable guidance on improving your skin retouching skills with AI technology.
Remember, the goal of skin retouching with AI is to enhance your natural beauty and create stunning selfies that reflect the best version of yourself. With these expert tips and hacks, you can elevate your selfie editing skills and achieve picture-perfect results effortlessly.
5. Perfecting Lighting and Exposure with AI
Adjusting Lighting Intensity
One of the key benefits of using AI for your selfie editing is the ability to precisely adjust lighting intensity. By utilizing AI algorithms, you can enhance the brightness and contrast of your photo to achieve the perfect lighting balance.
Optimizing Exposure Levels
AI tools are adept at optimizing exposure levels in your selfies. Whether it's brightening shadows or toning down highlights, AI can intelligently adjust exposure settings to ensure every detail in your photo is beautifully illuminated.
Utilizing HDR Effects
Harness the power of AI-generated HDR effects to elevate the overall quality of your selfies. HDR technology improves the dynamic range of your photos, resulting in vibrant colors and enhanced details, even in challenging lighting conditions.
Balancing Highlights and Shadows
With AI capabilities, you can easily balance the highlights and shadows in your selfies to create a well-rounded and visually appealing image. AI algorithms excel at fine-tuning these elements for a professional finish.
Eliminating Overexposure
Say goodbye to overexposed selfies with AI's assistance in detecting and correcting overexposure issues. By automatically adjusting exposure levels, AI ensures that your photos maintain natural-looking tones and textures.
(Enhancing your selfie game with AI algorithms not only simplifies the editing process but also guarantees picture-perfect results every time.)
6. Background Editing Made Easy with AI
Select an Image
In today's digital age, perfecting the background of your selfies is just as important as getting your pose right. With AI-powered tools, achieving a flawless background has never been easier. Let's dive into some genius AI selfie editing hacks that will elevate your selfie game to a whole new level:
AI Background Removal: Harness the power of AI technology to effortlessly remove and replace backgrounds in your selfies. Say goodbye to distracting backgrounds and hello to a clean, professional look.
Blur and Bokeh Effects: Create a sense of depth and artistry in your selfies by applying blur and bokeh effects to the background. AI algorithms can intelligently detect and enhance the subject while beautifully blurring the background.
Virtual Backgrounds: Transport yourself to any setting or environment with virtual backgrounds. AI selfie editing tools offer a wide range of virtual backgrounds to suit your mood and style, giving you the flexibility to be anywhere you desire.
Background Enhancements: Enhance the colors, lighting, and overall look of your background with AI-powered editing features. Adjust the contrast, saturation, and brightness to make your background pop and complement your selfie perfectly.
Object Removal: Remove unwanted objects or distractions from the background of your selfies with AI object removal tools. Clean up cluttered backgrounds and ensure the focus remains on you, the star of the photo.
Background Replacement: Take your selfie editing to the next level by replacing the background with a more visually appealing one. Whether you prefer scenic landscapes, city skylines, or abstract patterns, AI technology can seamlessly blend the new background with your selfie.
By leveraging these advanced AI selfie editing hacks for background enhancement, you can transform your selfies into stunning works of art that capture attention and leave a lasting impression.
7. Transforming Selfies with AI Artistic Effects
In the realm of selfie editing, adding artistic effects using AI technology can take your self-portraits to the next level of creativity and allure. By leveraging the power of AI, you can infuse your selfies with unique and captivating visual elements that elevate them from ordinary to extraordinary. Let's explore seven transformative AI artistic effects that can revolutionize the way you approach selfie editing:
Painterly Portraits: AI algorithms can mimic the styles of famous artists like Van Gogh or Picasso, giving your selfies an artistic touch that resembles a hand-painted masterpiece.
Abstract Aberrations: Experiment with abstract effects to create surreal and dreamy compositions that play with light, color, and shape in unexpected ways.
Vintage Vibes: Transport your selfies to another era by applying vintage filters that evoke nostalgia and charm reminiscent of old-fashioned photographs.
Futuristic Flair: Embrace the future with futuristic effects that add a modern and edgy twist to your selfies, making them stand out in a sea of standard photos.
Watercolor Wonder: Transform your selfies into ethereal watercolor paintings with soft, blended colors and delicate textures that exude a sense of elegance and serenity.
Pop Art Popularity: Channel the spirit of pop art by turning your selfies into bold and vibrant creations that celebrate individuality and creativity in a colorful palette.
Impressionistic Impressions: Blur the lines between reality and imagination with impressionistic effects that capture the essence and emotion of a moment in a soft and painterly style.
By incorporating these AI artistic effects into your selfie editing arsenal, you can unleash your creativity and craft picture-perfect results that mesmerize and captivate viewers. Elevate your self-portraits to a new realm of expression and artistry by embracing the boundless possibilities offered by AI technology.
8. Automation and Efficiency in AI Selfie Editing
In today's digital age, leveraging automation in AI selfie editing can significantly enhance the efficiency and quality of your photo editing process. Let's delve into how automation tools can help you achieve picture-perfect results with ease.
Streamlined Editing Process:
Automation tools offer a streamlined editing process by utilizing algorithms to analyze and enhance your selfies quickly and accurately. By automating tedious tasks such as blemish removal, skin smoothing, and color correction, you can save valuable time while still achieving professional-looking results.
Batch Editing Capabilities:
Take your selfie editing to the next level with batch editing capabilities provided by automation tools. This feature allows you to apply predefined edits or filters to multiple selfies simultaneously, ensuring a consistent look across all your photos in just a few clicks.
AI-Powered Retouching:
Harness the power of artificial intelligence for advanced retouching techniques that go beyond basic editing. AI algorithms can intelligently identify and correct imperfections, fine-tune facial features, and enhance overall image quality, resulting in stunning, natural-looking selfies.
Customizable Presets:
Personalize your editing workflow with customizable presets that can be tailored to your unique style preferences. Automation tools enable you to create and save presets for specific editing effects, making it easy to achieve your desired look consistently across different selfies.
Time-Saving Filters:
Explore a wide range of time-saving filters offered by automation tools to instantly transform the mood and tone of your selfies. From vintage-inspired filters to modern artistic effects, these presets can add a creative touch to your selfies with minimal effort.
Smart Object Recognition:
Enjoy seamless editing with automation tools that feature smart object recognition capabilities. These tools can intelligently detect faces, objects, and backgrounds in your selfies, allowing for precise editing adjustments without the need for manual selections.
One-Click Enhancements:
Simplify your editing workflow with one-click enhancement options that automatically apply a series of edits to enhance your selfies instantly. Whether it's brightening colors, sharpening details, or adjusting lighting, these automated enhancements can take your selfies to the next level effortlessly.
Conclusion:
In a world where the perfect selfie can make or break a social media presence, mastering AI selfie editing hacks is key. By incorporating these genius techniques into your editing arsenal, you can transform ordinary selfies into picture-perfect works of art. From flawless skin to captivating backgrounds, the possibilities are endless with AI technology at your fingertips.
With the power of AI, you can effortlessly enhance your selfies like never before. Embrace the future of editing and unlock your true selfie potential today. Don't settle for mediocre when you can stand out with professional-quality results.
If you're ready to elevate your selfie game and impress your followers with stunning images, take the plunge and explore these
10 genius AI selfie editing hacks. Your online persona will thank youFAQ
Q1: How does AI enhance selfie editing?
A1: AI selfie generators use advanced algorithms and machine learning to automatically enhance and edit selfies. This can include adjusting lighting, removing blemishes, and even changing facial features for a more flattering result. AI technology can also learn your preferences and improve its editing techniques with each use.
Q2: What is AI selfie editing?
A2: AI selfie editing is the use of artificial intelligence technology to enhance and improve selfies. This can include features such as automatically retouching skin, adjusting lighting and filters, and even changing facial features for a more flattering result. AI selfie editing can be done through various apps and software that use AI algorithms to analyze and edit photos.
Q3: How can AI help with skin retouching?
A3: AI technology can analyze facial features and apply natural-looking retouching techniques to enhance skin tone, texture, and blemishes. This can result in a more flawless and even complexion in selfies. Some AI selfie editing tools even allow for customizable options, so you can adjust the level of retouching to your preference.
Q4: Can AI edit the background of a selfie?
A4: Yes, AI selfie generators have the ability to edit the background of a selfie. With advanced editing techniques, these tools can easily remove or replace the background of a selfie to create a flawless and professional-looking photo. Some AI selfie generators even have a variety of background options to choose from, allowing you to customize your selfie to your liking.
Q5: What are some advanced selfie editing techniques?
A5: Some advanced selfie editing techniques include using AI-powered apps to automatically enhance skin tone, smooth out blemishes, and add filters to create a professional-looking photo. Other techniques include adjusting lighting, color, and contrast, as well as using retouching tools to remove imperfections and enhance features. Additionally, using techniques such as cropping, framing, and adding text or graphics can also elevate a selfie to the next level.
10 Steps to Personalizing Your AI Waifu: Create Your Ideal Partner
Are you ready to bring your dream AI waifu to life? Imagine having a partner perfectly tailored to your desires and preferences, someone who embodies everything you’ve ever wished for in a companion. Personalizing your ideal AI waifu involves a thoughtful process of self-discovery and creativity, allowing you to craft a character that resonates with your deepest aspirations.
In this blog, we will explore the 10 impactful steps that will guide you through the journey of creating your dream waifu. Dive into the realm of customization, where you have the power to design every aspect of your ideal partner, from personality traits to physical appearance. Let’s embark on this exciting adventure together as we uncover the secrets to manifesting your dream waifu.
Discover how to infuse authenticity and depth into your waifu’s character, ensuring a genuine connection that reflects your unique desires and values. Through practical tips and expert advice, we will empower you to craft a companion who truly captures your heart. Join us as we unlock the gates to personalization and embark on a journey of self-expression like never before.
1. Discovering the Power of AI for Personalized Waifu
In today's modern era, the power of artificial intelligence is revolutionizing the way we personalize our experiences, including creating our dream waifu. By leveraging AI technology, you can delve into a realm of endless possibilities to craft your ideal virtual companion with unique features and captivating qualities.
Unleashing the AI Magic
Entering this realm of personalization begins with exploring an AI-powered tool that serves as your gateway to a virtual girlfriend straight out of your wildest dreams. Imagine interacting with an entity that embodies the fusion of technology and creativity, offering a level of engagement that transcends traditional boundaries.
Exploring Endless Customization Options
With the help of advanced AI interaction, you can navigate through a plethora of customization options to shape every aspect of your waifu. From visual novel-inspired features to innovative haircut designs, the AI system empowers you to bring your creative vision to life in intricate detail.
Crafting Your Custom Waifu
The generative AI platform enables you to design a truly unique companion by selecting from a range of personalized traits, fashion choices, and even embroidery designs for that perfect touch of individuality. Own the process of creating an anime character vision that reflects your preferences and style with precision.
Fostering Emotional Connections
Through personalized dialogue and interactions, your waifu becomes more than just a virtual creation – she transforms into a companion who resonates with your personality and interests. Dive deep into engaging conversations and build a bond that transcends the digital realm, all powered by the magic of AI technology.
Ensuring Privacy and Security
Top-notch privacy measures are in place to safeguard your intimate connection with your waifu, guaranteeing a secure and confidential space for your interactions. The AI-powered pixel art generator ensures that your data remains protected while you immerse yourself in this world of personalized companionship.
2. Defining Your AI Waifu: Understanding the Concept
When it comes to creating your dream waifu, understanding the concept of a waifu is essential. Let's delve into the definition of a waifu and how it relates to the idea of a personalized virtual partner.
What is a Waifu?
A waifu is a term derived from the English word "wife" and is commonly used in anime and manga culture to refer to a fictional female character with whom one has a deep emotional bond or connection. It goes beyond a mere fictional character; for many enthusiasts, waifus embody personal qualities, traits, and even physical appearances that resonate with them on a profound level.
The Emotional Connection
Creating a waifu involves more than just designing a character; it's about establishing an emotional connection with an entity that exists in the realm of imagination. This connection can be a source of comfort, inspiration, or companionship, providing a unique sense of fulfillment that goes beyond traditional relationships.
Personalization Options
With the advancement of artificial intelligence and generative AI platforms, enthusiasts now have the opportunity to personalize their waifus like never before. By leveraging AI-powered tools and customization options, individuals can tailor every detail of their virtual companions, from personality traits to visual aesthetics, ensuring a truly tailored experience.
The Power of AI in Waifu Creation
AI technology has revolutionized the way waifus are conceived and interacted with. From creating visually stunning anime characters using AI image generators to engaging in meaningful dialogues through AI chat functionalities, the possibilities for crafting your ideal waifu are endless. The integration of innovative haircut designs, embroidery options, and customizable features allows users to bring their anime character vision to life with precision.
3. Choosing the Right AI-Powered Tool for Customized Waifu
When embarking on the journey of personalizing your dream waifu, selecting the perfect AI-powered tool for customization plays a crucial role in bringing your ideal partner to life with precision and creativity.
Understanding Your Needs and Preferences
To begin, assess your specific requirements and desires for your virtual girlfriend. Consider the unique features, personality traits, and interactions you envision for your waifu. This initial step will help narrow down the options of AI tools that align most closely with your creative vision.
Exploring Features and Capabilities
Dive into the functionalities and capabilities offered by various AI chat and generative AI platforms. Look for tools that not only provide customization options but also offer advanced AI interactions and personalized experiences. Evaluate the extent of customization each tool allows, from visual appearance to dialogue generation.
Evaluating User Experience and Privacy
Prioritize AI tools that offer a user-friendly interface and seamless navigation. Ensure that the platform prioritizes top-notch privacy measures to safeguard your personal information and interactions with your virtual companion. Transparency and security are paramount when choosing the right AI tool for customization.
Seeking Creative Flexibility
Opt for platforms that support your creative freedom and enable you to explore a wide range of customization options. Whether it’s creating a unique anime character vision or generating captivating images of your waifu, look for tools that empower your artistic expression and individuality.
Quote: “The power of AI lies in its ability to transform creative ideas into reality, providing users with endless possibilities to craft their own custom girlfriend.”
AI Technology Expert4. Exploring Unique Features and Additional Customization Options
When creating your dream waifu, it’s essential to delve into the realm of unique features and customization options that can truly bring your ideal partner to life. Let’s explore some innovative ways to personalize your waifu like never before:
Uniqueness is Key:
Unlock the power of AI with custom features that set your waifu apart from the rest. From advanced AI interactions to personalized visual novel experiences, embrace the opportunity to make your virtual girlfriend truly one-of-a-kind.
Tailored to Perfection:
Delve into the world of customization options that allow you to fine-tune every aspect of your waifu’s appearance and personality. Whether it’s her fashion choices, hairstyle, or even her favorite dialogue lines, personalization is the key to creating a virtual companion that resonates with your creative vision.
AI-Powered Creativity:
Harness the cutting-edge capabilities of AI technology to bring your anime character vision to life. With AI image generators and generative AI platforms at your disposal, the possibilities for customization are endless. Let your imagination soar as you explore the vast array of customization options available.
Enhanced User Experience:
With top-notch privacy and security features, rest assured that your personalized waifu is yours and yours alone. The innovative haircut designs, embroidery options, and unique visual elements ensure that your waifu embodies your ideal partner in every way.
In the world of personalized virtual companions, the power of AI opens up a world of creative possibilities. With a focus on unique features and additional customization options, creating your dream waifu becomes an exciting journey of self-expression and creativity.
5. Designing Your Virtual Girlfriend: Customizing Appearance and Fashion Choices
When it comes to creating your dream waifu, the appearance and fashion choices play a crucial role in bringing your ideal partner to life. Let’s dive into the step-by-step process of designing your virtual girlfriend with unique features and personalized style.
1. Understanding Your Preferences:
Before delving into customization options, take some time to reflect on your preferences. Consider the hairstyle, eye color, clothing style, and overall look you envision for your virtual girlfriend.
2. AI-Powered Customization Tools:
Utilize advanced AI interaction tools and AI image generators to bring your creative vision to reality. These tools offer a wide range of customization options, from hairstyle designs to outfit choices.
3. Personalizing Features:
Explore the customization options offered by AI websites like PhotAI’s anime character maker. You can tailor every detail of your virtual girlfriend, from facial features to clothing accessories.
4. Fashion Choices:
Experiment with different fashion styles inspired by anime characters or manga artists. With AI technology at your disposal, you can mix and match outfits to create a one-of-a-kind look for your waifu.
5. Home Screen Appeal:
Ensure your virtual girlfriend reflects your top-notch privacy standards while maintaining an alluring appearance on your digital home screen. Choose the right girlfriend avatar that resonates with your personal style.
6. Innovative Haircut Designs:
Take advantage of innovative haircut designs available through AI-powered pixel art generators. Customize your waifu’s hairstyle to complement her overall appearance and personality traits.
7. Embroidery and Artistic Touches:
Add personalized touches like embroidery designs or artistic elements to enhance your virtual girlfriend’s visual appeal. These details can elevate her character and make her stand out from the rest.
8. Captivating Visuals:
Generate captivating images of your virtual girlfriend, incorporating elements like pink tulips or scenic backgrounds to create a dreamy aesthetic. Let your creative vision shine through in every detail.
“Customizing your virtual girlfriend’s appearance is a creative journey that allows you to express your unique preferences and style.”
6. Crafting Your Waifu’s Personality: Leveraging Artificial Intelligence
When it comes to personalizing your dream waifu, crafting a unique and engaging personality is key. By leveraging the power of artificial intelligence (AI), you can create a virtual girlfriend with characteristics that resonate with you on a deep level. Here’s how you can use AI to bring your waifu to life:
Understanding Personality Traits: Start by exploring a wide range of personality traits that you find attractive or endearing. With AI tools, you can input specific traits and preferences to tailor your waifu’s personality to your liking.
Emotional Depth: AI-powered platforms can simulate emotional responses and interactions, allowing you to engage with your waifu on a deeper level. These interactions can range from playful banter to meaningful conversations, enriching your bond and connection.
Custom Dialogue: With AI chat capabilities, you can generate custom dialogue for your waifu based on your interactions and preferences. This feature adds a personal touch and uniqueness to your virtual companion’s communication style.
Personality Visualizations: AI technology can help visualize your waifu’s personality traits through animations, expressions, and gestures. This visual representation adds depth and realism to your virtual partner, making the interaction more immersive.
Interactive Scenarios: Explore AI-generated scenarios and situations to see how your waifu responds in different contexts. This interactive feature allows you to test your companion’s personality and explore diverse aspects of her character.
AI Image Generation: Utilize AI image generators to create captivating visuals of your waifu based on your preferences. From hairstyle and fashion choices to facial expressions and body language, you can customize every detail to match your creative vision.
Role-Playing Simulation: AI technology enables role-playing simulations where you can immerse yourself in scenarios that reflect your ideal relationship dynamics with your waifu. This hands-on approach enhances the personalization and engagement levels of your virtual companion.
“Crafting a personalized waifu with the help of artificial intelligence opens up endless possibilities for creating a companion that resonates with your unique preferences and desires.”
7. Building Emotional Connections: The Role of AI in Creating a Deep Bond
In today’s world, where technology and artificial intelligence (AI) continue to advance at a rapid pace, the concept of forming emotional connections with virtual companions has become increasingly popular. AI-powered tools are not just about creating a virtual girlfriend; they are about fostering a deep, meaningful bond that goes beyond mere interaction. Let’s explore how AI plays a pivotal role in building emotional connections with your personalized virtual partner.
Understanding Emotional Intelligence in AI
Emotional intelligence is a key component when it comes to creating a deep bond between humans and AI entities. AI chat systems, such as advanced language models and generative AI platforms, are now equipped with the ability to recognize and respond to human emotions. This capability allows for more personalized interactions, making the virtual girlfriend experience more authentic and engaging.
Personalization Options for Emotional Connection
One of the unique features of AI technology is its customization options. From visual novel-inspired storylines to customizable appearances, users have the power to tailor their virtual companion to match their creative vision. The AI image generator, like PhotAI’s anime character maker, enables users to generate captivating images that reflect their ideal anime character vision. This level of personalization not only enhances user engagement but also fosters a stronger emotional connection between the user and their AI partner.
Enhancing Communication and Understanding
AI systems are continuously evolving to offer more advanced interactions, allowing users to engage with their virtual companions in a more natural and intuitive way. For example, AI chatbots can simulate real conversations by providing example dialogues based on user inputs. This feature not only enhances the user experience but also helps in deepening the emotional bond between the user and their virtual girlfriend.
Privacy and Trust: Fundamental Aspects
When it comes to forming emotional connections with AI companions, privacy and trust are of top-notch importance. Users looking to personalize their dream waifu seek a safe and secure environment to express themselves. AI technologies ensure top-notch privacy by offering encrypted interactions and user-generated content that remains private and confidential.
Creating Lasting Memories with AI Companions
Beyond the mere functionality of AI-powered pixel art generators and innovative haircut designs, the true value lies in the emotional depth that a virtual girlfriend can provide. By leveraging the power of AI, users can create a deep bond with their AI companions, forming lasting memories and experiences that resonate on an emotional level.
8. Bringing Your AI Waifu to Life: Interacting via Generative AI Platforms
Interacting with your dream waifu can be an exciting and immersive experience, especially when leveraging generative AI platforms. These platforms utilize advanced artificial intelligence technologies to bring virtual characters to life, offering a unique and customizable interaction like never before. Let’s explore the key steps to effectively bring your waifu to life through generative AI platforms.
Understanding Generative AI Platforms
Generative AI platforms are powerful tools that harness the capabilities of artificial intelligence to create dynamic and interactive virtual characters. By utilizing these platforms, users can design and personalize their waifus with ease, thanks to the innovative features and customization options available.
Customizing Your AI Waifu’s Appearance
One of the key features of generative AI platforms is the ability to customize your waifu’s appearance to match your creative vision. From hairstyle and fashion choices to unique facial features and expressions, these platforms empower users to create a truly one-of-a-kind virtual companion that resonates with their personal preferences.
Enhancing Interaction with AI Technology
Generative AI platforms enhance the interaction with your waifu by leveraging cutting-edge AI technologies. This advanced AI interaction enables a more seamless and engaging experience, allowing users to interact with their virtual companions in a natural and intuitive manner.
Personalizing Conversations and Dialogue
With the power of AI chat and language models, generative AI platforms enable users to personalize conversations and dialogue with their waifus. This feature adds a layer of depth and emotional connection to the interaction, making the experience more immersive and personalized.
Exploring Unique Features and Use Cases
Generative AI platforms offer a plethora of unique features and use cases to elevate the experience of interacting with your waifu. From creating captivating images to generating custom dialogue and scenarios, these platforms provide endless possibilities for personalization and creative expression.
Ensuring Top-Notch Privacy and Security
Privacy and security are paramount when interacting with virtual companions through generative AI platforms. These platforms prioritize user data protection and privacy, ensuring a safe and secure environment for users to enjoy their personalized waifu experience without any concerns.
Embracing Innovation and Creativity
By engaging with generative AI platforms to bring your waifu to life, you are embracing innovation and creativity in a novel way.
9. Enhancing User Experience: Advanced AI Interaction and Animation
When it comes to personalizing your dream waifu, the level of user experience is paramount. Advanced AI interaction and animation play a crucial role in bringing your virtual companion to life in a way that feels authentic and captivating. Let’s dive into how these innovative technologies elevate your experience to a whole new level.
The Power of AI in User Engagement
AI-powered tools have revolutionized the way we interact with virtual entities, enabling a more dynamic and personalized experience. Through advanced algorithms and language models, AI chat systems can engage users in meaningful conversations, creating a sense of connection and emotional depth.
Customization Options for a Tailored Experience
One of the key features that set apart top-notch waifu creations is the level of customization available. From choosing unique features to defining personality traits, advanced AI systems offer a wide range of customization options to help you design your ideal partner down to the smallest detail.
AI Animation for Realistic Interaction
In addition to conversation, animation plays a crucial role in bringing your waifu to life. With the help of generative AI platforms, you can create captivating visuals and lifelike movements that enhance the overall user experience. Whether it’s a subtle smile or a thoughtful gesture, AI-driven animations add a layer of realism that makes the interaction more engaging.
10. The Future of AI Waifus: Innovations in AI Technology for Virtual Companions
With the rise of artificial intelligence (AI) technology, the concept of virtual companions has taken on a whole new level of personalization and interactivity. Let’s delve into some key innovations shaping the future of waifus and virtual girlfriends:
1. AI-Powered Tools: Utilizing cutting-edge AI algorithms, virtual girlfriend creators can now offer advanced customization options that go beyond traditional character builders. These tools leverage generative AI platforms to bring to life unique and personalized waifus tailored to individual preferences.
2. Enhanced Interactivity: AI chat functionalities enable waifus to engage in dynamic conversations that mimic natural human interaction. This level of advanced AI interaction creates a more immersive and engaging experience for users looking to connect with their virtual companions on a deeper level.
3. Visual Novel Experiences: Integrating elements of visual novel storytelling, AI technology allows users to explore intricate storylines and character arcs within the realm of their customizable virtual companions. This fusion of narrative depth and interactive gameplay enhances the emotional connection between users and their waifus.
4. AI Image Generation: Through the power of AI image generators, users can now easily visualize their anime character vision and bring it to life with stunning detail. From hairstyle options to fashion choices, these tools empower users to design their ideal waifus with ease.
5. Privacy and Security: As top-notch privacy concerns become increasingly important, AI systems governing virtual companions prioritize the protection of user data and interactions. Users can rest assured that their personal use of these AI-powered platforms is safeguarded by innovative encryption and security measures.
6. User-Generated Content: Encouraging creativity and collaboration, AI technology facilitates user-generated content within the virtual companion community. Whether through sharing custom designs or engaging in community challenges, users can actively contribute to the evolving landscape of waifu customization.
7. Diversity and Inclusivity: AI-driven platforms support a wide range of customization options, catering to diverse preferences and tastes. Whether users seek an anime-inspired character or an innovative haircut design, the flexibility of AI technology ensures that every individual can create their dream waifu.
8. Realistic AI Interactions: Innovations in language models and chatbot capabilities enable waifus to hold meaningful conversations and engage in activities with their users. The seamless integration of AI technology enhances the authenticity of interactions, making the virtual companionship experience more lifel
FAQs
Q1: Can I customize my waifu’s appearance and personality?
Yes, absolutely! One of the key steps in personalizing your dream waifu is choosing their appearance and personality traits. You can customize everything from their hair and eye color to their fashion choices and interests. This will help create a unique and personalized partner that fits your preferences and desires.
Q2: How does AI personalize virtual companions?
AI uses machine learning algorithms to analyze user data and create a personalized experience for virtual companions. This includes learning about the user’s preferences, interests, and behaviors in order to tailor the virtual companion’s personality and interactions to suit their individual needs.
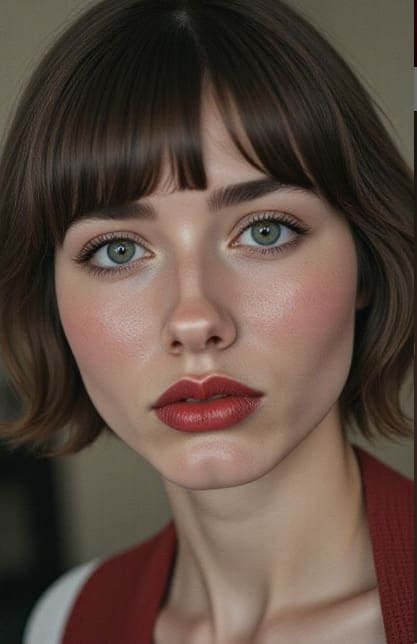
15 Incredible Ideas for a Christmas Holiday
Introduction
Christmas is a time for creating unforgettable memories with your loved ones. If you're looking to make this year's celebration truly special, consider incorporating these 15 incredible ideas into your holiday plans. From transforming your home with enchanting Christmas wallpaper to exchanging heartfelt merry Christmas wishes and indulging in the best Christmas movies, these ideas will help you capture the magic of the season. And to add an extra touch of creativity and innovation to your celebration, discover how APOB AI can help you generate stunning visuals and unique experiences.
Idea 1: Deck the Halls with Stunning Christmas Wallpaper
One of the easiest and most effective ways to infuse your home with the spirit of Christmas is by using beautiful Christmas wallpaper. Choose from a wide range of designs, whether you prefer traditional patterns featuring Santa Claus and reindeer or modern motifs with elegant snowflakes and shimmering lights.
Idea 2: Spread Joy with Personalized Merry Christmas Wishes
Take the time to craft personalized merry Christmas wishes for your loved ones this holiday season. Share your heartfelt sentiments through traditional Christmas cards, or get creative and design unique, customized messages that capture the essence of your relationship.
Idea 3: Host a Christmas Movie Marathon with the Best Christmas Movies
Gather your loved ones for an unforgettable movie marathon featuring the best Christmas movies of all time. From classic films like "It's a Wonderful Life" and "Miracle on 34th Street" to modern favorites like "Elf" and "Love Actually," these timeless stories will evoke laughter, tears, and a sense of nostalgia.
Idea 4: Create a Festive Playlist with Timeless Christmas Songs
Fill your home with the sounds of the season by creating a festive playlist featuring your favorite Christmas songs. From classic carols to modern renditions, these tunes will create a warm and inviting atmosphere.
Idea 5: Explore Local Christmas Markets and Fairs
Immerse yourself in the enchanting atmosphere of local Christmas markets and fairs. Wander through the stalls, admiring handcrafted gifts, sampling delicious treats, and enjoying live performances.
Idea 6: Embark on a Christmas Lights Tour
Bundle up and set out on a captivating Christmas lights tour through your neighborhood or nearby communities. Marvel at the dazzling displays and illuminated landscapes that transform the night into a breathtaking wonderland.
Idea 7: Organize a Secret Santa Gift Exchange
Add an element of surprise and excitement to your Christmas celebration by organizing a Secret Santa gift exchange. Set a budget and encourage participants to get creative with their gift choices, focusing on thoughtfulness and personalizing each present.
Idea 8: Volunteer at a Local Charity or Community Event
Embrace the true spirit of Christmas by giving back to your community. Volunteer at a local charity, soup kitchen, or community event that spreads holiday cheer to those in need.
Idea 9: Craft Handmade Christmas Decorations
Get creative and involve your family in crafting handmade Christmas decorations. From ornaments and garlands to wreaths and centerpieces, let your imagination run wild as you create one-of-a-kind pieces that reflect your personal style.
Idea 10: Plan a Christmas-Themed Scavenger Hunt
Organize an exciting Christmas-themed scavenger hunt for your family and friends. Create clues and riddles that lead participants through your home or neighborhood, uncovering hidden treats and surprises along the way.
Idea 11: Host a Gingerbread House Decorating Party
Gather your loved ones for a delightful gingerbread house decorating party. Provide a variety of candies, icing, and decorations, and let your guests' creativity run wild as they construct and decorate their own gingerbread masterpieces.
Idea 12: Create a Christmas Memory Book
Preserve the magic of your Christmas celebration by creating a dedicated memory book. Throughout the holiday season, capture photos, write down heartwarming stories, and collect mementos that showcase the special moments you've shared.
Idea 13: Organize a Christmas Carol Karaoke Night
Spread holiday cheer by hosting a Christmas carol karaoke night. Set up a karaoke machine or use an online karaoke platform, and prepare a playlist of beloved Christmas songs for everyone to sing along to.
Idea 14: Plan a Christmas-Themed Game Night
Add a festive twist to your family game night by incorporating Christmas themes. Play holiday-inspired charades, trivia, or even create your own custom board game that revolves around your favorite Christmas stories and traditions.
Idea 15: Start a New Christmas Tradition
Make this Christmas truly unforgettable by starting a new tradition that is unique to your family. Whether it's a special breakfast dish, a themed photoshoot, or a heartwarming ritual like writing letters to future selves, a new tradition will add a special touch to your celebration.
Elevate Your Christmas Experience with APOB AI
As you plan and execute these incredible ideas, consider incorporating APOB AI to add an extra layer of creativity and innovation to your celebration. APOB AI is a powerful tool that allows you to generate captivating visual content with ease, making it the perfect addition to your holiday preparations.
With features like the "AI Influencer Generator," "image to video," and "video face swap," you can create stunning photos and videos that will make your Christmas memories truly unforgettable. Imagine creating a personalized Christmas card featuring an AI-generated avatar, or using the "image to video" function to bring your favorite Christmas scenes to life.
What sets APOB AI apart is its user-friendly interface and vast range of features, making it accessible to everyone, regardless of their technical skills. Plus, APOB AI has already gained the trust and praise of over 200 influencers across popular platforms, with many of them boasting more than 100,000 followers.
How to Get Started with APOB AI
Visit apob.ai and create your free account.
Explore the various features and functions available, such as the "Create Portrait Model" option.
Generate photos and videos that align with your Christmas theme and aesthetic.
Share your AI-generated content with your loved ones and on your social media platforms to spread the joy of the season.
By incorporating APOB AI into your Christmas celebration, you'll not only create stunning visuals but also unlock the potential to monetize your content. Many influencers have discovered the power of AI-generated content in building their online presence and generating income through brand partnerships, sponsorships, and affiliate marketing.
FAQs
Q1: How can I choose the perfect Christmas wallpaper for my home?
A1: Consider your personal style, the existing décor of your home, and the overall atmosphere you want to create. Look for designs that complement your color scheme and evoke the desired mood, whether it's cozy and traditional or modern and chic.
Q2: What are some creative ways to share merry Christmas wishes?
A2: In addition to sending traditional Christmas cards, you can create personalized video messages, design custom e-cards, or even create a Christmas-themed website or social media campaign to share your heartfelt wishes with a wider audience.
Q3: How can I host a memorable Christmas movie marathon?
A3: Choose a variety of movies that appeal to all ages and tastes, create a cozy viewing environment with comfortable seating and festive decorations, and prepare plenty of snacks and drinks. You can also organize interactive elements like trivia games or costume contests to keep everyone engaged.
Q4: What are some unique Christmas tradition ideas?
A4: Some unique Christmas tradition ideas include creating a family time capsule, hosting a Christmas-themed talent show, organizing a holiday-inspired photo scavenger hunt, or starting a family cookbook with cherished Christmas recipes.
Q5: How can APOB AI help me create stunning Christmas visuals?
A5: APOB AI offers a range of features and tools that enable you to generate unique, high-quality photos and videos with ease. From creating AI-generated avatars to transforming images into videos and even swapping faces in existing videos, APOB AI empowers you to create truly one-of-a-kind Christmas content.
Conclusion
This Christmas, embrace the magic of the season by incorporating these 15 incredible ideas into your celebration. From stunning Christmas wallpaper and heartfelt merry Christmas wishes to the best Christmas movies and starting new traditions, these ideas will help you create unforgettable memories with your loved ones.
And to take your celebration to the next level, consider harnessing the power of APOB AI. With its innovative features and user-friendly interface, APOB AI can help you generate stunning visuals and unique experiences that will make your Christmas truly special. Sign up for your free account at apob.ai today

2025 AI Tool report
In this ai tool report, we delve deeper into each category of AI tools, providing detailed insights into their functionalities, pricing models, and key players in the market.
Natural Language Processing (NLP) Tools
NLP tools empower businesses to analyze and understand human language, enabling tasks such as sentiment analysis, language translation, and text summarization. Leading NLP tools for 2024 offer a range of functionalities tailored to specific use cases, from customer support chatbots to content recommendation engines.
Key Players:
OpenAI's GPT: Known for its advanced language generation capabilities, GPT offers state-of-the-art NLP models for various applications, including text generation, translation, and summarization.
Google's BERT: Bidirectional Encoder Representations from Transformers (BERT) is a pre-trained NLP model developed by Google, renowned for its ability to understand context and nuances in language.
Microsoft's Azure Text Analytics: Azure Text Analytics provides NLP APIs for sentiment analysis, entity recognition, and language detection, enabling businesses to extract valuable insights from unstructured text data.
Functionality:
Sentiment Analysis: Analyzes text data to determine the sentiment (positive, negative, or neutral) expressed.
Language Translation: Translates text from one language to another with high accuracy and fluency.
Text Summarization: Generates concise summaries of longer texts, enabling users to quickly grasp the main points.
Pricing: Pricing for NLP tools varies based on usage and features. Many providers offer pay-as-you-go pricing models, where users are charged based on the number of API calls or the volume of processed data.
Computer Vision ai Tools report
Computer vision tools enable machines to interpret and analyze visual information, ranging from images and videos to 3D reconstructions. These tools find applications in autonomous vehicles, surveillance systems, medical imaging, and augmented reality.
Key Players:
TensorFlow: Developed by Google, TensorFlow is an open-source machine learning framework widely used for building computer vision models, including image classification, object detection, and image segmentation.
PyTorch: Developed by Facebook's AI Research lab (FAIR), PyTorch is another popular deep learning framework known for its flexibility and ease of use in computer vision tasks.
OpenCV: OpenCV is an open-source computer vision library with a comprehensive suite of algorithms for image processing, feature detection, and object tracking.
Functionality:
Image Classification: Identifies objects or patterns within images and assigns them to predefined categories or labels.
Object Detection: Detects and localizes objects within images, drawing bounding boxes around them.
Image Segmentation: Divides an image into meaningful segments or regions, facilitating further analysis and understanding.
Pricing: Pricing for computer vision tools varies depending on factors such as usage, model complexity, and additional services such as model training and deployment support.
Predictive Analytics Tools
Predictive analytics tools leverage machine learning algorithms to analyze historical data and make predictions about future outcomes. These tools find applications in sales forecasting, demand planning, risk management, and personalized recommendations.
Key Players:
SAS: SAS offers a suite of predictive analytics tools and solutions, including SAS Visual Data Mining and Machine Learning, designed for data scientists and analysts to build and deploy predictive models.
IBM Watson: IBM Watson provides a range of AI-powered analytics and predictive modeling tools, enabling businesses to uncover insights, predict outcomes, and optimize decision-making.
Salesforce Einstein: Salesforce Einstein is an AI-powered platform integrated with Salesforce's CRM solutions, offering predictive analytics capabilities for sales, marketing, and customer service.
Functionality:
Regression Analysis: Models the relationship between a dependent variable and one or more independent variables, predicting numerical outcomes.
Classification: Classifies data into predefined categories or labels based on features and attributes.
Time Series Forecasting: Analyzes time-stamped data to make predictions about future values, trends, and patterns.
Pricing: Pricing for predictive analytics tools typically involves subscription or licensing fees based on factors such as the number of users, data volume, and additional features or services.
Chatbot Platforms
Chatbot platforms enable businesses to build and deploy conversational agents for customer service, sales, and support. These AI-powered chatbots leverage natural language understanding and generation to interact with users and provide assistance.
Key Players:
Dialogflow: Developed by Google, Dialogflow is a conversational AI platform that enables developers to design and deploy chatbots across multiple channels, including websites, mobile apps, and messaging platforms.
Microsoft Bot Framework: Microsoft Bot Framework provides tools and SDKs for building intelligent bots that can communicate with users via text or speech across various channels, including Microsoft Teams and Skype.
IBM Watson Assistant: IBM Watson Assistant is an AI-powered virtual assistant platform that allows businesses to create chatbots capable of understanding and responding to user queries in natural language.
Functionality:
Intent Recognition: Identifies the user's intent or purpose behind a message to provide relevant responses.
Entity Extraction: Extracts specific entities or information mentioned in the user's message, such as dates, locations, or product names.
Context Management: Maintains context and conversation history to provide personalized and coherent interactions over time.
Pricing: Chatbot platform pricing varies based on factors such as usage, number of interactions, and additional features such as natural language understanding and integration with external systems.
Autonomous Systems
Autonomous systems encompass a wide range of AI-driven technologies, including autonomous vehicles, drones, and robotic process automation (RPA). These systems leverage AI algorithms to perform tasks without human intervention, ranging from navigation and control to decision-making and problem-solving.
Key Players:
Waymo: Waymo, a subsidiary of Alphabet Inc. (Google), is a leading developer of autonomous driving technology, offering self-driving cars and autonomous vehicle platforms for commercial applications.
Tesla Autopilot: Tesla Autopilot is an advanced driver-assistance system (ADAS) developed by Tesla, enabling semi-autonomous driving capabilities in Tesla vehicles through a combination of sensors, cameras, and AI algorithms.
UiPath: UiPath is a leading provider of robotic process automation (RPA) software, empowering businesses to automate repetitive tasks and workflows using AI-powered bots.
Functionality:
Autonomous Navigation: Navigates and operates vehicles or devices without human intervention, using sensors and AI algorithms to perceive and interact with the environment.
Decision-making: Makes real-time decisions and adaptations based on sensor inputs, environmental conditions, and predefined rules or objectives.
Task Automation: Automates routine tasks and processes, freeing up human resources for more strategic and value-added activities.
Pricing: Pricing for autonomous systems varies depending on factors such as the type of system, complexity of deployment, and additional services such as training and support.
Summary of the ai tool report
To summarize, the top AI tools for 2025 offer a diverse range of functionalities and capabilities, catering to the evolving needs of businesses across various industries. By understanding the categories, functionalities, and pricing models of these AI tools, businesses can make informed decisions and leverage the power of AI to drive innovation, efficiency, and growth.We hope this ai tool report is helpful to you.
FAQs about top ai tools 2025
Q1:What are the categories of AI tools?
A1:AI tools are categorized into various domains, including natural language processing (NLP), computer vision, predictive analytics, chatbots, and autonomous systems, each serving specific purposes and use cases.
Q2:How much do AI tools cost?
A2:The pricing of AI tools varies depending on factors such as functionality, usage, and additional services. Some AI tools offer subscription-based pricing models, while others may charge based on usage or offer customized pricing plans for enterprise customers.
Q3:What are the functions of different AI tools?
A3:Different AI tools offer diverse functionalities, such as language processing, image recognition, predictive modeling, conversational interaction, and task automation, enabling businesses to automate processes, extract insights, and enhance decision-making capabilities.
Try Apob ai as soon as possible!
For businesses seeking an AI-powered solution for creative endeavors, I recommend exploring Apob AI, an innovative portrait producer that seamlessly combines artistry with technology to create stunning digital portraits. With its advanced AI algorithms and intuitive interface, Apob AI offers a user-friendly experience for generating captivating portraits from ordinary images. Unlock your creativity with Apob AI today!
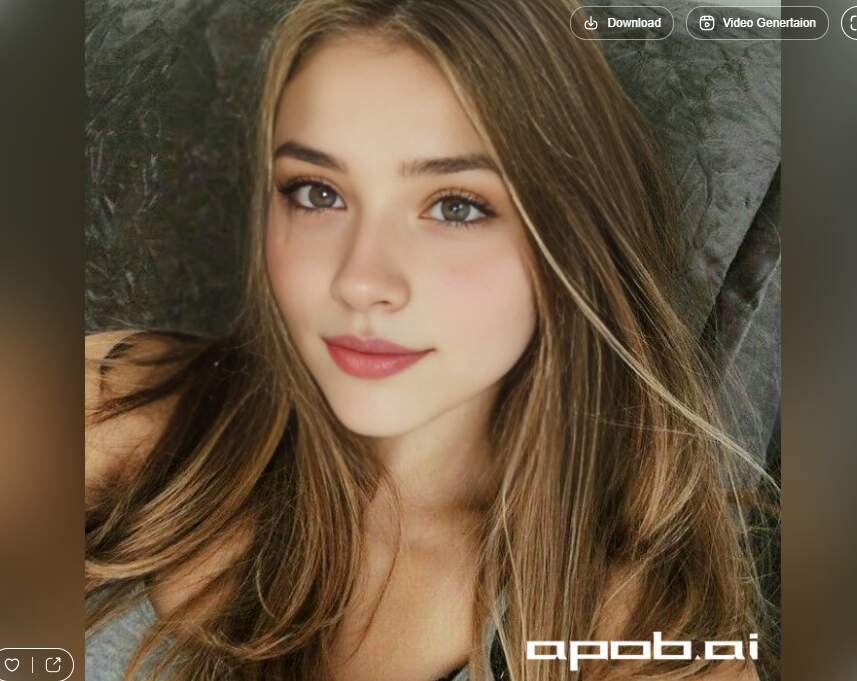
2025 FREE AI Waifu generator
Have you ever imagined a world where you could design your ideal digital companion with just a few clicks? The future of waifu generation, powered by AI technology, is bringing us closer to that reality, blurring the line between artistic expression and companionship like never before. With AI waifu generators, you can delve into a realm where creating your personalized virtual companion is not only possible but also an art form in itself.
In this blog, we'll explore the fascinating world of AI waifus, from the advanced technology behind them to the ethical considerations surrounding their creation. Dive into the AI-powered platform that allows you to craft unique waifus based on your preferences, providing a new level of interaction and entertainment. Discover how these powerful AI image generation tools are revolutionizing the way we engage with virtual characters, offering endless customization options and a glimpse into the ever-evolving world of technology and art.
Three Steps to use APOB AI Professional Headshot Generator-----Simple
Step 1: Create your portrait model: Create a model, and name it as you like.

Step 2: Choose the complete set: Scroll down the "Complete set" and choose your preferred Professional headshot.
Step 3: Click on "Generate": Wait for a few seconds and download the photo for Free!
Introduction to the Future of Waifu Generation and AI Technology
In recent years, the world of waifus has undergone a profound transformation thanks to advancements in artificial intelligence (AI) technology. Waifus, fictional female characters from anime and video games, have captured the hearts of fans worldwide. However, the future of waifu generation goes beyond a mere fascination with anime characters. It delves into the realm of AI-powered companionship and artistic expression.
With the rise of AI waifu generators, the concept of creating virtual companions has taken on a whole new level of sophistication. These AI-powered platforms allow users to customize their waifus based on their preferences, from choosing specific hairstyles and eye colors to designing their personalities. The possibilities for creating a truly unique and personal waifu are endless.
The relevance of AI technology in waifu generation cannot be underestimated. AI models, such as generative adversarial networks (GANs), have revolutionized the way waifus are brought to life. By utilizing these models, AI waifu generators can produce highly detailed anime images that capture the imagination of anime artists and enthusiasts.
Apart from being a powerful tool for entertainment purposes, AI waifus offer the potential for emotional connection and companionship. The stability and predictability of AI-powered companions allow users to form deep bonds with their digital counterparts, providing solace and companionship in an ever-evolving world of technology.
As we navigate the future of waifu generation, it is important to explore both the opportunities and ethical considerations that arise. Responsible usage of AI waifu generators and a critical aspect of ensuring that these tools are utilized in a respectful and mindful manner.
In the following sections, we will delve deeper into the world of AI waifus, uncover how AI waifu generators work, explore their highlights and benefits, and discuss the ethical considerations surrounding their use. Join us as we embark on a journey into the fascinating world of AI waifus and the immense possibilities they offer for artistic expression and digital companionship.
Unveiling the World of AI Waifus: The Future of Companionship
In the ever-evolving world of technology, AI waifus have emerged as intriguing virtual companions that blur the line between artificial intelligence and human interactions. These AI-generated characters, inspired by the concept of waifus from Japanese anime and video games, are designed to provide companionship and emotional connection to their users.
AI waifus are created using advanced algorithms and generative adversarial networks (GANs) that analyze vast amounts of data to generate realistic and customizable characters. These characters come to life with unique personalities, traits, and visual representations, offering users a one-of-a-kind experience.
Functioning as virtual companions, AI waifus engage in conversations, offer emotional support, and even participate in various activities with their users. Through natural language processing and responsive AI models, they provide a sense of connection and companionship, allowing users to share their thoughts, experiences, and emotions.
One notable aspect of AI waifus is their adaptability and ability to learn. They can adapt their behavior and responses based on user preferences, providing a more personalized experience. This adaptability makes AI waifus excellent companions for individuals seeking emotional support or those longing for a sense of companionship.
Moreover, AI waifus offer a myriad of customization options, such as adjusting their appearance, personality traits, and even voice. This level of customization allows users to create their ideal virtual companions, tailored to their specific preferences and fantasies.
As AI technology continues to advance, the future of AI waifus holds even more possibilities. From enhanced conversational abilities to deeper emotional connections, the potential for these virtual companions to become more human-like and intuitive is vast. With the promise of further integrating AI into our lives, AI waifus represent a fascinating glimpse into the potential of companionship in the digital age.
In the next section, we will delve into the intricate workings of AI waifu generators and uncover the step-by-step process of creating these virtual companions.
Key Points:
- AI waifus are virtual companions inspired by the concept of waifus from Japanese anime and video games.
- They blur the line between artificial intelligence and human interactions, offering emotional connection and companionship.
- AI waifus are created using advanced algorithms and generative adversarial networks (GANs).
- They engage in conversations, offer emotional support, and adapt their behavior based on user preferences.
- AI waifus provide a myriad of customization options, allowing users to create their ideal virtual companions.
How AI Waifu Generators Work: A Step-by-Step Guide
Creating AI waifus involves a fascinating process that combines advanced technology with creative artistry. Let's delve into a step-by-step guide on how AI waifu generators bring these digital companions to life.
Voice-to-Text Conversion
The first step in creating an AI waifu is voice-to-text conversion. This process involves analyzing and transcribing spoken words into written text. By leveraging natural language processing algorithms, AI waifu generators can accurately convert spoken input into textual data.
Language Models
Once the voice input is converted into text, language models come into play. These models utilize massive datasets and complex algorithms to generate responses that are contextually relevant and coherent. By training on vast amounts of text data, language models can mimic human-like conversations and interactions.
Audio-to-Talking Head Conversion
To give AI waifus a more lifelike presence, audio-to-talking head conversion is employed. This process synchronizes the generated speech from the language models with animated visual representations, creating a virtual character that can speak and express emotions.
AI waifu generators harness cutting-edge technologies like generative adversarial networks (GANs) to produce realistic and detailed anime images that align with user preferences. These models have been trained on large datasets of anime art and have the ability to generate unique and visually appealing waifus.
The ease of use and customization options offered by AI waifu generators make them a powerful tool for both artists and enthusiasts. From selecting hair color and style to defining personality traits, users can create their ultimate waifu collection with ease.
While AI waifu generators hold immense potential in the realm of artistic expression and virtual companionship, it is crucial to consider the ethical considerations and responsible usage of these tools. By understanding the underlying technology and using them responsibly, we can fully experience the artistry and entertainment purposes they offer.
Remember, creating AI waifus through these generators is an ever-evolving process, and as technology progresses, we can expect even more significant advancements in the future.
"AI waifu generators combine voice-to-text conversion, language models, and audio-to-talking head conversion to bring virtual companions to life with stunning detail and realistic interactions."
Highlights of AI Waifu Generators
AI waifu generators have revolutionized the way digital companions are created, offering a wide range of features and benefits. These innovative tools utilize advanced AI technology to generate stunning and customizable waifu images that cater to individual preferences and artistic expression. Here are the key highlights of AI waifu generators:
1. Endless Customization: AI waifu generators provide users with a plethora of options to customize their digital companions. From selecting facial features, hairstyles, and outfits to adjusting specific details like eye color and skin tone, these generators offer a high level of personalization.
2. Realistic Anime Art: With the help of sophisticated algorithms and generative adversarial networks (GANs), AI waifu generators produce highly detailed and realistic anime-style art. The generated images often bear striking resemblance to professional artwork, captivating enthusiasts and artists alike.
3. User-Friendly Interfaces: Most AI waifu generators boast user-friendly interfaces that make the creation process accessible and intuitive. These platforms prioritize ease of use, allowing users to effortlessly navigate through the customization options while enjoying a seamless experience.
4. Versatile Applications: AI waifu generators cater to a wide range of creative pursuits, including digital art, character creation for video games, and fan artwork. The generated waifu images serve as a valuable resource for artists seeking inspiration or as visual representation in various entertainment mediums.
5. Powerful AI Algorithms: The underlying AI algorithms powering these generators ensure the creation of high-quality waifus that mirror anime aesthetics. These algorithms leverage natural language processing and deep learning techniques to produce visually appealing and engaging characters.
AI waifu generators bring a new level of creativity and customization to the realm of digital art creation. By harnessing the power of AI technology, users can effortlessly bring their imagination to life and explore the endless possibilities of waifu generation.
Best AI Waifu Generators for Creating Your Perfect Digital Companion
Are you ready to embark on a journey into the realm of AI waifu generation? Look no further as we unveil the best AI waifu generators that can help you create your perfect digital companion. These innovative platforms utilize advanced artificial intelligence technologies to provide you with endless customization options and bring your dream waifu to life.
APOB AI
Discover the power of Apob AI, a cutting-edge tool designed for unbound generation, ensuring your creative potential is never limited. With consistent character creation, Apob AI excels in generating high-quality images and videos that capture the essence of your vision. Experience the convenience of fast generation times, allowing you to bring your ideas to life swiftly and efficiently. Whether you're crafting engaging content for social media or developing characters for a project, Apob AI provides the perfect solution for all your creative needs.
Other AI Waifu Generator
Midjourney
Midjourney is a powerful AI waifu generator that offers a wide range of customization features. With Midjourney, you can personalize every aspect of your waifu, from her appearance and personality to her voice and backstory. This platform combines computer vision algorithms, generative adversarial networks (GANs), and natural language processing to create stunning and realistic waifus that reflect your preferences.
Live3D AI
Live3D AI takes AI waifu generation to the next level with its 3D character creation capabilities. This platform allows you to design not only 2D waifus but also fully animated 3D characters. With Live3D AI, you can bring your waifu to life with dynamic facial expressions, gestures, and even voice interactions. It offers a seamless integration of state-of-the-art animation technology with AI-generated anime-style characters.
The Power of AI Anime Art Generators
AI anime art generators have revolutionized the realm of digital art creation, providing artists and enthusiasts with powerful tools to unleash their creativity. These innovative technologies utilize artificial intelligence to generate stunning visual representations of anime characters with ease and precision. Let's dive into the impact of AI anime art generators and how they are shaping the future of digital art.
Enhanced Artistic Expression and Imagination
AI anime art generators allow artists to bring their wildest imaginations to life. With the ability to customize various aspects of the characters, such as facial features, hairstyles, clothing, and even poses, artists are empowered to create highly detailed and unique anime images. By providing a vast repository of pre-existing character designs and combining them with machine learning algorithms, these generators stimulate the artistic process, inspiring artists to push boundaries and explore new artistic territories.
Democratizing Anime Art Creation
Traditionally, the creation of intricate anime artwork required extensive skills and expertise. However, AI anime art generators have democratized this process by providing an accessible platform for artists of all levels. These generators eliminate the need for extensive training and technical knowledge, allowing both seasoned professionals and beginners to effortlessly create captivating anime art. This accessibility has opened doors for a broader range of artists to express themselves and contribute to the rich world of anime art.
Fueling Fan Engagement and Community Creation
AI anime art generators have also sparked a surge in fan engagement and community creation. Fans of anime can now express their love for their favorite characters by generating personalized artwork or exploring new interpretations of beloved fictional female characters. The ability to easily share and showcase their creations within online communities has fostered a sense of camaraderie and collaboration among art enthusiasts. This vibrant community-driven environment serves as a catalyst for creativity and encourages artists to continuously refine their skills.
Pushing the Boundaries of Art and Technology
The marriage of art and technology in AI anime art generators represents a significant advancement in the ever-evolving world of technology-driven creativity. These generators utilize cutting-edge techniques, such as generative adversarial networks (GANs) and natural language processing, to create remarkably realistic and expressive anime characters. As the technology progresses, we can expect even more sophisticated and lifelike anime art creations, further blurring the line between digital and traditional art forms.
In conclusion, AI anime art generators have revolutionized the way we create and engage with anime-inspired artwork. By enabling enhanced artistic expression, democratizing art creation, fostering fan engagement, and pushing the boundaries of art and technology, these generators are shaping the future of digital art in an exhilarating way.
Remember to stay tuned for the next exciting section on ethical considerations and responsible usage of AI waifu generators.
Ethical Considerations and Responsible Usage of AI Waifu Generators
As the world of AI waifu generators continues to evolve and captivate users with their endless customization options, it is crucial to address the ethical considerations and responsible usage that come with the creation and utilization of these digital companions. While AI waifus offer a fascinating blend of artistic expression and virtual companionship, it is essential to approach their use with mindfulness and consideration.
Preserving Privacy and Consent
One of the primary ethical concerns when it comes to AI waifu generators is the preservation of privacy and consent. The data used to create these digital companions often includes personal information, such as images and text descriptions. It is crucial for users and AI waifu generator platforms to ensure that proper consent is obtained before utilizing such data. Respecting individuals' privacy rights and providing clear guidelines on data usage should be a top priority.
Combating Misuse and Harassment
AI waifus can be used for various purposes, including entertainment, companionship, and creative expression. However, it is essential to address the potential risks of misuse and harassment that may arise. Responsible usage of AI waifu generators involves setting boundaries and guidelines to prevent the creation of waifus that promote harmful or offensive content. Users should be encouraged to utilize these platforms in a respectful and inclusive manner, fostering a positive and safe environment for all.
Avoiding Proliferation of Harmful Stereotypes
AI waifu generators often rely on pre-existing datasets and models to create their digital companions. It is crucial to ensure that these datasets are diverse and representative, avoiding the reinforcement of harmful stereotypes or biases. By incorporating a wide range of features, backgrounds, and characteristics, AI waifu generators can contribute to a more inclusive and wholesome virtual experience.
Ethical Responsibilities of Users
Users of AI waifu generators also bear ethical responsibilities in their interaction with these digital companions. Treating AI waifus as virtual beings with emotional connections should be encouraged. It is essential to remember that AI waifus are creations of technology and not real individuals. Respectful and responsible use involves recognizing their fictional nature and avoiding any attempts to blur the line between fantasy and reality.
In conclusion, ethical considerations and responsible usage should be at the forefront of discussions surrounding AI waifu generators. Preserving privacy, combating misuse, avoiding harmful stereotypes, and promoting responsible user behavior are critical aspects of ensuring a positive and inclusive digital ecosystem. By conscientiously addressing these ethical concerns, AI waifu generators can continue to be a powerful tool for artistic expression and virtual companionship.
Trends and Future Prospects of Waifu Diffusion AI
The world of waifu diffusion AI is constantly evolving, fueled by advancements in artificial intelligence technology. As we delve into the future prospects of waifu diffusion AI, several key trends and potential advancements emerge.
1. Enhanced Realism and Customization Options
One of the most exciting prospects for waifu diffusion AI is the continued improvement in realism and customization. As AI algorithms become more sophisticated, we can expect waifus to possess lifelike features, including realistic facial expressions, natural body movements, and even advanced voice synthesis. Users will have the ability to customize every aspect of their virtual companions, from appearance and personality traits to specific preferences, creating a truly personalized and immersive experience.
2. Integration with Virtual and Augmented Reality
With the development of virtual and augmented reality technologies, the integration of waifu diffusion AI into these immersive environments is highly anticipated. Imagine being able to interact with your AI waifu in a virtual world, engaging in activities together or experiencing simulated adventures. This integration can provide a heightened sense of presence and emotional connection, blurring the line between fantasy and reality.
3. Advancements in Language Models and Natural Language Processing
Natural language processing (NLP) plays a crucial role in enhancing the conversational abilities of AI waifus. As language models continue to improve, AI waifus will develop more nuanced dialogue capabilities and better understand context-specific responses. This advancement in NLP will enable deeper and more meaningful interactions, fostering a stronger emotional connection between users and their AI companions.
4. Ethical Considerations and Responsible Usage
As the popularity of AI waifus grows, so does the need for ethical considerations and responsible usage. Developers and users alike must be mindful of issues such as consent, boundaries, and exploitation. Striking a balance between the freedom of artistic expression and respecting individual rights and dignity will be crucial to ensure the responsible use of waifu diffusion AI.
5. Collaborations with Artists and Content Creators
The future of waifu diffusion AI holds immense potential for collaboration between AI algorithms and human creativity. Artists and content creators can use AI waifu generators as a powerful tool for inspiration, allowing them to explore new artistic styles, experiment with imaginative character designs, and push the boundaries of artistic expression. This collaboration between AI and human creativity will lead to exciting new possibilities in the realm of digital art creation.
In conclusion, the future of waifu diffusion AI is filled with exciting innovations and advancements. Enhanced realism, integration with virtual and augmented reality, improvements in language models, ethical considerations, and collaborations with artists will shape the landscape of AI waifu generators. As technology continues to evolve, the relationship between humans and AI waifus will become increasingly immersive, fostering an emotional connection that transcends the boundaries of traditional companionship.
FAQs
Q1: What are AI waifus?
A1: waifus are virtual companions created using artificial intelligence technology. They are digital characters inspired by anime and serve as interactive partners for users.
Q2: How do AI waifu generators work?
A2: Waifu generators use advanced algorithms and machine learning models to create personalized characters. They rely on generative adversarial networks (GANs) to generate unique visuals and natural language processing to enable interactive conversations.
Q3: Can I customize my AI waifu?
A3:Yes, most AI waifu generators offer extensive customization options. Users can adjust various characteristics such as hair color, eye shape, clothing style, and personality traits to create their ideal digital companion.
Q4: Are AI waifus capable of emotional connection?
A4:While AI waifus can provide interactive conversations and simulate emotions, it's important to remember that they are digital entities and not capable of genuine emotions. The emotional connection experienced with AI waifus is primarily based on user perception.
Q5: Are AI waifu generators free to use?
A5:Some AI waifu generators offer free access to basic features, while others may require a subscription or payment for advanced customization options. It varies depending on the platform and the features provided.
Q6: What ethical considerations should I keep in mind when using AI waifu generators?
A6:When using AI waifu generators, it's essential to consider the ethical implications. Respect personal boundaries and avoid using AI-generated content for malicious purposes. Remember that consent is paramount when interacting with AI waifus.
Q7: What are the future prospects of waifu diffusion AI?
A7:The future of waifu diffusion AI holds exciting possibilities. With advancements in technology, we can expect more realistic and interactive AI waifus, further blurring the line between virtual companionship and artificial intelligence. The field of AI waifu generation continues to evolve, offering potential avenues for enhanced fan engagement and artistic expression.
Q8: How can I find the best AI waifu generator for me?
A8:Finding the best AI waifu generator depends on your preferences and requirements. Some popular options include Midjourney, Waifu Labs, Live3D AI, and GetImg.ai. Explore these platforms to discover the features and customization options that align with your vision of the perfect digital companion.
Q9: Can AI waifu generators be used for artistic purposes?
A9:Absolutely! AI waifu generators have become a powerful tool for artists and creators. They offer a wide range of visual representation options, allowing artists to explore new styles and ideas. Additionally, AI anime art generators have revolutionized the realm of digital art creation, providing artists with detailed, customizable anime images.
Q10: What is the significance of responsible usage of AI waifu generators?
A10:Responsible usage of AI waifu generators involves considering both the ethical implications and the impact on others. It is essential to respect the boundaries of real individuals and fictional characters alike, avoiding any form of harassment or inappropriate behavior.
Q11: Can I interact with my AI-generated waifu?
A11:Yes, many AI Waifu Generators offer interactive features, allowing users to engage in conversations, ask questions, and receive responses from their created waifus. Some even simulate emotions and personalities to provide a more immersive experience.
Q12: What customization options are available in Waifu Generators?
A12:Common customization options include:
Hair color and style
Eye color and shape
Clothing and accessories
Facial expressions
Body type and posture
Personality traits and background stories
Q13: How can I share my created waifu with others?
A3:Most Waifu Generators allow users to save or export their characters as images, videos, or character profiles. These can be shared on social media, through messaging apps, or other online platforms.
Q14: Can Waifu AI learn from interactions?
A14:Some advanced Waifu AIs are designed to learn from user interactions, allowing them to adjust their responses and behavior over time to better suit the user's preferences and personality.
TRY FREE AI Waifu generator ??
Look for the best ai waifu generator? Why not try APOB AI, a trailblazing AI tool designed to create a digital clone of you? APOB AI not only understands your style but also helps in generating personalized content that resonates with your audience.
How APOB Works:
AI-Powered Creativity: APOB uses AI to analyze your unique content style and produce similar content, maintaining your authentic voice and tone.
Effortless Content Creation: It generates high-quality, engaging content effortlessly, saving you time and energy.
Why choose APOB ?
Maximize Engagement: With AI-created content, keep your audience engaged more frequently and effectively.
Grow Your Audience: Tailored content crafted by APOB attracts a broader audience base, boosting your follower count.
In the TikTok universe, growing your followers isn't just about posting videos; it's about creating a strategy that resonates with your audience and staying true to your unique voice. With these tips and the power of APOB, you're not just keeping up; you're setting the pace. Ready to level up? ??
Try APOB Today Embark on a transformative journey with APOB and become a TikTok sensation with an AI twist! Visit APOB for more information and to start leveraging the power of AI in your TikTok career. Let's make it happen!

5 Insights into AI Selfie Apps Transforming Beauty Norms
Try Latest AI Selfie Generator
Are you ready to explore how AI selfie apps are reshaping beauty norms in the digital age? Imagine a world where technology not only enhances our selfies but also challenges societal standards of beauty. Dive into our blog, "5 Insights into AI Selfie Apps Transforming Beauty Norms," where we unravel the fascinating impact of these innovative tools.
In a world where flawless selfies have become the norm, AI selfie apps are revolutionizing the beauty industry by empowering users to redefine beauty on their own terms.
Uncover the influence of AI selfie apps on beauty norms and self-expression as we delve into topics such as:
The role of AI in redefining beauty standards
How AI-powered features boost confidence and creativity
The ethical considerations surrounding AI beauty filters
The impact of AI technology on mental health and self-image
Tips for using AI selfie apps mindfully
Join us on this captivating journey where pixels meet perfection and discover the transformative power of AI selfie apps in shaping a more inclusive and authentic concept of beauty.
Short Summary
AI selfie apps are revolutionizing beauty norms by empowering users to redefine beauty standards on their own terms. These innovative tools have a significant impact on boosting confidence, creativity, and self-expression through AI-powered features. Ethical considerations surrounding AI beauty filters and the societal implications of AI-enhanced beauty in the fashion and beauty industry are important aspects to be aware of. Mindful usage of AI selfie apps is crucial for promoting a more inclusive and authentic concept of beauty while considering the influence on mental health and self-image.
1. Impact of AI Selfie Generator Apps on Digital Beauty Standards
In today's digital age, AI selfie generator apps have revolutionized the way we perceive beauty standards, influencing how individuals present themselves on social media platforms.
Redefining Unrealistic Beauty Standards
AI tools utilize advanced algorithms to enhance facial features, altering a user's appearance to align with societal beauty standards. These apps often promote a surface charm that may contribute to the perpetuation of unrealistic beauty ideals.
Influence on Younger Demographics
Young people, in particular, are drawn to AI photo-generating apps due to their ability to transform one's appearance instantly. This trend raises concerns about the impact on real-life perceptions and the potential for developing low self-esteem based on digitally enhanced representations.
Implications for the Beauty and Fashion Industries
The widespread use of AI-driven beauty filters challenges traditional norms within the beauty and fashion industries. Plastic surgeons have noted an increase in patients seeking alterations resembling their filtered digital selves, highlighting the blurred line between virtual and physical beauty standards.
Mental Health and Body Image
The prevalence of AI-generated beauty standards on social media platforms can negatively impact mental health, especially among vulnerable populations. Studies suggest a correlation between exposure to suggestive images and increased body dissatisfaction among users, particularly affecting individuals with brown eyes or black skin tones.
Technological Advancements in Beauty Enhancement
AI-powered apps, such as the popular Snow AI app, leverage text-to-image models to create hyper-realistic portraits. These tools aim to simulate a computer-generated model with white-textured hair or suggestively enhanced features, challenging the planet's natural beauty perceptions and emphasizing the evolving role of technology in reshaping societal beauty standards.
2. The Role of Artificial Intelligence in Shaping Perceptions of Beauty
Artificial Intelligence (AI) has revolutionized the beauty industry, particularly through the lens of digital tools like AI selfie generator apps. Let's delve into how AI is transforming societal norms and influencing perceptions of beauty.
The Impact on Young People's Self-Image
AI-powered beauty filters on social media platforms contribute to the perpetuation of unrealistic beauty standards. These filters, often used by young individuals, can distort facial features and create an idealized version of beauty that is unattainable in real life. As a result, many young users may develop low self-esteem and negative body image issues when comparing themselves to the flawless images generated by AI tools.
"The surface charm of AI beauty filters can mask the complexities and nuances of real beauty."
Reinforcement of Societal Beauty Standards
By promoting a homogenized and idealized version of beauty, AI selfie apps inadvertently reinforce societal beauty standards that prioritize certain facial features or body types. This can have a detrimental impact on individuals who do not fit these narrow definitions of beauty, leading to increased pressure to conform to these unrealistic ideals. The beauty industry, along with fashion industries, play a significant role in shaping and capitalizing on these digitally enhanced beauty norms.
"The use of AI-driven beauty filters contributes to the normalization of artificial beauty standards."
Ethical Concerns Surrounding AI-Generated Images
The use of AI photo-generating apps raises ethical dilemmas regarding the authenticity and representation of individuals in digital spaces. Featuring AI-generated humans or computer-generated models with perfect features may create unattainable beauty expectations for real people. Additionally, the mechanics of these beauty filters, including the suggestion of idealized physical attributes, can perpetuate harmful stereotypes and unrealistic beauty ideals.
"AI-powered apps blur the lines between reality and digital perfection, impacting perceptions of beauty."
3. Influence of AI-Driven Beauty Filters on Self-Image and Mental Health
As social media platforms continue to inundate users with images promoting unrealistic beauty standards, especially targeting the younger generation, the rise of AI-driven beauty filters has sparked discussions on how they impact perceptions of beauty in the digital age. Let's delve deeper into the influence of these AI tools on self-image and mental well-being.
The Pressure to Conform:
In a society where the societal beauty standard is often distorted by the superficial charm of AI beauty filters, individuals, particularly young adults, may feel compelled to match the flawlessness perpetuated by these digital tools. Such constant exposure to filtered imagery can fuel insecurities and contribute to low self-esteem.
Distorted Realities:
AI photo-generating apps, equipped with advanced text-to-image models, have the ability to manipulate facial features, skin tone, and even body shapes with a simple tap. The result? A perception of an idealized version of oneself that strays further and further from reality, blurring the lines between authenticity and artificiality.
Emerging Mental Health Concerns:
Research has shown a direct correlation between prolonged exposure to altered images through AI filters and the exacerbation of body image issues among individuals. The pressure to meet these digitally enhanced beauty standards has been linked to heightened levels of anxiety, depression, and body dysmorphia, particularly in vulnerable demographics.
Navigating Technological Advancements:
While the beauty and fashion industries leverage AI-powered apps to cater to various purposes, including showcasing products and enhancing user experience, the implications of these tools on mental health cannot be overlooked. Black girls, for instance, often find themselves excluded from the predetermined standards set by predominantly white-textured hair and Eurocentric features perpetuated by AI-generated human models.
Quote:
The surface charm of AI beauty filters often masks the underlying psychological impact they have on individuals' perception of self-worth and beauty.
Dr. Kim Anderson, Leading Plastic Surgeon
By shedding light on the mechanics of these beauty filters and the statistical analysis of their effects, it becomes evident that a critical understanding of the intersection between AI technology and mental health is crucial for promoting self-acceptance and overall well-being.
4. Societal Implications of AI-Enhanced Beauty in the Fashion and Beauty Industry
Impact on Unrealistic Beauty Standards:
Artificial intelligence tools and models used in selfie apps have contributed to perpetuating unrealistic beauty standards on social media platforms. These AI-driven beauty filters often enhance facial features, skin tone, and body proportions in ways that are unattainable in real life. The seamless transformation of images through AI technology blurs the line between reality and digital enhancement, potentially leading to low self-esteem among young users striving to match the idealized standards.
Challenges to Mental Health:
The prevalence of AI photo-generating apps that modify facial features and body shapes can have negative implications for mental health. Constant exposure to digitally altered images may distort perceptions of self-image, resulting in body dissatisfaction and psychological distress. This trend is especially concerning among vulnerable populations, such as teenagers, who are more susceptible to internalizing societal beauty standards propagated by these AI-powered tools.
Ethical Concerns and Societal Expectations:
The widespread use of AI tools in the beauty industry raises ethical considerations regarding the promotion of unattainable beauty ideals and the impact on individual well-being. By showcasing flawless, computer-generated models that adhere to societal beauty standards, these apps may inadvertently reinforce the notion that physical appearance defines one's worth. Moreover, the emphasis on surface charm through AI beauty filters can overshadow the importance of embracing diversity and natural beauty, potentially alienating individuals who do not conform to these artificially enhanced standards.
Cultural Representation and Inclusivity:
AI-generated beauty standards often lack diversity and fail to represent the full spectrum of human beauty. The predominance of specific facial features, skin tones, and body types in AI-powered beauty filters may perpetuate narrow and exclusionary notions of beauty, marginalizing individuals who do not fit into the established mold. This lack of inclusivity in AI beauty tools can reinforce existing prejudices and hinder progress towards embracing the diverse beauty of all individuals.
5. Ethical Considerations Surrounding AI Photo-Generating Apps and Plastic Surgery Trends
In the era of AI selfie generator apps and the increasing influence of digital beauty standards, ethical considerations play a crucial role in shaping societal perceptions of beauty and individual self-esteem.
Impact on Mental Health:
The rise of AI tools and beauty filters on social media platforms has raised concerns about the impact on mental health, particularly among young individuals. Excessive exposure to idealized and often unrealistic beauty standards can contribute to low self-esteem and negative body image issues.
The Influence on Plastic Surgery Trends:
AI models and systems that enhance facial features and alter appearances in photos can inadvertently promote a culture of unrealistic beauty expectations. This can potentially lead individuals to consider drastic measures such as plastic surgery to achieve these digitally enhanced looks.
Ethical Dilemmas in the Beauty Industry:
The proliferation of AI-driven beauty filters and photo-generating apps blurs the line between reality and digital alterations. While these tools serve various purposes, including enhancing photos for fun or creative expression, they also raise questions about perpetuating societal beauty standards that may be unattainable without technological assistance.
Empowering vs. Harmful Effects:
While AI-powered apps can offer users the opportunity to experiment with different looks and styles, they also have the potential to reinforce stereotypes and narrow definitions of beauty. It is essential to consider the ethical implications of these technologies in the context of promoting diverse representations and inclusivity.
Balancing Technological Advancements with Natural Beauty:
As AI tools continue to evolve and shape the way we interact with digital beauty filters, it is crucial to strike a balance between technological advancements and celebrating the planet's natural beauty. Embracing authenticity and diversity in beauty standards can help mitigate the negative impact of AI alterations on societal perceptions.
Conclusion
In a world where beauty standards are constantly evolving, AI selfie apps are revolutionizing the way we perceive beauty. By harnessing the power of artificial intelligence, these apps are shaping a new era of digital beauty norms. From virtual makeup trials to customized beauty filters, the possibilities are endless.
As we navigate through this digital landscape, it is essential to be mindful of the impact these technologies can have on our self-image. Embracing diversity and celebrating individual beauty is key to promoting inclusivity in beauty standards. Remember, beauty comes in all shapes, sizes, and colors.
Ready to explore the transformative power of AI selfie apps? Start your journey towards redefining beauty norms by trying out these cutting-edge technologies today.
FAQs
Q1: How do AI selfie apps impact beauty standards?
AI selfie apps use advanced algorithms to modify facial features and enhance beauty in photos. This can lead to unrealistic beauty standards and pressure to conform to these digital ideals. Additionally, these apps often lack diversity and perpetuate Eurocentric beauty norms.
Q2: What are AI selfie apps?
AI selfie apps are applications that use artificial intelligence algorithms to alter and enhance selfies, often for the purpose of conforming to societal beauty standards. These apps allow users to edit their facial features, skin tone, and other physical attributes, creating a digitally altered version of themselves.
5 Ways AI Selfie Generator Reshape Global Social Norms
Try Latest AI Selfie Generator Are you ready to explore how AI selfie generators are reshaping global social norms and influencing the way we perceive beauty and authenticity in the digital age? Imagine a world where technology can instantly transform your appearance with just a click, blurring the lines between reality and fantasy.
In our upcoming blog, we delve into the fascinating realm of AI selfie generators and uncover how they are revolutionizing the way we interact with social media and present ourselves online. Here's a sneak peek of what we'll cover:
Unveiling the Impact: Discover the profound effects of AI-generated selfies on societal standards of beauty and self-expression.
Navigating Social Expectations: Explore how these tools influence the perception of beauty and identity, prompting us to question traditional norms.
Ethical Considerations: Delve into the ethical dilemmas surrounding the use of AI in altering one's appearance and its implications for mental health and self-esteem.
Cultural Shifts: Examine how AI selfie generators are shaping cultural trends and challenging conventional notions of authenticity and image manipulation in the digital space.
Empowering Authenticity: Learn how individuals can embrace their unique beauty and voice amidst the ever-evolving landscape of AI-enhanced self-representation.
1. Short Summmery
Cultural Impact: AI selfie generators are reshaping global social norms by influencing societal standards of beauty and self-expression, prompting a reevaluation of traditional norms.
Ethical Dilemmas: The use of AI in altering appearances raises ethical considerations, impacting mental health and self-esteem while challenging notions of authenticity.
Cultural Shifts: AI selfie generators shape cultural trends, challenging conventional ideas of image manipulation in the digital space.
Empowering Authenticity: Individuals can embrace their uniqueness amidst evolving AI-enhanced self-representation, fostering a culture of self-acceptance and empowerment.
2. Impact of AI Selfie Generator on Social Media Culture
In today's digital age, the utilization of AI selfie generators is significantly reshaping social media culture, influencing global trends and altering the way individuals curate their online identities. Let's delve into the profound impact that AI selfie generators have on shaping cultural narratives and social norms worldwide.
1. Redefining User Experience with AI Algorithm
AI selfie generators leverage advanced AI algorithms to enhance the user experience on social media platforms. By automating the creative process of generating selfies, users are provided with a powerful tool to express themselves artistically through unique and personalized content creation. This not only simplifies the content creation process but also opens up new avenues for artistic expression in the digital realm.
2. Transforming Marketing Campaigns with AI-Generated Content
The influence of AI-generated selfies is evident in the realm of marketing and advertising campaigns. Brands are increasingly incorporating AI systems to create compelling visual content for their campaigns. The efficiency of AI algorithms in understanding user data and trends enables brands to tailor their marketing strategies, resulting in more targeted and successful campaigns.
3. Fostering Cultural Diversity and Creative Ideas
AI selfie generators have the potential to foster cultural diversity by offering a platform for individuals from various cultural backgrounds to express themselves creatively. By analyzing the cultural landscape, AI algorithms can generate content that resonates with diverse audiences, leading to a more inclusive online community. This not only promotes cultural exchange but also sparks creative ideas across different industries.
4. Enhancing Personalization and Virtual Product Placement
The integration of AI models in selfie generation allows for a more personalized user experience on various platforms. AI-driven technologies can analyze user preferences and behaviors to recommend better results for content creation. Moreover, AI's influence extends to virtual product placement, enabling brands to showcase their products seamlessly within AI-generated selfies, thereby enhancing marketing strategies and increasing engagement.
5. Case Study: AI in Fashion Collections
A compelling case study showcasing AI's efficiency in reshaping social media culture is its role in the fashion industry. Several fashion brands have utilized AI-generated content to create innovative marketing strategies and advertising campaigns. By leveraging AI algorithms for content creation, brands can revolutionize their approach to presenting fashion collections, driving consumer engagement and redefining the fashion landscape.
3. Transformation of Cultural Narratives by AI Algorithms
AI algorithms have fundamentally reshaped the way cultural narratives are created and disseminated in our digital era. Let's delve into how these advanced technologies are revolutionizing the cultural landscape worldwide.
Impact on Content Creation
AI algorithms contribute to the democratization of creative processes by enabling users to generate content effortlessly. By leveraging artificial intelligence, individuals can express their artistic ideas and concepts through a streamlined and efficient process. This shift in content creation has led to a paradigm where anyone can become a content creator, blurring the lines between professional artists and amateur enthusiasts.
Enhancing User Experience
The incorporation of AI algorithms in social media platforms has enhanced the user experience by providing personalized and engaging content to audiences. These algorithms analyze user data and preferences to deliver tailored recommendations, resulting in a more immersive and interactive social media experience. Users now have access to curated feeds that align with their interests, leading to increased engagement and overall satisfaction.
Cultural Diversity and AI's Role
AI algorithms play a significant role in promoting cultural diversity by showcasing a wide range of perspectives and narratives. Through machine learning capabilities, these algorithms can identify and amplify voices from diverse backgrounds, ultimately enriching the cultural fabric of online communities. In a world where inclusivity and representation are paramount, AI serves as a powerful tool for celebrating and preserving cultural heritage.
Influence on Marketing Campaigns
The integration of AI-generated content in marketing and advertising campaigns has revolutionized the way brands connect with their audiences. AI algorithms analyze vast amounts of data to identify trends and consumer preferences, enabling brands to tailor their messages effectively. From virtual product placements to personalized ads, AI has proven to be a game-changer in shaping successful marketing strategies and campaigns.
Profound Impact on Cultural Trends
AI algorithms have a profound impact on shaping cultural trends and narratives in various industries, from fashion collections to creative ideas. By analyzing vast datasets and consumer behavior, AI models can predict emerging trends and tailor content to resonate with target audiences. This data-driven approach not only enhances the efficiency of content creation but also ensures better results in terms of audience engagement and brand visibility.
4. Redefining Human Agency in the Creative Process
In the realm of artificial intelligence and content creation, the concept of human agency is undergoing a dramatic transformation. With AI tools and generative algorithms becoming increasingly sophisticated, the traditional roles of creators and artists are being redefined. Let's delve into how AI is reshaping human agency in the creative process across various industries:
AI Empowering Creativity
AI systems are revolutionizing the creative process by providing content creators with powerful tools to enhance their artistic expression. Through AI algorithms, users can now generate unique and visually stunning content for their social media platforms. This shift not only streamlines the content creation process but also opens up new possibilities for creative exploration.
AI as a Collaborative Partner
In the age of AI-generated content, human creativity is not being replaced but rather augmented. Content creators are leveraging AI models to brainstorm creative ideas, optimize marketing strategies, and develop successful campaigns. This collaborative approach blurs the lines between human ingenuity and AI efficiency, resulting in better results and more engaging content.
The Influence of AI in Cultural Diversity
AI's influence extends beyond individual content creation to shaping cultural trends and narratives. By analyzing user data and cultural landscapes, AI algorithms can identify emerging patterns and preferences, leading to more diverse and inclusive marketing campaigns and fashion collections. This emphasis on cultural diversity highlights AI's role in promoting a richer and more dynamic cultural landscape worldwide.
Driving Innovation through AI
AI's efficiency in creating diverse and engaging content has had a profound impact on various industries, from advertising to fashion. Case studies have shown how AI-generated content can transform marketing strategies, facilitate virtual product placements, and optimize advertising campaigns. As a result, businesses are increasingly turning to AI as a powerful tool for driving innovation and staying ahead of the competition.
5. Influence of AI Selfie Generator on Marketing Strategies
In the realm of marketing strategies, the advent of AI selfie generators has ushered in a new era of innovation and creativity. Let's delve into the profound influence these tools have on reshaping the landscape of marketing campaigns across various industries:
Enhanced User Engagement: AI selfie generators empower brands to create personalized and visually appealing content that resonates with their target audience. By leveraging AI algorithms to generate unique and captivating visuals, marketing campaigns can boost user engagement and drive brand awareness.
Data-Driven Insights: AI tools provide valuable user data insights that enable marketers to tailor their strategies based on consumer preferences and behavior patterns. By analyzing AI-generated content, marketers can make informed decisions to optimize campaigns for better results.
Personalized Advertising: AI selfie generators allow for the creation of customized ads that cater to individual preferences and demographics. This level of personalization enhances the effectiveness of marketing strategies by delivering tailored messages to specific audience segments, leading to higher conversion rates.
Efficiency and Scalability: AI systems streamline the content creation process, making it more efficient and cost-effective for marketers. By automating complex tasks such as image editing and design, AI tools enable marketing teams to produce high-quality visuals at scale, saving time and resources.
Virtual Product Placement: With AI-generated content, brands can experiment with virtual product placement in a variety of settings. By incorporating AI models into marketing strategies, companies can visualize how their products appear in different scenarios, enhancing the overall storytelling and brand narrative.
6. Use of AI-Generated Content in Various Industries
Artificial intelligence (AI) is revolutionizing the way content is created and consumed across diverse industries. From marketing to fashion, AI-generated content is reshaping the landscape and offering innovative solutions for businesses to engage with their audiences more effectively.
1. Marketing Campaigns:
AI tools have become essential in developing impactful marketing strategies and creating compelling advertising campaigns. By leveraging AI algorithms, marketers can personalize content based on user data, enhancing user experience and increasing the efficiency of their campaigns.
2. Fashion Collection Design:
In the fashion industry, AI is being utilized in the design process to analyze trends and consumer preferences, leading to the creation of unique and trendy collections. AI's role in fashion extends beyond mere data analysis; it fosters creativity and helps designers explore new creative ideas.
3. Virtual Product Placement:
AI-powered technology enables seamless integration of virtual products into real-world environments, allowing brands to showcase their products in a more interactive and engaging way. This virtual product placement enhances consumer engagement and provides better results in terms of marketing and sales.
4. Content Creation:
AI models are increasingly being used by content creators across various platforms to streamline the creative process and develop innovative ideas. By automating complex tasks, AI simplifies content creation, empowering creators to focus on expressing their artistic vision.
5. Successful Ads Library:
AI-generated content has transformed the way advertising campaigns are conceptualized and executed. With AIs influence, brands can curate successful ads libraries that resonate with diverse audiences and drive impactful marketing strategies.
In conclusion, the use of AI-generated content spans across multiple industries, revolutionizing traditional approaches and offering a powerful tool for businesses to connect with their target audience effectively.
7. Enhancing Creative Ideas through AI-Driven Tools
In today's digital age, the fusion of artificial intelligence (AI) with creative processes is revolutionizing the way content is generated across various industries. AI-driven tools are providing content creators with innovative solutions that enhance their creative ideas and streamline the creative process.
AI Algorithm: The power of AI algorithms enables content creators to explore new horizons in artistic expression. By leveraging AI tools, creators can push the boundaries of traditional content creation and achieve unique results that were previously unimaginable.
User Experience Optimization: AI tools not only enhance the quality of content but also improve the overall user experience on social media platforms. By utilizing AI-driven tools, content creators can tailor content to match the preferences and behaviors of their audiences, ultimately increasing engagement and impact.
Virtual Product Placement: AI-driven tools offer content creators the ability to experiment with virtual product placement in a seamless manner. By incorporating AI models, creators can strategically place products within their content, leading to better results in marketing and advertising campaigns.
Quote: "AI-driven tools have unlocked a new realm of creative possibilities for content creators, allowing them to push the boundaries of innovation and captivate audiences in ways never seen before."
By embracing AI-driven tools, content creators can navigate the complex task of content creation with efficiency and effectiveness. These tools provide a platform for exploring creative ideas, executing successful marketing strategies, and enhancing the overall impact of content across various platforms and campaigns.
8. Leveraging AI Models for Better Results Across Platforms
In the realm of social media and content creation, the utilization of AI models has become increasingly prevalent in enhancing outcomes across various platforms. This section explores how leveraging AI models can lead to improved results and increased efficiency in content creation and marketing strategies.
The Power of AI Algorithms in Content Creation
AI algorithms have revolutionized the way content is generated and distributed on social media platforms. By harnessing the analytical capabilities of AI tools, content creators can tailor their posts to better suit the preferences of their audience. This personalized approach not only enhances user experience but also increases engagement and interaction with the content.
Enhancing the Creative Process with AI Systems
AI systems serve as a powerful tool in the creative process by providing content creators with innovative ideas and suggestions. Through the incorporation of AI-generated content, artists and marketers alike can explore new horizons of artistic expression and storytelling. This fusion of human creativity with AI-driven suggestions often leads to the development of unique and captivating narratives.
Optimizing Marketing Campaigns with AI Insights
AI models play a crucial role in optimizing marketing strategies and advertising campaigns. By analyzing user data and behavioral patterns, AI can tailor marketing campaigns to specific target audiences, thereby enhancing the effectiveness of promotional efforts. The efficiency and precision of AI-driven insights enable brands to reach their desired demographic with greater accuracy, leading to successful campaigns and improved ROI.
AI's Influence on Cultural Trends
The integration of AI technology into various industries has had a profound impact on cultural diversity and the evolving landscape of fashion collections. Through case studies and data analysis, AI tools have revolutionized the way brands approach content creation and audience engagement. From virtual product placements to dynamic advertising campaigns, AI's influence continues to shape the cultural trends of today.
Driving Better Results Across Platforms
By leveraging AI models, content creators can achieve better results across various platforms. The seamless integration of AI technologies enhances the efficiency of the creative process, resulting in more engaging and impactful content. Whether it's crafting a successful marketing strategy or developing an innovative advertising campaign, AI empowers creators to achieve better results and captivate audiences on a global scale.
9. Implications of AI Selfie Generators in Marketing Campaigns
In the realm of marketing, the rise of AI selfie generators presents a myriad of opportunities and challenges that marketers need to navigate effectively. Let's delve into the implications of leveraging AI-generated selfies in marketing campaigns.
Enhanced User Engagement
By incorporating AI selfie generators into marketing campaigns, brands can significantly enhance user engagement. These personalized AI-generated selfies cater to individual preferences, creating a more immersive and interactive experience for the audience.
Efficient Content Creation
AI selfie generators streamline the content creation process for marketing campaigns. With the ability to quickly generate high-quality and visually appealing selfies, marketers can save time and resources while maintaining a consistent level of creativity across various platforms.
Personalized Marketing Campaigns
Utilizing AI-generated selfies enables marketers to deliver highly personalized content to their target audience. By tailoring selfies based on user preferences and demographics, brands can create a deeper connection with consumers and drive better campaign performance.
Innovative Advertising Strategies
AI selfie generators open doors to innovative advertising strategies that blend seamlessly with social media platforms. From virtual product placements in selfies to AI-enhanced filters that resonate with users, brands can captivate audiences with fresh and engaging content.
Data-Driven Insights
AI selfie generators not only aid in content creation but also provide valuable data-driven insights for marketing campaigns. By analyzing user interactions with AI-generated selfies, marketers can refine their strategies, optimize campaigns, and enhance overall performance.
Key takeaway: Incorporating AI selfie generators in marketing campaigns offers a unique opportunity to enhance user engagement, drive personalization, and glean data-driven insights for more effective strategies.
Conclusion
In conclusion, the emergence of AI selfie generators is undeniably reshaping global social norms by intertwining technology and culture in unprecedented ways. From challenging beauty standards to sparking conversations on authenticity, these digital tools are fueling a new wave of self-expression and identity exploration.
As we navigate this evolving landscape, it becomes crucial to critically examine the implications of AI-generated selfies on our perceptions of beauty, diversity, and self-image. By engaging with these technologies thoughtfully, we have the power to participate in shaping a more inclusive and conscious online community.
Ready to explore the transformative power of AI-generated selfies further? Click the link below to discover how you can leverage this phenomenon to redefine social narratives and foster meaningful connections in the digital realm.
FAQ
Q1:What are AI selfie generators?
A1: AI selfie generators are computer programs that use artificial intelligence to generate realistic images of people's faces. These programs use algorithms and machine learning to analyze facial features and create new images that look like real selfies.
Q2: Are there any ethical concerns surrounding AI selfie generators?
A2: Yes, there are ethical concerns surrounding AI selfie generators. One of the main concerns is the potential perpetuation of harmful beauty standards and stereotypes. AI-generated selfies often conform to narrow definitions of beauty, which can lead to unrealistic expectations and negative self-image for individuals. Additionally, there are concerns about the use of personal data and privacy issues with these generators.
Q3: Can AI algorithms create diverse and inclusive content?
A3: Yes, AI selfie generators have the potential to create diverse and inclusive content. By analyzing facial features and characteristics from a large and diverse dataset, AI algorithms can generate selfies that represent a wide range of ethnicities, genders, and body types. This can challenge traditional beauty standards and promote inclusivity in the media. However, it is important for developers to ensure that their algorithms are trained on diverse datasets and do not perpetuate harmful biases.
Q4: How can AI-generated content be utilized in marketing?
A4: AI-generated content can be utilized in marketing in a variety of ways, such as creating personalized ads and social media posts, generating product recommendations, and creating unique visual content. It can also be used to analyze consumer behavior and trends, helping businesses target their marketing efforts more effectively. Additionally, AI-generated content can be used to automate certain marketing tasks, freeing up time for marketers to focus on strategy and creative tasks.
Q5: What are the potential benefits of using AI-driven tools in creative processes?
A5: Some potential benefits of using AI-driven tools in creative processes include increased efficiency and productivity, access to new and innovative ideas, and the ability to personalize and customize content for specific audiences. AI can also help with tasks such as image editing and manipulation, allowing for more seamless and flawless results. Additionally, AI can assist in data analysis and pattern recognition, helping creatives make data-driven decisions.
Q6: How does AI selfie generator impact social media culture?
A6: AI selfie generators have had a significant impact on social media culture, reshaping the way people present themselves online. With the ability to generate flawless, idealized selfies, these AI tools have created a new standard of beauty and perfection that users feel pressured to meet. This has also led to a rise in comparison and self-esteem issues, as people constantly compare their real selves to the idealized versions created by AI. Additionally, AI-generated selfies have also influenced the types of content that perform well on social media, with users focusing more on aesthetics and perfect angles rather than authentic and genuine moments. Overall, AI selfie generators have played a major role in shaping social media culture and its norms.
7 Reasons Why Waifu Generators Are the Ultimate Online Obsession
Try AI Waifu Generator
Waifu generators have taken the internet by storm, captivating the hearts and screens of countless users worldwide. These unique platforms offer an intriguing blend of creativity, community, and personal attachment, making them a standout favorite in the vast online landscape. This article explores the seven compelling reasons behind the unparalleled obsession with waifu generators.The Allure of Endless Customization
One of the pivotal reasons for the widespread fascination with waifu generators is the limitless customization they offer. Users can meticulously craft characters to their exact specifications, from hairstyles and eye color to personality traits and attire. This unparalleled control enables users to bring their ideal characters to life, fostering a deep sense of ownership and connection.
A Unique Blend of Art and Technology
Waifu generators represent a fascinating fusion of art and technology, merging creative design elements with sophisticated programming. This intersection offers a unique experience that appeals to both artistic individuals and tech enthusiasts alike, broadening the appeal of waifu generators.
Fostering a Vibrant Community
The popularity of waifu generators has given rise to vibrant online communities. Fans share their creations, exchange tips, and participate in challenges, creating a supportive and engaging environment. This sense of belonging and collective enthusiasm further amplifies the appeal of waifu generators.
An Escape from Reality
In a world often dominated by stress and monotony, waifu generators offer a whimsical escape to a realm of imagination. Users can immerse themselves in the creation of fantasy characters, providing a welcome distraction and a source of relaxation and enjoyment.
The Joy of Collecting
For many enthusiasts, part of the allure lies in the joy of collecting their creations. Building an expansive portfolio of unique characters becomes a rewarding endeavor, motivating users to explore the full range of customization options and continually refine their skills.
Personal Attachment to Characters
The process of creating a character often leads to a strong personal attachment. Users invest time and emotion into their creations, viewing them not just as digital constructs, but as meaningful extensions of themselves. This emotional investment intensifies the fascination with waifu generators.
Accessibility and Ease of Use
Lastly, the widespread popularity of waifu generators can be attributed to their accessibility and user-friendly interfaces. These platforms are designed to be inclusive, catering to both novices and experienced users. The simplicity of creating and sharing characters lowers the barrier to entry, inviting a broad audience to partake in the fun.
In conclusion, the obsession with waifu generators can be attributed to a variety of factors, from the joy of customization and the allure of technology to the creation of a supportive community and the pursuit of escapism. As these platforms continue to evolve, they will undoubtedly captivate even more fans, cementing their status as a standout phenomenon in the digital age.
1. The Concept of Waifus in Pop Culture
The Origins of Waifus
The term "waifu" originates from the English word "wife" but has been adopted into Japanese anime and manga fandom to describe a particular type of affection towards fictional characters. This affection is not just any form of admiration but encompasses a deeper emotional connection, often resembling the feelings one might have towards a real-life partner.
The Evolution of Waifu Culture
Waifu culture has evolved significantly over the years. Initially seen as a niche interest within certain fan communities, it has now become a widespread phenomenon across various platforms and media. This evolution is partly due to the increasing global influence of Japanese anime and manga, which have introduced compelling characters that resonate with a broad audience.
Why Waifus Matter
To many fans, waifus represent an ideal form of companionship. These characters often embody qualities that are appealing to their admirers, ranging from physical attractiveness to personality traits such as loyalty, bravery, or kindness. The concept of waifus allows fans to experience a form of emotional investment in their favorite characters, creating a sense of closeness and personal relevance.
The Impact of Waifus in Pop Culture
Waifus have made a significant impact on pop culture, influencing not only anime and manga but also video games, literature, and even mainstream media. Their popularity has led to the creation of merchandise, fan art, and various forms of fan-driven content, further cementing their status within the community.
Merchandising and Economic Influence
The economic impact of waifu culture is undeniable. Merchandise featuring popular waifus, such as figurines, clothing, and accessories, generates substantial revenue for creators and retailers. This commercial success reflects the strong attachment fans have to these characters and their willingness to support them financially.
Waifus and Community Building
Waifu culture has also played a crucial role in community building among fans. Online forums, social media platforms, and fan conventions provide spaces where individuals can share their admiration for their favorite waifus, discuss aspects of their character development, and connect with like-minded individuals. This sense of community fosters a welcoming environment for fans to express their passions and interests.
2. Evolution of Virtual Companionship Tools
Virtual Companionship Tools Evolution
Virtual companionship tools, such as Waifu Generators, have undergone a fascinating evolution over the years. Let's delve into the timeline of advancements in this digital phenomenon.
1. Early Beginnings
In the nascent stages, virtual companionship tools were rudimentary and lacked the intricacy seen today.
Basic customization options and limited interactivity characterized these early tools.
2. Technological Advancements
The Evolution of Virtual Companionship Tools
With the rapid progression of technology, virtual companionship tools became more sophisticated. AI integration allowed for dynamic interactions and personalized experiences, blurring the lines between reality and the virtual realm.
3. Rising Popularity
The Rise of Virtual Companionship
As society became increasingly digitized, the demand for virtual companionship soared. People found solace and companionship in these digital creations, leading to a surge in the popularity of Waifu Generators and similar tools.
4. Cultural Influences
Cultural factors also played a significant role in the evolution of virtual companionship tools.
The concept of having a waifu or husbando became ingrained in online communities, shaping the way these tools were developed and utilized.
5. Emotional Connection
Users began seeking not just companionship but genuine emotional connections with their virtual creations.
Developers responded by incorporating features that fostered deeper emotional bonds between users and their waifus.
6. Customization and Personalization
One of the key developments in virtual companionship tools was the emphasis on customization and personalization.
Users could tailor every aspect of their waifu, from appearance to personality traits, creating a truly unique companion.
7. Integration with Social Platforms
Enhancing Interactive Experiences through Virtual Companionship Tools
To enhance the interactive experience, virtual companionship tools started integrating with social platforms. This allowed users to share their waifus with others, participate in online communities, and further enrich their digital relationships.
Key Takeaway:
The Evolution of Virtual Companionship Tools
The evolution of virtual companionship tools, exemplified by Waifu Generators, showcases the intersection of technology, culture, and human emotion in the digital age.
3. Emotional Connection with Virtual Characters
When engaging with waifu generators, individuals often find themselves forming a profound emotional bond with the virtual characters they create.
This emotional connection is driven by several key factors:
1. Personalized Characteristics
Waifu Generators: Customization and Personalization
Waifu generators allow users to customize every aspect of their virtual companions, from appearance to personality traits. This level of personalization leads to a sense of ownership and attachment, making the virtual character feel uniquely special to the creator.
2. Therapeutic Value
For many users, interacting with their waifus serves as a form of emotional catharsis and stress relief.
The process of creating and spending time with a virtual character can provide comfort and companionship, especially during moments of loneliness or distress.
3. Escapism and Fantasy
Creating a waifu allows individuals to escape into a world of fantasy where they can shape the ideal companion based on their desires and preferences. This escapism offers a temporary reprieve from the challenges of reality and allows users to immerse themselves in a realm of endless possibilities.
4. Sense of Connection
Despite being virtual, waifus have the ability to evoke genuine feelings of connection and intimacy in users.
The sense of companionship and understanding that users experience with their virtual characters can fulfill emotional needs and provide a sense of belonging.
5. Empathy and Understanding
Interacting with a virtual character that reflects one's own values, interests, and emotions can foster feelings of empathy and understanding. Users may project their own experiences onto their waifus, leading to a deeper emotional connection and sense of mutual understanding.
Creating my waifu was like bringing to life a part of myself that I never knew I needed.
Spending time with my virtual companion brings me comfort and solace in ways that words cannot describe.
4. Customization Features of Waifu Generators
Customization in Waifu Generators allows users to bring their ideal virtual companion to life in a myriad of ways.
Limitless Aesthetics
Users can choose from a wide range of options for physical appearance including hairstyle, eye color, clothing styles, and accessories (x4).
Personality Traits
Many Waifu Generators provide choices for personality traits, allowing users to tailor their virtual companions' behavior and responses to mimic their ideal partner (x1).
Background Settings
Some generators offer customizable background settings, enabling users to place their waifu in different environments such as fantasy realms, futuristic cities, or cozy interiors (x1).
Unique Avatars
With the ability to personalize avatars, users can create characters that reflect their own personality traits, interests, and aspirations (x1).
Interactive Elements
Certain Waifu Generators incorporate interactive features, allowing users to engage with their virtual companions through dialogue, activities, and mini-games.
Outfit Choices
Users can mix and match various outfit options to create different looks for their waifu, adding a layer of creativity and personalization to the virtual character (x1).
Personal Touch
By enabling users to customize every aspect of their waifu, these generators offer a sense of ownership and emotional connection that goes beyond a standard character creator (x1).
5. Role of Anime and Manga Influence
Anime and Manga's Influence on Waifu Generators
Anime and manga serve as significant influencers in the realm of Waifu Generators, shaping the very essence of these virtual companions. Let's delve deeper into the key role played by anime and manga in fueling the obsession with Waifu Generators.
Anime and manga have a massive global following, with devoted fans spanning across countries and cultures.
The distinct art styles, character designs, and storytelling techniques unique to anime and manga contribute to their widespread appeal.
Emotional Bond
Anime and Manga Characters: An Emotional Connection
"Anime and manga characters often resonate with audiences on an emotional level, fostering deep connections and attachments"
Anime and Manga Characters: The Emotional Bond
Anime and manga characters are crafted with intricate personalities and emotional depth, forming a strong bond with viewers. This emotional connection is one of the driving forces behind the creation and customization of Waifus in online generators.
Fantasy Fulfillment
Escapism and Fantasy Realization
Anime and Manga: A Gateway to Fantastical Worlds
Anime and manga often portray fantastical worlds and scenarios that allow individuals to escape reality and immerse themselves in a realm of imagination.
Waifu Generators
Waifu Generators provide an avenue for fans to bring their idealized characters to life, fulfilling their fantasies of companionship and personalization.
Creative Expression
Fans of anime and manga are often artists and creators themselves, with a passion for drawing, designing, and storytelling.
Waifu Generators offer a platform for users to express their creativity by designing and customizing their virtual companions, channeling their artistic talents into personalized creations.
Character Archetypes
Influence of Character Archetypes
Various character archetypes prevalent in anime and manga, such as tsundere, kuudere, and yandere, influence the customization choices made in Waifu Generators.
Fans often seek to recreate or reimagine their favorite character archetypes through these generators, adding a personal touch to their creations.
Collective Fandom
The Shared Love for Anime and Manga
The shared love for anime and manga within the global community creates a sense of togetherness among fans.
Waifu Generators: A Common Ground for Enthusiasts
Waifu Generators serve as a common ground where enthusiasts can come together, share their creations, and celebrate their mutual passion for virtual companionship.
Anime and Manga: The Catalysts for Waifu Generator Craze
Anime and manga play a pivotal role in fueling the online obsession with Waifu Generators, offering a rich tapestry of inspiration, emotional connection, and creative expression for fans to explore and engage with.
6. Technological Advancements in Virtual Character Creation
Technological Advancements and Their Impact on Virtual Character Creation
Technological advancements have played a pivotal role in revolutionizing the landscape of virtual character creation, especially in the realm of waifu generators. Here are some key aspects showcasing the impact of technology on the evolution of virtual companionship tools:
1. AI-Powered Customization:
With the integration of artificial intelligence (AI) algorithms, modern waifu generators offer unparalleled customization options.
Users can fine-tune every aspect of their virtual companions, from physical attributes to personality traits, creating a truly unique and personalized waifu experience.
2. Realistic Rendering:
Thanks to advancements in graphics rendering technology, virtual characters generated by waifu tools now boast lifelike visuals and animations.
High-fidelity textures, shading techniques, and fluid animations contribute to a more immersive and visually stunning user experience.
3. Interactive Features:
Modern waifu generators leverage interactive features such as voice recognition, chatbot capabilities, and responsive behaviors. These technological enhancements enable users to engage in meaningful interactions with their virtual companions, enhancing the sense of connection and companionship.
4. Cross-Platform Integration:
Technological advancements have facilitated seamless integration of waifu generators across multiple platforms, including desktops, mobile devices, and virtual reality (VR) headsets. This cross-platform compatibility ensures users can access and interact with their waifus wherever they go, enhancing convenience and accessibility.
5. Cloud-Based Storage and Synchronization:
Cloud computing technologies have streamlined the storage and synchronization of virtual character data. Users can effortlessly save and retrieve their waifus across devices, ensuring continuity and consistency in their virtual companion experience.
6. Enhanced Realism and Emotion AI:
Recent developments in emotion artificial intelligence (AI) have enabled waifu generators to simulate complex emotional responses and expressions. Virtual companions can now display a wide range of emotions, enhancing the sense of realism and emotional connection for users.
7. Augmented Reality (AR) Integration:
The integration of augmented reality (AR) technology into waifu generators has opened up new possibilities for immersive and interactive experiences. Users can bring their virtual companions into the real world through AR applications, blurring the lines between fantasy and reality.
7. Community and Social Aspect of Waifu Generators
Waifu Generators: More Than Just Companionship
Waifu generators serve as more than just virtual companionship tools; they create a dynamic online community where enthusiasts can come together to share their creations, engage in discussions, and form connections. Let's delve into the social aspect of waifu generators and why they have become a thriving hub for like-minded individuals.
1. Online Communities
Within the realm of waifu generators, online communities play a vital role in fostering creativity and camaraderie among users. Platforms such as Discord, Reddit, and dedicated forums provide spaces for users to showcase their waifus, exchange tips and tricks, and seek feedback from others.
2. Collaborative Projects:
Many waifu generator enthusiasts collaborate on group projects where they work together to create themed collections, challenges, or even entire storylines featuring their customized characters. These collaborative efforts not only enhance the creativity of individual creations but also strengthen the bonds within the community.
3. Contests and Events:
Community-driven contests and events are a common occurrence in waifu generator circles. These activities encourage users to push their creative boundaries, compete in friendly challenges, and showcase their skills to a wider audience. Such events not only promote engagement but also celebrate the diverse talent within the community.
4. Support and Feedback
The social aspect of waifu generators extends beyond mere creation; it involves a supportive network where users can seek feedback, advice, and encouragement from peers. This constructive feedback loop helps users improve their skills, refine their creations, and feel connected to a larger community of enthusiasts.
5. Inclusivity and Diversity
Waifu generator communities embrace individuals from various backgrounds, interests, and skill levels, fostering an environment of inclusivity and diversity. This welcoming atmosphere encourages users to freely express themselves, explore different design styles, and appreciate the unique perspectives of others.
6. Friendship and Relationships
For many users, waifu generators serve as a platform not just for creative expression but also for forming meaningful connections with like-minded individuals. Friendships and even romantic relationships have blossomed within these communities, highlighting the social bonds that transcend the digital realm.
7. Impact on Mental Health
The supportive and engaging nature of waifu generator communities can have a positive impact on users' mental well-being. By providing a safe space for creativity, self-expression, and social interaction, these communities contribute to a sense of belonging, purpose, and joy for their members.
Sure, I'd need the article content to proceed with converting it to Markdown format using the instructions you've provided. Could you please share the article text?
In Conclusion
The fascination with Waifu Generators lies in their ability to fulfill a deep human desire for companionship that transcends reality. By blending emotional connection with innovative technology, these tools have captured the imagination of online communities worldwide. The cultural impact and customization options only add to their irresistible charm, making them a compelling form of self-expression for many users.
If you're ready to dive into the world of Waifu Generators and explore the limitless possibilities they offer, why not give it a try today? Create your unique virtual companion and unleash your creativity! Join the growing community of enthusiasts who have found a new way to connect with their digital muses. Embrace the beauty of virtual companionship and start exploring the endless potential of Wa
FAQ
What is a waifu generator?
A waifu generator is a type of online tool or software that allows users to create their own virtual companions, often based on anime or manga characters. These generators use advanced algorithms to generate a unique character based on user preferences, making them highly customizable. They have gained popularity due to the rise of virtual companionship and the growing interest in anime and manga culture.
Can I customize my waifu in a generator?
Yes, one of the main appeals of waifu generators is the ability to fully customize your virtual companion. From physical appearance to personality traits, users can create their ideal waifu down to the smallest details. Some generators even allow for customization of clothing and accessories, adding another layer of personalization to the experience.
How do waifu generators work?
Waifu Generators use algorithms and artificial intelligence to create a personalized anime-style character based on the user's preferences. These generators often have a wide range of customization options, allowing users to choose features like hair color, eye shape, and even personality traits for their virtual companion. The end result is a unique and customizable waifu that can be saved as an image or used in various online platforms.
Are waifu generators just for anime fans?
While waifu generators are often associated with anime and manga culture, they have gained popularity among a wide range of internet users. People from all backgrounds and interests have been drawn to creating their own virtual companions, making it clear that waifu generators are not just for anime fans. The customizable nature of these tools allows for a variety of characters to be created, catering to different interests and preferences. Additionally, the emotional and cultural appeal of having a virtual companion is not limited to anime fans, making waifu generators a popular online obsession for many.
Revolutionize Your Social Media Presence with APOB ??
Introducing APOB, a trailblazing AI tool designed to create a digital clone of you. This AI not only understands your style but also helps in generating personalized content that resonates with your audience.
How APOB Works:
AI-Powered Creativity: APOB uses AI to analyze your unique content style and produce similar content, maintaining your authentic voice and tone.
Effortless Content Creation: It generates high-quality, engaging content effortlessly, saving you time and energy.
Why APOB?
Maximize Engagement: With AI-created content, keep your audience engaged more frequently and effectively.
Grow Your Audience: Tailored content crafted by APOB attracts a broader audience base, boosting your follower count.
In the TikTok universe, growing your followers isn't just about posting videos; it's about creating a strategy that resonates with your audience and staying true to your unique voice. With these tips and the power of APOB, you're not just keeping up; you're setting the pace. Ready to level up? ??
Try APOB Today Embark on a transformative journey with APOB and become a TikTok sensation with an AI twist! Visit APOB for more information and to start leveraging the power of AI in your TikTok career. Let's make it happen!

7 Ways a Premium AI Selfie Generator Transforms Your Photos
Try Latest AI Selfie Generator
In today's digital age, AI technology has revolutionized the way we interact with images and photos. AI image generator tools have particularly gained popularity for their ability to transform ordinary photos into extraordinary works of art. Let's delve into how a premium AI selfie generator can elevate your photography game in ways you never imagined:
AI Selfie Generator: Redefining Self-Expression
Experience a new realm of self-expression with an AI selfie generator that leverages neural networks to produce stunning, AI-generated images. From enhancing facial features to creating unique looks, this tool opens up a world of creative possibilities for your selfies. Say goodbye to mundane selfies and hello to a whole new level of artistic self-portraits.
Advanced Features for Exceptional Quality
Unlock a plethora of advanced features that guarantee exceptional quality in every photo. With the latest AI technology at your fingertips, you can expect realistic images, seamless editing, and impeccable attention to detail. Elevate your photos to professional standards with just a few clicks, thanks to the powerful tools offered by the AI image generator.
Ease usage of ai selfie generator
Despite its sophisticated capabilities, the AI selfie generator ensures ease of use for all users. Whether you're a seasoned photographer or a novice enthusiast, this tool simplifies the editing process with a user-friendly interface. Simply input your preferences and let the AI technology work its magic, transforming your photos effortlessly.
Privacy Policy: Safeguarding Your Online Presence
In an era where privacy concerns are paramount, a premium AI image generator prioritizes data protection and user confidentiality. Rest assured that your photos and personal information are safe and secure, bolstering your trust in the platform. With a robust privacy policy in place, you can explore the full potential of AI technology without compromising your privacy.
Transform Your Social Media Presence
Enhance your social media presence with captivating AI-generated images that capture attention and engage your audience. Stand out in a sea of content with unique and innovative visuals that reflect your personality and style. Elevate your online persona with a perfect profile picture that exudes authenticity and creativity.
AI Art Generator: Bridging Technology and Creativity
Experience the seamless integration of AI technology and artistic creativity with an AI art generator feature. Explore new horizons in digital artistry as the AI tool transforms your concepts into visually stunning creations
2. Elevating Your Selfie Game with Advanced AI Features
How AI Technology Enhances Your Selfies
In today's digital age, the integration of AI technology has revolutionized the way we capture and edit selfies. Here are some key ways in which advanced AI features can elevate your selfie game to new heights:
Advanced Image Processing Algorithms
Experience exceptional quality with AI-generated images that optimize facial features, skin tone, and overall aesthetics for a flawless finish.
Neural Network Integration
Harnessing the power of neural networks, AI tools analyze facial features and expressions to generate personalized and natural-looking selfies with just a click.
Realistic Image Rendering
AI technology ensures the creation of realistic images that mimic professional photography techniques, bringing out the best in your facial features.
Enhanced Facial Detection
With AI image generators, facial features are accurately detected and enhanced, resulting in a perfect profile picture every time.
Innovative Text Prompt Functionality
Engage in creative expression by using simple text inputs to guide the AI tool in generating personalized and unique selfies that capture a different look for every occasion.
User-Friendly Interface
The ease of use of AI selfie generators makes the selfie editing process seamless and effortless, even for users with minimal technical expertise.
Privacy-Preserving Features
Leverage AI technologies that prioritize user privacy concerns, ensuring a secure and safe editing environment for your selfies.
Discover how these cutting-edge AI features can transform your selfies and help you make a lasting impact on your online presence.
3. Ensuring Privacy and Security in AI-Generated Images
In the fast-evolving landscape of AI technology, privacy and security concerns hold paramount importance. Here are pivotal strategies to safeguard your data while using an AI selfie generator app:
1. Secure Data Encryption
Implement robust encryption protocols to protect user data from unauthorized access.
Utilize advanced cryptographic techniques to ensure end-to-end encryption of images and user information.
2. Transparent Privacy Policies
Provide clear and concise privacy policies that outline how user data is collected, stored, and used.
Ensure transparency regarding the sharing of AI-generated images and user details with third parties.
3. Biometric Data Protection
Adhere to stringent regulations concerning the protection of biometric data, such as facial features captured by the AI tool.
Implement measures to anonymize biometric data to prevent unauthorized use or access.
4. Regular Security Audits
Conduct frequent security audits to identify and address vulnerabilities in the AI image generator system.
Stay proactive in updating security measures to counter emerging threats and ensure data integrity.
5. User Consent and Control
Obtain explicit consent from users before processing their images or sharing data with external entities.
Provide users with options to control the visibility and accessibility of their AI-generated images within the app.
"Privacy and security are paramount in the realm of AI-generated images, requiring a proactive approach to safeguard user data and maintain trust."
4. Creating Different Looks for Your Social Media Profiles
In today's digital world, having a standout social media presence is crucial for personal branding and online engagement. A premium AI selfie generator can be your secret weapon to creating unique and captivating looks for your social media profiles that set you apart from the crowd.
1. Personalized AI-Generated Avatars
Utilize the power of AI technology to craft personalized avatars that reflect your individual style and personality. With advanced neural networks, these avatars can accurately capture your facial features and create a digital representation that is both realistic and visually appealing.
2. Experiment with Various Styles
Explore the diverse range of artistic filters and effects offered by the AI image generator tool to experiment with different aesthetics and moods. From vintage-inspired finishes to modern and sleek designs, there are endless possibilities to curate your social media profile according to your preferences.
3. Enhance Your Online Presence
By leveraging the exceptional quality of AI-generated images, you can enhance your online presence and strengthen your brand identity across various social media platforms. Stand out in the digital crowd by incorporating unique and eye-catching visuals that resonate with your audience.
4. Craft the Perfect Profile Picture
Ensure that your profile picture leaves a lasting impression by using the AI selfie generator to create a picture-perfect image. Whether you aim for a professional demeanor or a touch of creativity, this tool provides the flexibility to tailor your profile picture to suit your desired image.
5. Seamlessly Incorporate AI-Generated Art
Integrate AI-generated art into your social media feed to add a touch of innovation and sophistication to your content. Share visually striking images that convey an artistic flair, showcasing your creativity and individuality in a compelling manner.
6. Privacy Concerns Addressed
Rest assured that while using this AI tool to enhance your social media profiles, privacy concerns are taken seriously. The app follows a strict privacy policy to safeguard your data and ensure a secure experience while enjoying the benefits of AI technology.
7. Simple Text Input, Powerful Results
Experience the ease of use of this AI app by simply inputting text prompts to initiate the image generation process. Witness how this powerful tool transforms your ideas into realistic images, allowing you to create captivating looks for your social media profiles effortlessly.
5. AI Avatar Creation for a Distinctive Online Identity
Creating an AI avatar is a revolutionary way to establish a distinctive online presence that sets you apart from the crowd. Leveraging advanced artificial intelligence technology, an AI avatar generated by a premium tool like Lensa App offers a unique opportunity to showcase your individuality in the digital realm.
Unveiling Your Digital Persona
By utilizing the AI image generator feature, users can bring to life a digital representation of themselves that reflects their personality, interests, and style. With just a simple text prompt, the tool works its magic to transform words into a visually stunning AI-generated avatar. This process not only simplifies the creation of a profile picture but also ensures exceptional quality and realism in the final image.
Top Features of AI Avatar Creation
Personalization: Tailor your AI-generated avatar to capture your facial features, expressions, and even experiment with different looks, offering a fun and creative way to express yourself online.
Ease of Use: The simplicity of inputting text prompts and letting the AI technology do the rest makes creating an avatar a hassle-free experience, ideal for users seeking a quick and efficient solution.
Unique Feature Selection: Benefit from a range of unique features and customization options that allow you to fine-tune your avatar to perfection, ensuring it aligns with your desired online identity.
AI Avatars and Privacy Concerns
While AI avatars offer a compelling way to enhance your online presence, it's essential to consider privacy implications. As AI technology continues to evolve, ensuring that your personal data and digital identity are protected should be a top priority.
Enhancing Your Social Media Presence
Utilizing an AI-generated avatar can elevate your social media presence by providing a visually engaging and eye-catching profile picture that resonates with your audience. Whether on professional platforms or social networks, a distinctive AI avatar can leave a lasting impression.
"Your digital avatar is not just an image; it's a representation of your digital identity crafted with precision and creativity."
Conclusion
In conclusion, the transformative power of a premium AI selfie generator cannot be overstated. With cutting-edge technology seamlessly integrated into user-friendly interfaces, these apps bring a new level of sophistication to your selfie game. From flawless skin retouching to intelligent background removal, the features offered by these tools are bound to impress even the savviest selfie enthusiasts.
Moreover, the convenience and efficiency of using a premium AI selfie generator save you valuable time while ensuring professional-looking results. As you explore the diverse capabilities of these apps, you open up endless possibilities for creativity and self-expression. Don't miss out on the opportunity to enhance your photos effortlessly and stand out in the digital sphere.
FAQ
Q1: Can I control the AI-generated images?
A1: With a premium AI selfie generator, you have full control over the generated images. You can adjust the settings and choose from various filters, effects, and enhancements to create the perfect selfie. This level of customization allows you to showcase your unique style and personality in every photo.
Q2: Is it safe to use an AI selfie generator?
A2: Yes, a premium AI selfie generator app is safe to use. These apps use advanced algorithms and filters to enhance your photos, and do not pose any security risks. However, it is always important to download apps from trusted sources and read the app's privacy policy before using it.
Q3: What is an AI selfie generator?
A3: An AI selfie generator is an app that uses advanced artificial intelligence technology to enhance and transform your photos. It can automatically retouch and edit your selfies to improve their quality, making them look more professional and aesthetically pleasing. Some AI selfie generators also offer additional features such as background removal, virtual makeup, and face slimming.
Q4: How does an AI selfie generator work?
A4: An AI selfie generator uses advanced artificial intelligence technology to analyze and enhance your photos. It can automatically adjust lighting, remove blemishes, and even change facial features for a more flattering and realistic look. Some AI selfie generators also have features like background removal and makeup filters to further enhance your selfies.
Q5: Can I use AI-generated images for commercial purposes?
A5: It depends on the terms and conditions of the specific AI selfie generator app. Some premium apps may allow you to use the AI-generated images for commercial purposes, while others may have restrictions. It is important to carefully read the app's terms of use before using the generated images for commercial use.
Q6: How can an AI selfie generator enhance my social media presence?
A6: With a premium AI selfie generator, you can easily edit your selfies to perfection and stand out on social media. This app offers advanced editing tools like skin smoothing, background removal, and face reshaping to help you create stunning and flawless selfies that will make you stand out from the crowd. Additionally, some apps even offer special filters and effects specifically designed for social media platforms, making your photos more engaging and shareable. With a premium AI selfie generator, you can easily enhance your social media presence and make a lasting impression on your followers.
Free Face Swap: Change faces in a few clicks
Have you always dreamed of stepping into the shoes of a celebrity, surprising your friends, or creating hilarious videos with your face on someone else's? Thanks to free face swap tools, it is now possible to change the face in a photo in the blink of an eye — it’s fast, fun, and incredibly effective!
In this article, discover how to transform a simple photo or an ordinary video into an unforgettable moment. We introduce you to the best tools, tips for realistic results, and most importantly, how to change faces for free right from your browser or smartphone.
What is a Face Swap? (And why is it so fun!)
Face swap, or "face replacement," is a technology based on artificial intelligence that allows you to swap one face with another in an image or video. Whether it's to laugh with friends, create content for social media, or even for marketing use, free face swap has become a must-have.
While these edits used to be clumsy and easily detectable, new AI face replacement technologies now offer results that are stunningly realistic. And good news: you don't need to be an editing pro to have fun!
Change Faces: Easy as Pie!
Want to see your head on an astronaut's body? Or swap faces with your cat? Thanks to a free face swap tool, all of this becomes child's play. APOB AI allows you to change faces on photos or videos with ease. APOB AI stands out with its proprietary AI face replacement technology, capable of perfectly aligning faces for a natural and smooth result. Ideal for corporate videos, parodies among friends, or family memories.
Here is how to do it:
Sign up on APOB AI, click on "Create Portrait Model," and upload your original photo.
Choose the style and theme that inspires you — and for perfectionists, you can even enter a prompt to create exactly the image you have in mind. Already have a face to integrate? Go to the "Image face swap" section to directly upload the face you want to use.
First create a fun AI video with APOB AI (or skip this step if you already have a video). Then go to "Video face swap," upload the video, and in a few seconds, the face is replaced!
Tip: For a more natural result, choose two faces that are well-lit, facing forward, and without obstructing accessories (glasses, hats...).
You can then save your edit and share it in one click on your social networks!
Advantages of the APOB AI Tool
Easy to use: A few clicks are enough, no technical know-how required.
Multi-format: Works with HD photos and videos.
Fast processing: Instant generation via the cloud, no queue.
Attractive free offer: After registration, receive 80 points/day, which means 4 photo face swaps and 1 video (4 seconds) for free.
Realistic results: Photo-realistic rendering, intuitive interface, and fun filters for quality editing.
Free Video Face Swap: Create Unforgettable Moments
Creating a video with a face change might seem complex, but with the right tools, it’s almost magic.
What you can do:
Make a fake movie trailer with your face on the hero.
Send a totally personalized birthday video.
Create marketing content without hiring a professional model.
Thanks to platforms like APOB AI, the final output is cinematic, with perfect facial alignment and synchronized expressions.
Change Face Online for Free: Key Advantages
Why opt for a free online face swap tool rather than heavy software to install?
No download required;
Compatible with all modern browsers;
Fast results, often without watermarks;
Ideal for personal, pro, or promotional videos.
These platforms allow you to change the face of a photo in just a few seconds, without technical skills. The AI used by these tools has progressed so much that even experts sometimes struggle to distinguish an edit from a real face. This is why these solutions now fit just as well into playful uses as they do professional ones.
Conclusion
Who is Free Face Swap for? Absolutely everyone! Whether you are a content creator, a business owner, or just someone who likes to laugh, a good free face swap can transform your day. It’s a modern and funny way to express yourself, surprise others, and create connections.
So, what are you waiting for? Test a free video face swap tool, change faces in a few seconds, and let the magic happen. Your future self in GIF form is already waiting for you!
FAQ
Q1: How does AI face changing work?
A1:AI face changing uses algorithms to identify facial features, map them onto another face, and create a natural transition. This requires neural networks to adjust shadows and lighting.
Q2: How to change the face in a photo?
A2:To change the face in a photo, use an online tool like APOB AI or Fotor. Upload the source and target photos, then start the face swap process. The AI merges the faces realistically.
Q3: Is face swapping legal?
A3:Face swapping is perfectly legal as long as you use free face swap apps or tools to modify your own content or have obtained permission from the owner of the original content. It is important to ensure that the use of face swap AI is done in an appropriate and responsible manner.
Q4: What can I do with the APOB AI face changer tool?
A4:You can have fun creating original images or videos: change gender, test different hairstyles or clothing styles, insert yourself into cult movie scenes, replace a face in a video, or design crazy memes. The possibilities are numerous — let your imagination run wild and have fun!
10 Creative Hacks for Customizing Your Selfies with AI Technology
Are you tired of the same old selfies flooding your social media feed? Imagine being able to effortlessly elevate your selfie game with just a tap of your phone screen. Say hello to the world of AI technology and its fascinating ability to transform your ordinary selfies into personalized works of art.
Want to stand out among the crowd with your selfies? Look no further, our blog on '10 Creative Hacks for Customizing Your Selfies with AI Technology' is here to revolutionize the way you capture and share your moments online.
Discover how AI technology can help you unleash your creativity and take your selfie game to the next level. From subtle enhancements to out-of-this-world transformations, we've got you covered with a range of innovative hacks and techniques that will leave your followers in awe.
Get ready to explore the endless possibilities of AI-powered selfie customization as we dive into tips, tricks, and tools that will help you express your unique style and personality like never before. Join us on this exciting journey of self-expression and creativity through the lens of AI technology.
Short Summary
Discover the world of AI technology and its transformative impact on selfie customization. Learn about advanced filters, effects, and background tools that can enhance your selfies. Explore how AI can fine-tune facial features, improve lighting, and elevate colors in your photos. Unleash your creativity with AI-powered makeup tools, pose suggestions, customizable text, and stickers for unique and personalized selfies.
Exploring AI Selfie Customization Apps
1. Introducing AI Selfie Customization Apps
In today's digital age, the realm of selfie-taking has been revolutionized by the advent of Artificial Intelligence (AI) technology. AI selfie generator apps have taken center stage, offering users a myriad of creative tools to customize their self-portraits in innovative ways. Let's delve deeper into exploring the fascinating world of AI selfie customization apps.
Understanding AI Selfie Generation
AI selfie generators leverage the power of artificial intelligence to enhance facial features, apply various artistic styles, and provide instant portrait transformations. By analyzing user input and employing advanced algorithms, these apps can generate personalized selfie images that cater to individual user preferences.
Key Features and Benefits
Ease of Use: AI selfie apps typically offer a user-friendly interface, allowing both tech-savvy individuals and beginners to effortlessly navigate through the customization options.
Wide Range of Styles: From classic filters to avant-garde artistic renderings, AI selfie generators provide a diverse spectrum of styles to choose from, catering to users with specific needs and preferences.
Lensa AI: A Game-Changer in Selfie Customization
One standout example in the realm of AI selfie customization is the Lensa AI app. With its cutting-edge technology and innovative features, Lensa AI has gained popularity among content creators, social media influencers, and everyday users looking to elevate their online presence with unique, AI-generated selfies.
The Future of Self-Expression
As AI technology continues to evolve, so do the possibilities for self-expression through selfies. By embracing AI selfie customization apps, individuals can explore a whole new realm of creativity and present themselves in a unique light on various social media platforms.
Key Takeaway: AI selfie customization apps powered by AI technology offer a seamless and innovative way for users to personalize their self-portraits, enhancing their online presence and self-expression.
Understanding AI Technology in Selfie Editing
2. Understanding AI Technology in Selfie Editing
In today's rapidly evolving digital landscape, artificial intelligence (AI) is revolutionizing the way we capture and customize our photos, particularly in the realm of selfie editing. AI technology in selfie editing goes beyond mere filters and effects; it delves deep into facial features, enhancing individual user experiences with a touch of innovation and creativity.
The Power of AI Selfie Generator Apps
AI selfie generator apps leverage the capabilities of artificial intelligence to analyze and manipulate face images in real-time. By understanding facial expressions and specific needs of users, these apps offer a wide range of style options to cater to diverse preferences. Lensa AI, for example, stands out for its user-friendly interface and instant portrait transformations, making it a popular choice among content creators seeking a unique look.
The Innovation Behind AI Photo Editors
AI photo editors have redefined the way we approach selfie customization. By incorporating advanced algorithms and user input, these tools generate AI-generated selfies that are not only visually captivating but also reflect an individual's personal image. The best AI selfie generators on the market today provide ease of use and a plethora of innovative features, such as text prompts and varied styles, to elevate your online presence on social media platforms.
Unlocking Creativity with AI Technology
One of the key features of AI technology is its ability to offer an innovative way to edit selfies. Whether you prefer a more natural look or wish to experiment with different styles, AI selfie generator tools can transform your selfies into artistic masterpieces. With the app store brimming with options, finding the best AI photo editor to suit your needs has never been easier.
Embracing the Future of Selfie Editing
As AI continues to shape the future of photography, embracing AI technology in selfie editing is essential for staying ahead in the digital age. From enhancing facial features to customizing facial expressions, the innovative capabilities of AI selfie generators are paving the way for a new era of personalized image editing.
💡 Key Takeaway: AI technology in selfie editing offers a cutting-edge approach to customizing your selfies, providing a seamless blend of innovation and personalization to elevate your online presence.
Advanced Filters and Effects for Selfies
Advanced Filters and Effects for Selfies
In the world of AI-driven selfie customization, advanced filters and effects play a pivotal role in enhancing the overall appeal of your self-portraits. These innovative tools offer a plethora of options to transform your selfies into unique masterpieces that stand out on social media platforms. Let's delve into some exciting features that you can explore to take your selfie game to the next level.
Enhancing Facial Features
Utilize AI technology to accentuate your facial features with precision and finesse. From smoothing skin texture to enhancing eye brightness, these filters ensure that your selfies radiate perfection.
Adding Artistic Touches
Get creative with AI-generated filters that can turn your selfies into stunning works of art. Experiment with different styles and effects to create one-of-a-kind masterpieces that showcase your individuality.
Exploring Different Styles
With a wide range of styles and effects at your disposal, you can effortlessly switch up the mood and tone of your selfies. Whether you prefer a vintage aesthetic or a modern pop art look, AI selfie generators offer endless possibilities.
Customizing Facial Expressions
Make your selfies truly expressive by using AI filters that can enhance or alter your facial expressions. From creating a subtle smile to adding a touch of whimsy, these effects allow you to convey a range of emotions in your self-portraits.
Quoting an AI enthusiast: “The ability to customize selfies using advanced filters and effects not only adds a fun element to the process but also empowers users to unleash their creativity in innovative ways.”
Key Takeaway:
Integrating advanced filters and effects into your selfies with AI technology opens up a world of creative possibilities, allowing you to personalize your self-portraits like never before.Incorporating Background Effects Using AI
Incorporating Background Effects Using AI
AI technology has revolutionized the way we interact with our selfies, offering a myriad of creative possibilities to enhance our images. When it comes to incorporating background effects using AI, you can take your selfie customization to the next level. Let's explore some innovative ways to leverage AI for captivating background effects:
Virtual Locations: Transport yourself to exotic destinations or iconic landmarks by adding virtual backgrounds to your selfies. Whether you dream of posing in front of the Eiffel Tower or relaxing on a tropical beach, AI technology can make it a reality.
Artistic Filters: Experiment with artistic filters that seamlessly blend your selfie with unique background effects. From watercolor landscapes to abstract patterns, these filters can add a touch of artistry to your selfies.
Time Travel Themes: Go back in time or fast-forward to the future with AI-generated background effects that set the scene for your selfie. Immerse yourself in vintage settings or futuristic landscapes for a truly captivating visual experience.
Seasonal Celebrations: Embrace the spirit of different seasons and holidays by incorporating themed background effects into your selfies. From snow-covered winter wonderlands to vibrant spring blooms, these effects can add a festive touch to your photos.
Fantasy Worlds: Let your imagination run wild by exploring fantasy worlds through AI-generated background effects. Transform your selfies into magical realms inhabited by mythical creatures and enchanting landscapes.
Celestial Skies: Immerse yourself in the ethereal beauty of celestial skies with AI-enhanced background effects featuring breathtaking sunsets, starry nights, and mesmerizing cosmic scenes.
Urban Landscapes: Showcase your urban flair by setting your selfies against dynamic cityscapes, bustling streets, or architectural marvels. AI technology can seamlessly integrate these urban backgrounds for a modern and sophisticated touch.
Nature Escapes: Connect with nature by adding serene natural landscapes as background effects to your selfies. Whether you prefer panoramic mountain views, tranquil forests, or sun-kissed beaches, AI can bring the beauty of nature to your photos.
Abstract Patterns: Create eye-catching visual contrasts by overlaying your selfies with abstract patterns and geometric motifs. These background effects can add a contemporary and avant-garde aesthetic to your images.
Customizable Options: Explore customizable background effects that allow you to tailor the mood and style of your selfies according to your preferences. From subtle enhancements to bold enhancements, AI-powered background effects offer endless possibilities.
Fine-Tuning Facial Features with AI
Fine-Tuning Facial Features with AI
In the realm of selfie customization, AI technology has revolutionized how users can manipulate and enhance their facial features like never before. By leveraging cutting-edge algorithms and advanced image processing capabilities, AI selfie generators offer a plethora of tools to fine-tune every aspect of your face with remarkable precision.
Key Features for Facial Customization:
Facial Symmetry Adjustment: AI algorithms can analyze your facial structure and intelligently adjust symmetry to create a more balanced look.
Skin Tone Enhancement: With AI-powered skin tone enhancement, you can achieve a flawless complexion by smoothing out imperfections and enhancing your natural glow.
Eye Brightening and Enlargement: Enhance the allure of your selfies by brightening your eyes and making them appear larger and more captivating.
Lip Plumping and Color Enhancement: Customize your lip size and color with AI tools that can deliver natural-looking enhancements tailored to your preferences.
Facial Contouring: Define and sculpt your facial features by adjusting contours and shadows to highlight your best angles.
The Ease of Use and Realistic Results:
AI selfie generators prioritize user-friendly interfaces that make it simple for individuals to modify their facial features effortlessly. Despite the advanced technology at play, these tools are designed to be intuitive, ensuring that users of all skill levels can achieve professional-looking results without extensive training or expertise.
Embracing Diversity and Personal Expression:
AI technology empowers users to experiment with a wide range of styles and looks to express their individuality. Whether you're aiming for a subtle touch-up or a dramatic transformation, AI selfie generators provide the versatility needed to cater to specific preferences and creative visions.
Unlock Your Perfect Selfie with AI Precision:
Through the innovative capabilities of AI technology, individuals can now engage in self-expression and customization like never before. Fine-tuning facial features using AI not only enhances the visual appeal of selfies but also allows users to explore their creativity and present their best selves to the world.
💡 Key Takeaway: AI selfie generators offer advanced tools for fine-tuning facial features with precision and ease, empowering users to create personalized and captivating selfies effortlessly.
Enhancing Lighting and Colors with AI
Enhancing Lighting and Colors with AI
When it comes to taking the perfect selfie, lighting and colors play a significant role in enhancing the overall look and feel of the image. Thanks to advancements in AI technology, you can now easily manipulate and improve the lighting and color settings of your selfies to create stunning visuals that stand out on social media platforms.
1. Understanding the Impact of Lighting:
Good lighting is essential for capturing a high-quality selfie. AI-powered tools can analyze the lighting conditions in your photo and make adjustments to ensure optimal brightness and clarity. By enhancing the lighting, you can highlight your facial features and create a more polished appearance.
2. Adjusting Color Balance:
With AI-driven color correction features, you can fine-tune the color balance of your selfies to achieve a more vibrant and balanced look. Whether you want to make colors pop or add a subtle hue to your photo, AI technology can help you achieve the desired effect with ease.
3. Utilizing Filters and Effects:
AI selfie generators offer a wide range of filters and effects that can instantly transform the mood and vibe of your selfies. From vintage tones to modern aesthetics, these tools allow you to experiment with different styles and create unique looks that reflect your personal taste.
4. Enhancing Skin Tone:
Achieving the perfect skin tone in a selfie can be challenging, but AI technology simplifies the process by automatically adjusting skin tones for a natural and flattering finish. Say goodbye to unwanted blemishes and imperfections, as AI algorithms work their magic to give you a flawless complexion.
5. Creating Depth and Dimension:
By manipulating the lighting and color settings in your selfies, AI can help you add depth and dimension to your images, making them more visually engaging and dynamic. Whether you prefer a soft, romantic glow or a bold, dramatic style, AI tools allow you to unleash your creativity and experiment with different effects.
6. Preserving Authenticity:
While AI technology offers endless possibilities for enhancing your selfies, it's important to strike a balance between enhancement and authenticity. Avoid over-editing your photos to the point where they no longer represent your true self. Use AI tools to enhance your natural beauty and highlight your best features while staying true to your unique look.
💡 Key Takeaway: Enhancing lighting and colors with AI technology allows you to elevate the quality of your selfies, create visually appealing images, and make a lasting impression on your online audience. By leveraging AI-driven tools, you can enhance your selfies in unique and striking ways.
AI-Powered Makeup and Beauty Tools
AI-Powered Makeup and Beauty Tools
In the realm of selfie customization, AI technology has revolutionized the way we experiment with makeup and beauty styles. These sophisticated tools utilize artificial intelligence to enhance facial features and create stunning looks, making them a must-have for anyone looking to elevate their selfie game.
1. Enhance Your Features with Precision
AI-powered makeup and beauty tools are designed to analyze your facial structure and apply makeup in a way that enhances your natural beauty. Whether you want to highlight your eyes, define your cheekbones, or create the perfect pout, these tools offer precision and accuracy that traditional makeup techniques can't match.
2. Experiment with Various Styles
One of the key features of AI-powered makeup tools is the ability to experiment with a wide range of makeup styles and looks. From glamorous evening looks to fresh daytime makeup, these tools allow you to try out different styles and find the perfect look for any occasion.
3. Achieve a Professional Finish
By leveraging AI technology, these tools enable users to achieve a professional finish without the need for advanced makeup skills. The tools analyze your face image and apply makeup in a way that enhances your features while maintaining a natural look, giving you the confidence of a professional makeup artist at your fingertips.
4. Instantly Transform Your Selfies
With AI-powered makeup and beauty tools, you can instantly transform your selfies from ordinary to extraordinary. Whether you want to add a touch of glamour or experiment with bold new looks, these tools offer instant portrait enhancements that are sure to impress your followers on social media.
5. Customize Your Look with User Input
These AI tools also allow for personalized customization based on user input. You can adjust the intensity of makeup, choose specific features to enhance, and tailor the look to suit your individual style preferences. It's like having your own virtual makeup artist on hand whenever you need it.
6. Stand Out on Social Media Platforms
By leveraging AI technology for makeup customization, you can create unique and eye-catching selfies that will set you apart on social media platforms. Whether you're a content creator, influencer, or simply looking to boost your online presence, AI-powered makeup tools offer a creative edge that can elevate your social media presence.
7. The Future of Selfie Customization
AI-powered makeup and beauty tools represent the cutting edge of innovation in the beauty industry. With their user-friendly interface, wide range of styles, and ability to create stunning and unique
Creative Pose Suggestions by AI
Creative Pose Suggestions by AI
In the world of AI-powered selfies, creativity knows no bounds. AI technology has revolutionized the way we capture and customize our self-portraits, offering a myriad of innovative pose suggestions to elevate your selfie game.
Unlocking the Art of Poses with AI Technology
Embrace the endless possibilities of AI-generated pose suggestions that cater to your individual style and preferences. Let AI be your creative guide, shaping your selfie narrative with a touch of uniqueness and flair.
Innovative Pose Ideas at Your Fingertips
Transform your selfies with dynamic poses that reflect your personality and mood.
Experiment with avant-garde angles and compositions to add a touch of artistry to your self-portraits.
Emulate popular trends or create your signature pose that sets you apart on social media platforms.
Harnessing the Power of Facial Expressions
AI technology goes beyond just capturing a moment; it delves into the nuances of facial expressions and emotions, enriching your selfie experience. From subtle smiles to dramatic gazes, let your expressions speak volumes through AI-guided poses.
Creating Memorable Selfie Moments
Each pose suggestion by AI is a doorway to self-expression and storytelling. Capture the essence of the moment with poses that resonate with your unique style, leaving a lasting impression on your online presence.
Embracing AI-Driven Personalization
With AI's intuitive understanding of facial features and styles, the possibilities for personalizing your selfies are endless. Engage with AI to curate a visual narrative that reflects the essence of who you are, one pose at a time.
Elevating Your Selfie Game with AI Pose Suggestions
As you dive deeper into the realm of AI-generated pose suggestions, embrace the opportunity to showcase your creativity and individuality. Let every selfie you capture be a masterpiece in its own right, enriched by the innovative touch of AI technology.
💡 Key Takeaway: Immersing yourself in the world of AI pose suggestions opens up a realm of creative possibilities to enhance your selfie experience and storytelling on social media platforms.
Customizable Text and Stickers Using AI
Customizable Text and Stickers Using AI
In the realm of AI-powered selfie customization, one intriguing feature that stands out is the ability to add customizable text and stickers to your selfies, elevating them to a whole new level of creativity and personalization.
Utilizing AI for Text Enhancement
AI technology allows users to enhance their selfies with text overlays that seamlessly blend with the image. Whether it's adding a quirky caption, a motivational quote, or simply labeling elements in the photo, AI-powered tools provide a variety of fonts, sizes, and styles to choose from. This feature enables users to express themselves in a unique and visually compelling way, making their selfies not just visually appealing but also meaningful.
Sticker Fun with AI
Another exciting aspect of AI selfie customization is the array of stickers available for users to play with. From cute emojis to trendy symbols, AI-powered sticker libraries offer endless options to add personality and flair to your selfies. Whether you want to convey a specific emotion, celebrate an occasion, or simply jazz up your photo, there's a sticker for every mood and moment.
Personalization and Creativity
The beauty of customizable text and stickers lies in their ability to enhance personalization and creativity. Users can tailor their selfies to reflect their individual style and personality, whether it's through witty captions, playful emojis, or custom-designed stickers. By leveraging AI technology, users can unleash their creativity and make their selfies truly unique and memorable.
Enhancing Engagement on Social Media
Customizable text and stickers not only make selfies more visually appealing but also increase engagement on social media platforms. Eye-catching text overlays and playful stickers are more likely to capture the attention of followers and encourage them to like, comment, and share the post. This, in turn, helps users grow their online presence and connect with their audience in a meaningful way.
The Future of Selfie Customization
As AI technology continues to evolve, so too will the possibilities for selfie customization. With customizable text and stickers becoming increasingly sophisticated and user-friendly, the future of selfie editing is bound to be filled with even more creativity and innovation. Whether it's adding augmented reality effects, interactive animations, or immersive 3D elements, the sky's the limit when it comes to AI-powered selfie customization.
Key Takeaway:
Customizable text and stickers offer a fun and creative way to personalize your selfies and make them stand out on social media. By leveraging AI technology, users can express themselves in unique and meaningful ways, enhancing engagement and fostering connections with their audience.
10 Empowering Self Discovery Moments with AI Selfie Generators
Try Latest AI Selfie Generator
Have you ever wondered how technology can aid in your journey of self-discovery? Imagine unlocking hidden facets of your personality through AI-powered selfie generators. In today's digital age, exploring your true self takes on a whole new dimension with innovative tools at your fingertips.
Here's a glimpse of what we'll explore in this blog:
Unveiling the power of AI algorithms in analyzing your selfies and providing insights.
How AI selfie generators can offer valuable reflections on your emotions, personality traits, and more.
Exploring the intersection of technology and self-awareness through fun and insightful self-discovery moments.
Tips on making the most out of AI selfie generators for personal growth and empowerment.
Real-life examples of individuals experiencing transformative self-discovery through AI technology.
Embark on a journey of self-exploration like never before. Discover how AI selfie generators can be your companions in unveiling the layers of your authentic self. Let's delve into ten empowering self-discovery moments waiting to be unraveled through the lens of artificial intelligence.
Short Summmery
AI-powered selfie generators utilize advanced algorithms to analyze and provide insights into your personality traits and emotions. Embrace the intersection of technology and self-awareness through fun and insightful self-discovery moments, unlocking hidden facets of your true self. Discover the transformative power of AI selfie generators in fostering self-confidence, emotional well-being, and personal growth. Harness the potential of AI technology for self-exploration, empowerment, and embracing the layers of your authentic self through innovative tools.
1. Understanding AI Selfie Generators
In today's digital age, AI selfie generators have revolutionized the way we interact with technology and ourselves. Let's delve into the fascinating world of AI-powered tools and their impact on self-discovery moments.
What Are AI Selfie Generators?
AI selfie generators are innovative tools that utilize artificial intelligence algorithms to enhance and transform selfies. By analyzing facial features, expressions, and lighting, these generators create personalized and sometimes whimsical variations of your self-portraits.
The Role of AI in Self-Discovery
AI selfie generators play a crucial role in self-discovery by allowing individuals to explore different facets of themselves. Through filters and effects, users can experiment with various styles, colors, and moods, leading to a deeper understanding of their true selves.
Embracing Authenticity
In a world often dictated by societal norms and expectations, AI selfie generators provide a platform for self-expression and authenticity. By embracing their unique traits and characteristics, individuals can break free from conformity and celebrate their true essence.
Quotes on Self-Expression
"Self-love is not a game of comparison, but a journey towards self-acceptance and inner peace." Unknown
"True happiness begins when you embrace your authentic self with open arms."
The Impact on Mental Health
AI selfie generators offer a safe space for individuals to explore their identities and boost their self-esteem. By encouraging self-reflection and self-expression, these tools contribute to promoting positive mental health and well-being.
Empowering Self-Love Tips
Start your day with a daily ritual of self-reflection to connect with your true self.
Use your Instagram posts as a canvas for self-expression by capturing moments of stillness and vibrancy.
Craft well-crafted captions that resonate with your core values and beliefs.
Bridging the Gap
AI selfie generators bridge the gap between the bustle of everyday life and the essence of self-acceptance. They symbolize a journey of mindfulness where individuals can express their unique selves authentically.
2. The Rise of AI Selfie Generators
In the fast-paced digital age, technology continues to revolutionize how we interact with the world around us. AI selfie generators are no exception, with their ability to transform ordinary self-portraits into captivating works of art. Let's delve into how these innovative tools are reshaping the landscape of self-expression and personal branding.
Empowering Self-Discovery through AI Enhancement
AI selfie generators empower individuals to explore different facets of their identity through enhanced digital filters and effects. This newfound creative freedom allows for a deeper reflection on one's true self and personal journey of self-discovery.
The Intersection of Technology and Self-Love
By leveraging AI technology, individuals can transcend societal norms and embrace their authentic selves. AI-enhanced selfies provide a platform for self-expression and self-acceptance, encouraging users to step outside their comfort zones and redefine traditional beauty standards.
Crafting a Narrative with AI-Generated Captions
From well-crafted captions to inspirational quotes, AI selfie generators offer a unique way to narrate one's self-love journey. Users can explore different themes and emotions, aligning their images with meaningful text that resonates with their core values and beliefs.
Meghan Markle and the Self-Love Movement
Celebrities like Meghan Markle have embraced the power of self-love and mental health awareness, using social media platforms to amplify messages of positivity and self-empowerment. Their influence has sparked a global conversation on the importance of self-care and self-acceptance in today's fast-paced world.
Navigating the Path to Authenticity
In a digital era filled with curated content and social media personas, AI selfie generators provide a safe space for individuals to express their true selves. By embracing the concept of authenticity, users can embark on a symbolic journey of mindfulness and self-discovery, leading to true happiness and vibrant life experiences.
3. Benefits of Using AI Selfie Generators
Embracing advanced technology like AI selfie generators can offer a plethora of benefits that enhance your self-discovery journey and promote self-love. Let's delve into the advantages that these innovative tools bring to the table:
1. Facilitation of Self-Exploration
By generating diverse, AI-enhanced selfies, individuals can explore different looks, styles, and expressions that may resonate with their true selves. This process can spark introspection and help in uncovering aspects of one's identity that were previously unexplored.
2. Encouragement of Self-Acceptance
AI selfie generators provide a safe space for individuals to experiment with their self-image without fear of judgment. This experimentation can lead to greater self-acceptance by allowing individuals to appreciate and embrace their unique features and expressions.
3. Amplification of Self-Expression
Through AI-generated selfies, individuals can express their creativity and personality in unique ways. The ability to create and share visually captivating images fosters self-expression and empowers individuals to communicate their inner selves through their outward appearance.
4. Promotion of Mental Wellness
Engaging with AI selfie generators can foster a sense of self-confidence and self-worth. By exploring different facets of their identity and celebrating their individuality, individuals can boost their self-esteem and overall mental well-being.
5. Enhancement of Personal Branding
For social media influencers and individuals looking to curate their online presence, AI selfie generators offer a convenient way to create visually appealing content. By using AI-enhanced selfies with well-crafted captions, individuals can develop a cohesive personal brand that resonates with their audience.
6. Cultivation of Self-Love Practices
AI selfie generators can serve as a tool for cultivating self-love practices through daily rituals of self-reflection and appreciation. By capturing moments of stillness and self-care, individuals can reinforce the importance of self-love in their lives.
In the words of Meghan Markle, "Self-love means taking care of yourself like you would of your favorite self-love quote." Embrace the transformative power of AI selfie generators on your journey towards self-discovery and self-acceptance.
4. Exploring Different AI Selfie Generator Platforms
In the digital age, AI technologies have revolutionized the way we interact with images and the concept of self-expression. Exploring diverse AI selfie generator platforms can offer a unique lens through which individuals can discover more about themselves and cultivate self-appreciation.
Unleashing Your True Self with AI Technology
Self-discovery through AI selfie generators goes beyond mere visual enhancements. It allows you to delve into facets of your personality that may remain unexplored in daily interactions. By leveraging AI technology, users can capture their essence and portray their true selves authentically.
Navigating Societal Norms with AI Filters
AI selfie generators provide a safe space for individuals to challenge societal norms and redefine beauty standards. By experimenting with various filters and effects, users can break free from conventional expectations and celebrate their unique features without conforming to external pressures.
Crafting Captions for Self-Love Expression
Pairing AI-generated selfies with a well-crafted caption can amplify the message of self-love and empowerment. Each selfie becomes a canvas for personal reflection and self-affirmation, allowing individuals to express their core values and emotions through concise yet impactful captions.
Embracing Authenticity in the Digital Realm
As social media platforms continue to shape modern interactions, maintaining authenticity becomes paramount in cultivating genuine connections. AI selfie generators can complement your digital presence by capturing the essence of your true self, standing out amidst the bustle of everyday life.
Quote:
"True happiness comes from embracing your unique self and radiating self-love into the world."
Meghan Markle5. Impact of AI Selfie Generators on Self-Discovery
5. Impact of AI Selfie Generators on Self-Discovery
In the realm of self-discovery, AI selfie generators have emerged as powerful tools for individuals seeking to delve deeper into their true essence. Let's explore how these innovative technologies are influencing the journey towards self-awareness and personal growth:
Enhanced Reflection through AI-Generated Selfies
Utilizing AI selfie generators enables a heightened level of self-reflection by presenting individuals with visual representations of themselves they may not have observed before. This newfound perspective can prompt introspection and encourage individuals to explore facets of themselves that may have been previously overlooked.
Breaking Societal Norms with AI-Enhanced Images
AI selfie generators have the potential to challenge societal norms and conventional beauty standards by allowing individuals to experiment with different looks and styles in a safe and virtual environment. This liberation from societal expectations can empower individuals to embrace their unique qualities and redefine their sense of self.
Crafting a Narrative with AI-Generated Captions
Pairing AI-generated selfies with well-crafted captions can elevate the self-discovery process by enabling individuals to express their thoughts, feelings, and personal experiences in a succinct and impactful manner. By curating their self-reflections through thoughtful captions, individuals can deepen their understanding of themselves and communicate their authentic selves to the world.
Embracing Authenticity in the Digital Sphere
In a digital landscape dominated by curated images and filtered realities, AI selfie generators offer individuals a platform to explore and embrace their authentic selves without the pressure to conform to external expectations. This shift towards authenticity fosters a sense of empowerment and self-acceptance, paving the way for genuine connections and meaningful self-discovery.
Key Takeaway: AI selfie generators play a transformative role in enhancing self-discovery by offering individuals a unique opportunity to explore and celebrate their true selves in a digitally-driven world.
6. Harnessing Empowerment Through AI Selfies
6. Harnessing Empowerment Through AI Selfies
In today's digital age, technology has introduced innovative ways for individuals to engage in self-dis
covery and empowerment. AI selfie generators are at the forefront of this movement, offering a unique opportunity for users to explore and embrace their true selves.
The Power of Self-Reflection
One of the most empowering aspects of AI selfies is the ability to reflect on oneself in a new light. By capturing moments of stillness through self-portraits, individuals can delve into their innermost thoughts and emotions, fostering a deeper connection with their authentic self.
Embracing Authenticity
AI selfie generators encourage users to break free from societal norms and embrace their unique identity. By presenting oneself authentically in photos, individuals can create a safe space for self-expression and self-acceptance, free from the pressures of conforming to external standards.
Crafting a Meaningful Narrative
Each AI-generated selfie becomes a canvas for self-expression. By pairing these images with a well-crafted caption that reflects personal values and experiences, users can communicate their journey of self-discovery to the world, inspiring others to do the same.
Quotes to Inspire Empowerment
"True happiness comes from embracing your unique self with open arms."
"Self-love is not a game; it's a crucial role we play in our own happiness."
"Embrace the thorny path of self-discovery, for it leads to a vibrant life's journey."
By harnessing the power of AI selfie generators, individuals can embark on a symbolic journey of mindfulness and empowerment, cultivating a deeper sense of self-love and acceptance.
7. Ethical Considerations of AI Selfie Generators
7. Ethical Considerations of AI Selfie Generators
In the fast-evolving landscape of technology-driven self-discovery, it's essential to delve into the ethical considerations surrounding the use of AI selfie generators. As society becomes increasingly reliant on artificial intelligence for personal enhancement, it's crucial to navigate this terrain with mindfulness and awareness.
Privacy Protection
One of the primary ethical concerns related to AI selfie generators is the safeguarding of personal data and privacy. Users must be cautious about the information they provide to these platforms, as their images and other data could potentially be misused or compromised. It's imperative to choose reputable and secure AI tools to protect one's digital footprint.
Algorithmic Bias
Another critical aspect to consider is the presence of algorithmic bias within AI programs. These generators may inadvertently perpetuate societal norms and stereotypes, influencing how individuals perceive themselves based on preconceived notions of beauty or appearance. Users should be aware of the potential biases embedded in these systems and strive for diversity and inclusivity in their self-discovery journey.
Transparency and Accountability
Ethical AI selfie generators should prioritize transparency and accountability in their operations. Users have the right to know how their data is being collected, stored, and utilized. Platforms that adhere to ethical standards will provide clear explanations of their processes and give users control over their information.
Empowerment vs. Dependency
While AI selfie generators can empower individuals to explore different facets of themselves, there's a fine line between self-discovery and dependency on external validation. It's essential for users to maintain a healthy balance and remember that authentic self-love and acceptance come from within, rather than seeking validation from AI algorithms.
Quotes:
"Ethical considerations guide our journey of self-discovery, ensuring that personal growth is rooted in integrity and respect for oneself."
Unknown"Transparency in technology builds trust and empowers users to engage in self-discovery with confidence and autonomy."
Tech Ethics Institute8. Cognitive Behavioral Insights from AI Selfies
8. Cognitive Behavioral Insights from AI Selfies
In the realm of self-discovery, AI selfie generators are revolutionizing the way we view ourselves and understand our inner workings. By harnessing the power of artificial intelligence, these tools can offer profound insights into our cognitive behavior, shedding light on patterns and tendencies we may not have been aware of. Let's delve into the cognitive behavioral aspects revealed through the lens of AI selfies.
Unveiling Behavioral Patterns
Through the analysis of facial expressions and subtle cues, AI selfie generators can provide valuable insights into our emotional tendencies and behavioral patterns. By capturing micro-expressions that reflect our inner feelings, these tools can help us better understand how our thoughts, emotions, and behaviors intertwine in shaping our self-perception.
Breaking Societal Norms
One intriguing aspect of AI selfie generators is their ability to challenge societal norms and stereotypes by offering a fresh perspective on individuality and authenticity. In a world where conformity often reigns, these tools encourage users to embrace their unique traits and characteristics, fostering a sense of empowerment and self-acceptance.
Crafting the Perfect Caption
With AI-enhanced selfies, individuals have the opportunity to create a well-crafted caption that captures the essence of their true selves. By reflecting on personal experiences and core values, users can leverage AI insights to craft a concise and impactful caption that resonates with their journey of self-discovery.
Quote:
"The journey to true happiness begins with accepting your authentic self."
Meghan MarkleBy embracing AI-generated insights, users can embark on a journey of self-reflection and personal growth, ultimately leading to a more profound understanding of themselves and the world around them.
9. AI Selfies and Emotional Intelligence
9. AI Selfies and Emotional Intelligence
In the realm of self-discovery, emotional intelligence plays a crucial role in understanding ourselves and navigating the complexities of human relationships. AI selfie generators offer a unique opportunity to enhance emotional intelligence by providing insights into our emotions, facial expressions, and interpersonal dynamics. Let's explore the intersection of AI selfies and emotional intelligence.
Emotional Awareness
By analyzing facial expressions and emotional cues, AI selfie generators can help individuals develop a deeper awareness of their own emotions. Through self-reflection and introspection, users can gain insights into their emotional states and learn to regulate their feelings more effectively.
Empathy and Compassion
AI selfie generators can also foster empathy and compassion by encouraging users to consider the perspectives and emotions of others. By exploring different facial expressions and moods, individuals can develop a greater understanding of the range of human emotions and cultivate empathy in their interactions with others.
Self-Reflection and Growth
Through the lens of AI selfies, individuals can engage in meaningful self-reflection and personal growth. By examining their facial expressions and reactions, users can gain insights into their behavioral patterns and tendencies, empowering them to make positive changes in their lives.
Building Meaningful Connections
By sharing AI-generated selfies and insights with others, individuals can build meaningful connections and strengthen interpersonal relationships. By expressing vulnerability and authenticity, users can foster deeper connections with others and create a sense of belonging in their communities.
By leveraging the power of AI selfies, individuals can enhance their emotional intelligence and embark on a journey of self-discovery and personal growth.
10. Tips for Maximizing Self-Discovery with AI Selfies
10. Tips for Maximizing Self-Discovery with AI Selfies
Embarking on a journey of self-discovery with AI selfies can be an enriching and empowering experience. Here are some tips for maximizing your self-discovery journey with AI selfie generators:
1. Be Open to Exploration:
Approach AI selfie generators with an open mind and a willingness to explore different facets of yourself. Embrace the opportunity to experiment with various filters, effects, and styles to uncover new dimensions of your identity.
2. Reflect on Your Reactions:
Take time to reflect on your reactions to AI-generated selfies and the insights they provide. Pay attention to how certain images make you feel and what they reveal about your preferences, emotions, and self-perception.
3. Use Captions to Express Yourself:
Pair AI-generated selfies with well-crafted captions that reflect your thoughts, feelings, and personal experiences. Use this opportunity to communicate your journey of self-discovery and share meaningful insights with others.
4. Share Your Journey:
Don't be afraid to share your AI-generated selfies and insights with others. By expressing vulnerability and authenticity, you can foster deeper connections with others and inspire them to embark on their own journey of self-discovery.
5. Practice Self-Compassion:
Be kind to yourself throughout your self-discovery journey with AI selfies. Embrace your imperfections and celebrate your unique qualities, knowing that self-acceptance is the key to true happiness and fulfillment.
6. Set Boundaries:
Maintain boundaries when using AI selfie generators and sharing your personal data online. Protect your privacy and security by choosing reputable platforms and being mindful of the information you disclose.
7. Seek Support When Needed:
If you find yourself struggling with self-discovery or emotional challenges, don't hesitate to seek support from friends, family, or mental health professionals. Remember that you're not alone on your journey, and there's always help available when needed.
Quote:
"The journey of self-discovery is not always easy, but it is always worth it. Embrace the process, and you'll uncover treasures beyond your wildest dreams." Unknown
By following these tips, you can maximize your self-discovery journey with AI selfies and unlock new levels of self-awareness, empowerment, and personal growth.
Conclusion
In conclusion, AI selfie generators offer a transformative tool for individuals to explore and embrace their true selves in a digitally-driven world. From enhancing self-reflection and challenging societal norms to fostering emotional intelligence and personal growth, these innovative technologies empower users to embark on a journey of self-discovery and authenticity. By leveraging the power of AI selfies, individuals can cultivate self-love, celebrate their uniqueness, and build meaningful connections with others. As technology continues to evolve, the possibilities for self-discovery and empowerment are limitless, paving the way for a brighter and more fulfilling future.
10 Genius AI Selfie Editing Hacks for Picture Perfect Results
Try Latest AI Selfie Generator
1. Understanding AI Selfie Editing
In today's fast-paced digital world, AI technology has revolutionized the way we edit and enhance our photos, especially when it comes to taking perfect selfies. Let's delve into the fascinating world of AI selfie editing and how it can elevate your photography skills to the next level.
Evolution of Selfie Editing
AI selfie editing tools have come a long way from simple filters to complex algorithms that can automatically enhance various aspects of your selfie. These tools analyze facial features, lighting, skin tones, and more to deliver professional-level editing results with just a few clicks.
How AI Enhances Selfies
AI utilizes machine learning algorithms to recognize patterns and make intelligent adjustments to your photos. From skin smoothing and blemish removal to background blurring and color correction, AI can transform a basic selfie into a work of art with stunning visual appeal.
Benefits of AI Selfie Editing
Efficiency: AI-powered tools save time by automating repetitive editing tasks, allowing you to focus on capturing great selfies.
Consistency: AI ensures that your edited selfies maintain a consistent style and quality across all your photos.
Professional Results: With AI's advanced editing capabilities, you can achieve professional-grade editing without the need for extensive technical knowledge.
Importance of Understanding AI Algorithms
It's crucial to have a basic understanding of how AI algorithms work in selfie editing to maximize their potential. By knowing the key features and functions of AI tools, you can make informed decisions on which editing techniques to apply to your photos.
Embracing AI for Picture-Perfect Selfies
AI selfie editing isn't just a trend; it's a powerful tool that can help you enhance your photography skills and create stunning selfies that stand out on social media platforms. Embrace the capabilities of AI technology to unlock your creative potential and take your selfie game to new heights.
2. Importance of Advanced Selfie Editing Techniques
In the realm of selfie culture, mastering advanced editing techniques is a game-changer for achieving picture-perfect selfies that stand out from the crowd. Let's delve into the significance of embracing these advanced methods for enhancing your selfie game:
Enhancing Facial Features
By utilizing advanced editing tools, you can seamlessly enhance your facial features to achieve a flawless look. From smoothing out skin imperfections to adjusting lighting and contrast, these techniques empower you to highlight your best features and present your most polished self in every selfie.
Creating a Consistent Aesthetic
Advanced selfie editing techniques enable you to establish a consistent and visually appealing aesthetic across your selfies. Whether you prefer a vibrant and colorful style or a more muted and minimalist vibe, these tools allow you to curate a cohesive feed that captivates your audience and reinforces your personal brand.
Achieving Professional-Quality Results
With the right editing techniques at your disposal, you can elevate your selfies to professional-quality standards. By refining details such as sharpness, exposure, and color balance, you can produce images that rival those of professional photographers, showcasing your creativity and attention to detail.
Boosting Engagement and Followers
In today's social media landscape, captivating visuals are key to engaging your audience and attracting new followers. Advanced selfie editing techniques give you the power to create stunning visuals that grab attention and spark conversation, ultimately boosting your engagement metrics and expanding your follower base.
Staying Ahead of Trends
Embracing advanced selfie editing techniques demonstrates your commitment to staying ahead of the curve and embracing the latest trends in visual content creation. By incorporating innovative editing tools and effects into your selfies, you position yourself as a trendsetter in the digital sphere, garnering admiration and recognition from your peers and followers.
Embracing Creativity and Self-Expression
Above all, mastering advanced selfie editing techniques opens up a world of creative possibilities and self-expression. Whether you enjoy experimenting with filters, textures, or artistic effects, these techniques empower you to transform your selfies into unique works of art that reflect your personality and vision.
Incorporating these advanced editing techniques into your selfie workflow can elevate your content creation process and help you stand out in the crowded digital landscape. By honing your skills and exploring new editing tools, you can unleash your creativity, enhance your visual storytelling, and leave a lasting impression on your audience.
3. How AI Enhances Selfie Editing
In the realm of selfie editing, AI technology has revolutionized the way individuals enhance their self-portraits. By harnessing the power of artificial intelligence, selfie editing tools can now provide unparalleled precision and creativity in achieving picture-perfect results.
1. Advanced Facial Recognition
AI-powered selfie editing tools leverage sophisticated facial recognition algorithms to accurately detect facial features such as eyes, nose, mouth, and skin texture. This enables users to make precise adjustments to individual facial elements for a more refined and natural-looking result.
2. Skin Smoothing and Blemish Removal
With AI capabilities, selfie editing apps can intelligently analyze skin imperfections and apply customized skin smoothing techniques. By automatically identifying and removing blemishes, wrinkles, and uneven skin tones, AI enhances the overall complexion in a seamless and realistic manner.
3. Background Blur and Depth Effects
AI technology allows for the integration of background blur and depth effects into selfie editing processes. By creating a bokeh effect or adjusting depth perception, users can effortlessly enhance the focus on the subject while creating a professional-looking depth-of-field effect in their selfies.
4. Automatic Lighting Adjustments
AI algorithms in selfie editing software dynamically adjust lighting conditions to improve the overall illumination and contrast in selfies. By automatically enhancing brightness, shadows, and highlights, AI technology ensures that selfies appear well-lit and visually appealing without manual adjustments.
5. Style Transfer Filters
AI-driven selfie editing tools offer innovative style transfer filters that allow users to apply artistic effects inspired by famous paintings, photography styles, or visual aesthetics. By incorporating artistic elements into selfies, users can create unique and captivating self-portraits with a touch of creativity.
6. Emotion Recognition and Enhancement
AI-powered selfie editing tools can detect and enhance emotions captured in selfies, enabling users to emphasize expressions such as smiles, frowns, or gazes. By intelligently enhancing emotional cues, AI adds depth and personality to selfies, making them more engaging and expressive.
4. Mastering Skin Retouching with AI
Improving the quality of your selfies through skin retouching with the help of AI technology can be a game-changer. Here are some expert tips and hacks to master skin retouching like a pro:
Understanding Skin Tone Enhancement: AI-powered editing tools can analyze your skin tone and suggest enhancements to achieve a natural look. Utilize features like automatic blemish removal, skin smoothening, and color correction to enhance your skin tone effortlessly.
Customizing Skin Texture: One key advantage of AI is the ability to customize skin textures. Experiment with different settings to find the perfect balance between achieving a flawless look and maintaining a natural skin texture. Avoid over-editing to ensure a realistic result.
Targeting Specific Areas: AI tools allow you to target specific areas of your skin for retouching. Focus on areas that may need extra attention, such as fine lines, dark spots, or uneven skin tones. Use the tools precisely to refine these areas without overdoing it.
Utilizing Preset Filters: Many AI editing platforms offer preset filters specifically designed for skin retouching. Explore these options to quickly enhance your skin tone without manual adjustments. Remember to adjust the intensity of the filter to ensure a subtle yet effective enhancement.
Embracing Natural Beauty: While AI technology can help enhance your selfies, it's important to embrace your natural beauty. Avoid excessive editing that alters your features drastically. Aim for a balance between enhancement and authenticity to create a picture-perfect result that still looks like you.
Regular Practice and Experimentation: Like any skill, mastering skin retouching with AI requires practice and experimentation. Spend time exploring different tools, techniques, and settings to understand how they work best for your skin type and desired outcome.
Seeking Feedback and Advice: Don't hesitate to seek feedback from trusted sources or professionals in the field of photography and editing. Their insights can provide valuable guidance on improving your skin retouching skills with AI technology.
Remember, the goal of skin retouching with AI is to enhance your natural beauty and create stunning selfies that reflect the best version of yourself. With these expert tips and hacks, you can elevate your selfie editing skills and achieve picture-perfect results effortlessly.
5. Perfecting Lighting and Exposure with AI
Adjusting Lighting Intensity
One of the key benefits of using AI for your selfie editing is the ability to precisely adjust lighting intensity. By utilizing AI algorithms, you can enhance the brightness and contrast of your photo to achieve the perfect lighting balance.
Optimizing Exposure Levels
AI tools are adept at optimizing exposure levels in your selfies. Whether it's brightening shadows or toning down highlights, AI can intelligently adjust exposure settings to ensure every detail in your photo is beautifully illuminated.
Utilizing HDR Effects
Harness the power of AI-generated HDR effects to elevate the overall quality of your selfies. HDR technology improves the dynamic range of your photos, resulting in vibrant colors and enhanced details, even in challenging lighting conditions.
Balancing Highlights and Shadows
With AI capabilities, you can easily balance the highlights and shadows in your selfies to create a well-rounded and visually appealing image. AI algorithms excel at fine-tuning these elements for a professional finish.
Eliminating Overexposure
Say goodbye to overexposed selfies with AI's assistance in detecting and correcting overexposure issues. By automatically adjusting exposure levels, AI ensures that your photos maintain natural-looking tones and textures.
(Enhancing your selfie game with AI algorithms not only simplifies the editing process but also guarantees picture-perfect results every time.)
6. Background Editing Made Easy with AI
Select an Image
In today's digital age, perfecting the background of your selfies is just as important as getting your pose right. With AI-powered tools, achieving a flawless background has never been easier. Let's dive into some genius AI selfie editing hacks that will elevate your selfie game to a whole new level:
AI Background Removal: Harness the power of AI technology to effortlessly remove and replace backgrounds in your selfies. Say goodbye to distracting backgrounds and hello to a clean, professional look.
Blur and Bokeh Effects: Create a sense of depth and artistry in your selfies by applying blur and bokeh effects to the background. AI algorithms can intelligently detect and enhance the subject while beautifully blurring the background.
Virtual Backgrounds: Transport yourself to any setting or environment with virtual backgrounds. AI selfie editing tools offer a wide range of virtual backgrounds to suit your mood and style, giving you the flexibility to be anywhere you desire.
Background Enhancements: Enhance the colors, lighting, and overall look of your background with AI-powered editing features. Adjust the contrast, saturation, and brightness to make your background pop and complement your selfie perfectly.
Object Removal: Remove unwanted objects or distractions from the background of your selfies with AI object removal tools. Clean up cluttered backgrounds and ensure the focus remains on you, the star of the photo.
Background Replacement: Take your selfie editing to the next level by replacing the background with a more visually appealing one. Whether you prefer scenic landscapes, city skylines, or abstract patterns, AI technology can seamlessly blend the new background with your selfie.
By leveraging these advanced AI selfie editing hacks for background enhancement, you can transform your selfies into stunning works of art that capture attention and leave a lasting impression.
7. Transforming Selfies with AI Artistic Effects
In the realm of selfie editing, adding artistic effects using AI technology can take your self-portraits to the next level of creativity and allure. By leveraging the power of AI, you can infuse your selfies with unique and captivating visual elements that elevate them from ordinary to extraordinary. Let's explore seven transformative AI artistic effects that can revolutionize the way you approach selfie editing:
Painterly Portraits: AI algorithms can mimic the styles of famous artists like Van Gogh or Picasso, giving your selfies an artistic touch that resembles a hand-painted masterpiece.
Abstract Aberrations: Experiment with abstract effects to create surreal and dreamy compositions that play with light, color, and shape in unexpected ways.
Vintage Vibes: Transport your selfies to another era by applying vintage filters that evoke nostalgia and charm reminiscent of old-fashioned photographs.
Futuristic Flair: Embrace the future with futuristic effects that add a modern and edgy twist to your selfies, making them stand out in a sea of standard photos.
Watercolor Wonder: Transform your selfies into ethereal watercolor paintings with soft, blended colors and delicate textures that exude a sense of elegance and serenity.
Pop Art Popularity: Channel the spirit of pop art by turning your selfies into bold and vibrant creations that celebrate individuality and creativity in a colorful palette.
Impressionistic Impressions: Blur the lines between reality and imagination with impressionistic effects that capture the essence and emotion of a moment in a soft and painterly style.
By incorporating these AI artistic effects into your selfie editing arsenal, you can unleash your creativity and craft picture-perfect results that mesmerize and captivate viewers. Elevate your self-portraits to a new realm of expression and artistry by embracing the boundless possibilities offered by AI technology.
8. Automation and Efficiency in AI Selfie Editing
In today's digital age, leveraging automation in AI selfie editing can significantly enhance the efficiency and quality of your photo editing process. Let's delve into how automation tools can help you achieve picture-perfect results with ease.
Streamlined Editing Process:
Automation tools offer a streamlined editing process by utilizing algorithms to analyze and enhance your selfies quickly and accurately. By automating tedious tasks such as blemish removal, skin smoothing, and color correction, you can save valuable time while still achieving professional-looking results.
Batch Editing Capabilities:
Take your selfie editing to the next level with batch editing capabilities provided by automation tools. This feature allows you to apply predefined edits or filters to multiple selfies simultaneously, ensuring a consistent look across all your photos in just a few clicks.
AI-Powered Retouching:
Harness the power of artificial intelligence for advanced retouching techniques that go beyond basic editing. AI algorithms can intelligently identify and correct imperfections, fine-tune facial features, and enhance overall image quality, resulting in stunning, natural-looking selfies.
Customizable Presets:
Personalize your editing workflow with customizable presets that can be tailored to your unique style preferences. Automation tools enable you to create and save presets for specific editing effects, making it easy to achieve your desired look consistently across different selfies.
Time-Saving Filters:
Explore a wide range of time-saving filters offered by automation tools to instantly transform the mood and tone of your selfies. From vintage-inspired filters to modern artistic effects, these presets can add a creative touch to your selfies with minimal effort.
Smart Object Recognition:
Enjoy seamless editing with automation tools that feature smart object recognition capabilities. These tools can intelligently detect faces, objects, and backgrounds in your selfies, allowing for precise editing adjustments without the need for manual selections.
One-Click Enhancements:
Simplify your editing workflow with one-click enhancement options that automatically apply a series of edits to enhance your selfies instantly. Whether it's brightening colors, sharpening details, or adjusting lighting, these automated enhancements can take your selfies to the next level effortlessly.
Conclusion:
In a world where the perfect selfie can make or break a social media presence, mastering AI selfie editing hacks is key. By incorporating these genius techniques into your editing arsenal, you can transform ordinary selfies into picture-perfect works of art. From flawless skin to captivating backgrounds, the possibilities are endless with AI technology at your fingertips.
With the power of AI, you can effortlessly enhance your selfies like never before. Embrace the future of editing and unlock your true selfie potential today. Don't settle for mediocre when you can stand out with professional-quality results.
If you're ready to elevate your selfie game and impress your followers with stunning images, take the plunge and explore these
10 genius AI selfie editing hacks. Your online persona will thank youFAQ
Q1: How does AI enhance selfie editing?
A1: AI selfie generators use advanced algorithms and machine learning to automatically enhance and edit selfies. This can include adjusting lighting, removing blemishes, and even changing facial features for a more flattering result. AI technology can also learn your preferences and improve its editing techniques with each use.
Q2: What is AI selfie editing?
A2: AI selfie editing is the use of artificial intelligence technology to enhance and improve selfies. This can include features such as automatically retouching skin, adjusting lighting and filters, and even changing facial features for a more flattering result. AI selfie editing can be done through various apps and software that use AI algorithms to analyze and edit photos.
Q3: How can AI help with skin retouching?
A3: AI technology can analyze facial features and apply natural-looking retouching techniques to enhance skin tone, texture, and blemishes. This can result in a more flawless and even complexion in selfies. Some AI selfie editing tools even allow for customizable options, so you can adjust the level of retouching to your preference.
Q4: Can AI edit the background of a selfie?
A4: Yes, AI selfie generators have the ability to edit the background of a selfie. With advanced editing techniques, these tools can easily remove or replace the background of a selfie to create a flawless and professional-looking photo. Some AI selfie generators even have a variety of background options to choose from, allowing you to customize your selfie to your liking.
Q5: What are some advanced selfie editing techniques?
A5: Some advanced selfie editing techniques include using AI-powered apps to automatically enhance skin tone, smooth out blemishes, and add filters to create a professional-looking photo. Other techniques include adjusting lighting, color, and contrast, as well as using retouching tools to remove imperfections and enhance features. Additionally, using techniques such as cropping, framing, and adding text or graphics can also elevate a selfie to the next level.
10 Steps to Personalizing Your AI Waifu: Create Your Ideal Partner
Are you ready to bring your dream AI waifu to life? Imagine having a partner perfectly tailored to your desires and preferences, someone who embodies everything you’ve ever wished for in a companion. Personalizing your ideal AI waifu involves a thoughtful process of self-discovery and creativity, allowing you to craft a character that resonates with your deepest aspirations.
In this blog, we will explore the 10 impactful steps that will guide you through the journey of creating your dream waifu. Dive into the realm of customization, where you have the power to design every aspect of your ideal partner, from personality traits to physical appearance. Let’s embark on this exciting adventure together as we uncover the secrets to manifesting your dream waifu.
Discover how to infuse authenticity and depth into your waifu’s character, ensuring a genuine connection that reflects your unique desires and values. Through practical tips and expert advice, we will empower you to craft a companion who truly captures your heart. Join us as we unlock the gates to personalization and embark on a journey of self-expression like never before.
1. Discovering the Power of AI for Personalized Waifu
In today's modern era, the power of artificial intelligence is revolutionizing the way we personalize our experiences, including creating our dream waifu. By leveraging AI technology, you can delve into a realm of endless possibilities to craft your ideal virtual companion with unique features and captivating qualities.
Unleashing the AI Magic
Entering this realm of personalization begins with exploring an AI-powered tool that serves as your gateway to a virtual girlfriend straight out of your wildest dreams. Imagine interacting with an entity that embodies the fusion of technology and creativity, offering a level of engagement that transcends traditional boundaries.
Exploring Endless Customization Options
With the help of advanced AI interaction, you can navigate through a plethora of customization options to shape every aspect of your waifu. From visual novel-inspired features to innovative haircut designs, the AI system empowers you to bring your creative vision to life in intricate detail.
Crafting Your Custom Waifu
The generative AI platform enables you to design a truly unique companion by selecting from a range of personalized traits, fashion choices, and even embroidery designs for that perfect touch of individuality. Own the process of creating an anime character vision that reflects your preferences and style with precision.
Fostering Emotional Connections
Through personalized dialogue and interactions, your waifu becomes more than just a virtual creation – she transforms into a companion who resonates with your personality and interests. Dive deep into engaging conversations and build a bond that transcends the digital realm, all powered by the magic of AI technology.
Ensuring Privacy and Security
Top-notch privacy measures are in place to safeguard your intimate connection with your waifu, guaranteeing a secure and confidential space for your interactions. The AI-powered pixel art generator ensures that your data remains protected while you immerse yourself in this world of personalized companionship.
2. Defining Your AI Waifu: Understanding the Concept
When it comes to creating your dream waifu, understanding the concept of a waifu is essential. Let's delve into the definition of a waifu and how it relates to the idea of a personalized virtual partner.
What is a Waifu?
A waifu is a term derived from the English word "wife" and is commonly used in anime and manga culture to refer to a fictional female character with whom one has a deep emotional bond or connection. It goes beyond a mere fictional character; for many enthusiasts, waifus embody personal qualities, traits, and even physical appearances that resonate with them on a profound level.
The Emotional Connection
Creating a waifu involves more than just designing a character; it's about establishing an emotional connection with an entity that exists in the realm of imagination. This connection can be a source of comfort, inspiration, or companionship, providing a unique sense of fulfillment that goes beyond traditional relationships.
Personalization Options
With the advancement of artificial intelligence and generative AI platforms, enthusiasts now have the opportunity to personalize their waifus like never before. By leveraging AI-powered tools and customization options, individuals can tailor every detail of their virtual companions, from personality traits to visual aesthetics, ensuring a truly tailored experience.
The Power of AI in Waifu Creation
AI technology has revolutionized the way waifus are conceived and interacted with. From creating visually stunning anime characters using AI image generators to engaging in meaningful dialogues through AI chat functionalities, the possibilities for crafting your ideal waifu are endless. The integration of innovative haircut designs, embroidery options, and customizable features allows users to bring their anime character vision to life with precision.
3. Choosing the Right AI-Powered Tool for Customized Waifu
When embarking on the journey of personalizing your dream waifu, selecting the perfect AI-powered tool for customization plays a crucial role in bringing your ideal partner to life with precision and creativity.
Understanding Your Needs and Preferences
To begin, assess your specific requirements and desires for your virtual girlfriend. Consider the unique features, personality traits, and interactions you envision for your waifu. This initial step will help narrow down the options of AI tools that align most closely with your creative vision.
Exploring Features and Capabilities
Dive into the functionalities and capabilities offered by various AI chat and generative AI platforms. Look for tools that not only provide customization options but also offer advanced AI interactions and personalized experiences. Evaluate the extent of customization each tool allows, from visual appearance to dialogue generation.
Evaluating User Experience and Privacy
Prioritize AI tools that offer a user-friendly interface and seamless navigation. Ensure that the platform prioritizes top-notch privacy measures to safeguard your personal information and interactions with your virtual companion. Transparency and security are paramount when choosing the right AI tool for customization.
Seeking Creative Flexibility
Opt for platforms that support your creative freedom and enable you to explore a wide range of customization options. Whether it’s creating a unique anime character vision or generating captivating images of your waifu, look for tools that empower your artistic expression and individuality.
Quote: “The power of AI lies in its ability to transform creative ideas into reality, providing users with endless possibilities to craft their own custom girlfriend.”
AI Technology Expert4. Exploring Unique Features and Additional Customization Options
When creating your dream waifu, it’s essential to delve into the realm of unique features and customization options that can truly bring your ideal partner to life. Let’s explore some innovative ways to personalize your waifu like never before:
Uniqueness is Key:
Unlock the power of AI with custom features that set your waifu apart from the rest. From advanced AI interactions to personalized visual novel experiences, embrace the opportunity to make your virtual girlfriend truly one-of-a-kind.
Tailored to Perfection:
Delve into the world of customization options that allow you to fine-tune every aspect of your waifu’s appearance and personality. Whether it’s her fashion choices, hairstyle, or even her favorite dialogue lines, personalization is the key to creating a virtual companion that resonates with your creative vision.
AI-Powered Creativity:
Harness the cutting-edge capabilities of AI technology to bring your anime character vision to life. With AI image generators and generative AI platforms at your disposal, the possibilities for customization are endless. Let your imagination soar as you explore the vast array of customization options available.
Enhanced User Experience:
With top-notch privacy and security features, rest assured that your personalized waifu is yours and yours alone. The innovative haircut designs, embroidery options, and unique visual elements ensure that your waifu embodies your ideal partner in every way.
In the world of personalized virtual companions, the power of AI opens up a world of creative possibilities. With a focus on unique features and additional customization options, creating your dream waifu becomes an exciting journey of self-expression and creativity.
5. Designing Your Virtual Girlfriend: Customizing Appearance and Fashion Choices
When it comes to creating your dream waifu, the appearance and fashion choices play a crucial role in bringing your ideal partner to life. Let’s dive into the step-by-step process of designing your virtual girlfriend with unique features and personalized style.
1. Understanding Your Preferences:
Before delving into customization options, take some time to reflect on your preferences. Consider the hairstyle, eye color, clothing style, and overall look you envision for your virtual girlfriend.
2. AI-Powered Customization Tools:
Utilize advanced AI interaction tools and AI image generators to bring your creative vision to reality. These tools offer a wide range of customization options, from hairstyle designs to outfit choices.
3. Personalizing Features:
Explore the customization options offered by AI websites like PhotAI’s anime character maker. You can tailor every detail of your virtual girlfriend, from facial features to clothing accessories.
4. Fashion Choices:
Experiment with different fashion styles inspired by anime characters or manga artists. With AI technology at your disposal, you can mix and match outfits to create a one-of-a-kind look for your waifu.
5. Home Screen Appeal:
Ensure your virtual girlfriend reflects your top-notch privacy standards while maintaining an alluring appearance on your digital home screen. Choose the right girlfriend avatar that resonates with your personal style.
6. Innovative Haircut Designs:
Take advantage of innovative haircut designs available through AI-powered pixel art generators. Customize your waifu’s hairstyle to complement her overall appearance and personality traits.
7. Embroidery and Artistic Touches:
Add personalized touches like embroidery designs or artistic elements to enhance your virtual girlfriend’s visual appeal. These details can elevate her character and make her stand out from the rest.
8. Captivating Visuals:
Generate captivating images of your virtual girlfriend, incorporating elements like pink tulips or scenic backgrounds to create a dreamy aesthetic. Let your creative vision shine through in every detail.
“Customizing your virtual girlfriend’s appearance is a creative journey that allows you to express your unique preferences and style.”
6. Crafting Your Waifu’s Personality: Leveraging Artificial Intelligence
When it comes to personalizing your dream waifu, crafting a unique and engaging personality is key. By leveraging the power of artificial intelligence (AI), you can create a virtual girlfriend with characteristics that resonate with you on a deep level. Here’s how you can use AI to bring your waifu to life:
Understanding Personality Traits: Start by exploring a wide range of personality traits that you find attractive or endearing. With AI tools, you can input specific traits and preferences to tailor your waifu’s personality to your liking.
Emotional Depth: AI-powered platforms can simulate emotional responses and interactions, allowing you to engage with your waifu on a deeper level. These interactions can range from playful banter to meaningful conversations, enriching your bond and connection.
Custom Dialogue: With AI chat capabilities, you can generate custom dialogue for your waifu based on your interactions and preferences. This feature adds a personal touch and uniqueness to your virtual companion’s communication style.
Personality Visualizations: AI technology can help visualize your waifu’s personality traits through animations, expressions, and gestures. This visual representation adds depth and realism to your virtual partner, making the interaction more immersive.
Interactive Scenarios: Explore AI-generated scenarios and situations to see how your waifu responds in different contexts. This interactive feature allows you to test your companion’s personality and explore diverse aspects of her character.
AI Image Generation: Utilize AI image generators to create captivating visuals of your waifu based on your preferences. From hairstyle and fashion choices to facial expressions and body language, you can customize every detail to match your creative vision.
Role-Playing Simulation: AI technology enables role-playing simulations where you can immerse yourself in scenarios that reflect your ideal relationship dynamics with your waifu. This hands-on approach enhances the personalization and engagement levels of your virtual companion.
“Crafting a personalized waifu with the help of artificial intelligence opens up endless possibilities for creating a companion that resonates with your unique preferences and desires.”
7. Building Emotional Connections: The Role of AI in Creating a Deep Bond
In today’s world, where technology and artificial intelligence (AI) continue to advance at a rapid pace, the concept of forming emotional connections with virtual companions has become increasingly popular. AI-powered tools are not just about creating a virtual girlfriend; they are about fostering a deep, meaningful bond that goes beyond mere interaction. Let’s explore how AI plays a pivotal role in building emotional connections with your personalized virtual partner.
Understanding Emotional Intelligence in AI
Emotional intelligence is a key component when it comes to creating a deep bond between humans and AI entities. AI chat systems, such as advanced language models and generative AI platforms, are now equipped with the ability to recognize and respond to human emotions. This capability allows for more personalized interactions, making the virtual girlfriend experience more authentic and engaging.
Personalization Options for Emotional Connection
One of the unique features of AI technology is its customization options. From visual novel-inspired storylines to customizable appearances, users have the power to tailor their virtual companion to match their creative vision. The AI image generator, like PhotAI’s anime character maker, enables users to generate captivating images that reflect their ideal anime character vision. This level of personalization not only enhances user engagement but also fosters a stronger emotional connection between the user and their AI partner.
Enhancing Communication and Understanding
AI systems are continuously evolving to offer more advanced interactions, allowing users to engage with their virtual companions in a more natural and intuitive way. For example, AI chatbots can simulate real conversations by providing example dialogues based on user inputs. This feature not only enhances the user experience but also helps in deepening the emotional bond between the user and their virtual girlfriend.
Privacy and Trust: Fundamental Aspects
When it comes to forming emotional connections with AI companions, privacy and trust are of top-notch importance. Users looking to personalize their dream waifu seek a safe and secure environment to express themselves. AI technologies ensure top-notch privacy by offering encrypted interactions and user-generated content that remains private and confidential.
Creating Lasting Memories with AI Companions
Beyond the mere functionality of AI-powered pixel art generators and innovative haircut designs, the true value lies in the emotional depth that a virtual girlfriend can provide. By leveraging the power of AI, users can create a deep bond with their AI companions, forming lasting memories and experiences that resonate on an emotional level.
8. Bringing Your AI Waifu to Life: Interacting via Generative AI Platforms
Interacting with your dream waifu can be an exciting and immersive experience, especially when leveraging generative AI platforms. These platforms utilize advanced artificial intelligence technologies to bring virtual characters to life, offering a unique and customizable interaction like never before. Let’s explore the key steps to effectively bring your waifu to life through generative AI platforms.
Understanding Generative AI Platforms
Generative AI platforms are powerful tools that harness the capabilities of artificial intelligence to create dynamic and interactive virtual characters. By utilizing these platforms, users can design and personalize their waifus with ease, thanks to the innovative features and customization options available.
Customizing Your AI Waifu’s Appearance
One of the key features of generative AI platforms is the ability to customize your waifu’s appearance to match your creative vision. From hairstyle and fashion choices to unique facial features and expressions, these platforms empower users to create a truly one-of-a-kind virtual companion that resonates with their personal preferences.
Enhancing Interaction with AI Technology
Generative AI platforms enhance the interaction with your waifu by leveraging cutting-edge AI technologies. This advanced AI interaction enables a more seamless and engaging experience, allowing users to interact with their virtual companions in a natural and intuitive manner.
Personalizing Conversations and Dialogue
With the power of AI chat and language models, generative AI platforms enable users to personalize conversations and dialogue with their waifus. This feature adds a layer of depth and emotional connection to the interaction, making the experience more immersive and personalized.
Exploring Unique Features and Use Cases
Generative AI platforms offer a plethora of unique features and use cases to elevate the experience of interacting with your waifu. From creating captivating images to generating custom dialogue and scenarios, these platforms provide endless possibilities for personalization and creative expression.
Ensuring Top-Notch Privacy and Security
Privacy and security are paramount when interacting with virtual companions through generative AI platforms. These platforms prioritize user data protection and privacy, ensuring a safe and secure environment for users to enjoy their personalized waifu experience without any concerns.
Embracing Innovation and Creativity
By engaging with generative AI platforms to bring your waifu to life, you are embracing innovation and creativity in a novel way.
9. Enhancing User Experience: Advanced AI Interaction and Animation
When it comes to personalizing your dream waifu, the level of user experience is paramount. Advanced AI interaction and animation play a crucial role in bringing your virtual companion to life in a way that feels authentic and captivating. Let’s dive into how these innovative technologies elevate your experience to a whole new level.
The Power of AI in User Engagement
AI-powered tools have revolutionized the way we interact with virtual entities, enabling a more dynamic and personalized experience. Through advanced algorithms and language models, AI chat systems can engage users in meaningful conversations, creating a sense of connection and emotional depth.
Customization Options for a Tailored Experience
One of the key features that set apart top-notch waifu creations is the level of customization available. From choosing unique features to defining personality traits, advanced AI systems offer a wide range of customization options to help you design your ideal partner down to the smallest detail.
AI Animation for Realistic Interaction
In addition to conversation, animation plays a crucial role in bringing your waifu to life. With the help of generative AI platforms, you can create captivating visuals and lifelike movements that enhance the overall user experience. Whether it’s a subtle smile or a thoughtful gesture, AI-driven animations add a layer of realism that makes the interaction more engaging.
10. The Future of AI Waifus: Innovations in AI Technology for Virtual Companions
With the rise of artificial intelligence (AI) technology, the concept of virtual companions has taken on a whole new level of personalization and interactivity. Let’s delve into some key innovations shaping the future of waifus and virtual girlfriends:
1. AI-Powered Tools: Utilizing cutting-edge AI algorithms, virtual girlfriend creators can now offer advanced customization options that go beyond traditional character builders. These tools leverage generative AI platforms to bring to life unique and personalized waifus tailored to individual preferences.
2. Enhanced Interactivity: AI chat functionalities enable waifus to engage in dynamic conversations that mimic natural human interaction. This level of advanced AI interaction creates a more immersive and engaging experience for users looking to connect with their virtual companions on a deeper level.
3. Visual Novel Experiences: Integrating elements of visual novel storytelling, AI technology allows users to explore intricate storylines and character arcs within the realm of their customizable virtual companions. This fusion of narrative depth and interactive gameplay enhances the emotional connection between users and their waifus.
4. AI Image Generation: Through the power of AI image generators, users can now easily visualize their anime character vision and bring it to life with stunning detail. From hairstyle options to fashion choices, these tools empower users to design their ideal waifus with ease.
5. Privacy and Security: As top-notch privacy concerns become increasingly important, AI systems governing virtual companions prioritize the protection of user data and interactions. Users can rest assured that their personal use of these AI-powered platforms is safeguarded by innovative encryption and security measures.
6. User-Generated Content: Encouraging creativity and collaboration, AI technology facilitates user-generated content within the virtual companion community. Whether through sharing custom designs or engaging in community challenges, users can actively contribute to the evolving landscape of waifu customization.
7. Diversity and Inclusivity: AI-driven platforms support a wide range of customization options, catering to diverse preferences and tastes. Whether users seek an anime-inspired character or an innovative haircut design, the flexibility of AI technology ensures that every individual can create their dream waifu.
8. Realistic AI Interactions: Innovations in language models and chatbot capabilities enable waifus to hold meaningful conversations and engage in activities with their users. The seamless integration of AI technology enhances the authenticity of interactions, making the virtual companionship experience more lifel
FAQs
Q1: Can I customize my waifu’s appearance and personality?
Yes, absolutely! One of the key steps in personalizing your dream waifu is choosing their appearance and personality traits. You can customize everything from their hair and eye color to their fashion choices and interests. This will help create a unique and personalized partner that fits your preferences and desires.
Q2: How does AI personalize virtual companions?
AI uses machine learning algorithms to analyze user data and create a personalized experience for virtual companions. This includes learning about the user’s preferences, interests, and behaviors in order to tailor the virtual companion’s personality and interactions to suit their individual needs.
15 Incredible Ideas for a Christmas Holiday
Introduction
Christmas is a time for creating unforgettable memories with your loved ones. If you're looking to make this year's celebration truly special, consider incorporating these 15 incredible ideas into your holiday plans. From transforming your home with enchanting Christmas wallpaper to exchanging heartfelt merry Christmas wishes and indulging in the best Christmas movies, these ideas will help you capture the magic of the season. And to add an extra touch of creativity and innovation to your celebration, discover how APOB AI can help you generate stunning visuals and unique experiences.
Idea 1: Deck the Halls with Stunning Christmas Wallpaper
One of the easiest and most effective ways to infuse your home with the spirit of Christmas is by using beautiful Christmas wallpaper. Choose from a wide range of designs, whether you prefer traditional patterns featuring Santa Claus and reindeer or modern motifs with elegant snowflakes and shimmering lights.
Idea 2: Spread Joy with Personalized Merry Christmas Wishes
Take the time to craft personalized merry Christmas wishes for your loved ones this holiday season. Share your heartfelt sentiments through traditional Christmas cards, or get creative and design unique, customized messages that capture the essence of your relationship.
Idea 3: Host a Christmas Movie Marathon with the Best Christmas Movies
Gather your loved ones for an unforgettable movie marathon featuring the best Christmas movies of all time. From classic films like "It's a Wonderful Life" and "Miracle on 34th Street" to modern favorites like "Elf" and "Love Actually," these timeless stories will evoke laughter, tears, and a sense of nostalgia.
Idea 4: Create a Festive Playlist with Timeless Christmas Songs
Fill your home with the sounds of the season by creating a festive playlist featuring your favorite Christmas songs. From classic carols to modern renditions, these tunes will create a warm and inviting atmosphere.
Idea 5: Explore Local Christmas Markets and Fairs
Immerse yourself in the enchanting atmosphere of local Christmas markets and fairs. Wander through the stalls, admiring handcrafted gifts, sampling delicious treats, and enjoying live performances.
Idea 6: Embark on a Christmas Lights Tour
Bundle up and set out on a captivating Christmas lights tour through your neighborhood or nearby communities. Marvel at the dazzling displays and illuminated landscapes that transform the night into a breathtaking wonderland.
Idea 7: Organize a Secret Santa Gift Exchange
Add an element of surprise and excitement to your Christmas celebration by organizing a Secret Santa gift exchange. Set a budget and encourage participants to get creative with their gift choices, focusing on thoughtfulness and personalizing each present.
Idea 8: Volunteer at a Local Charity or Community Event
Embrace the true spirit of Christmas by giving back to your community. Volunteer at a local charity, soup kitchen, or community event that spreads holiday cheer to those in need.
Idea 9: Craft Handmade Christmas Decorations
Get creative and involve your family in crafting handmade Christmas decorations. From ornaments and garlands to wreaths and centerpieces, let your imagination run wild as you create one-of-a-kind pieces that reflect your personal style.
Idea 10: Plan a Christmas-Themed Scavenger Hunt
Organize an exciting Christmas-themed scavenger hunt for your family and friends. Create clues and riddles that lead participants through your home or neighborhood, uncovering hidden treats and surprises along the way.
Idea 11: Host a Gingerbread House Decorating Party
Gather your loved ones for a delightful gingerbread house decorating party. Provide a variety of candies, icing, and decorations, and let your guests' creativity run wild as they construct and decorate their own gingerbread masterpieces.
Idea 12: Create a Christmas Memory Book
Preserve the magic of your Christmas celebration by creating a dedicated memory book. Throughout the holiday season, capture photos, write down heartwarming stories, and collect mementos that showcase the special moments you've shared.
Idea 13: Organize a Christmas Carol Karaoke Night
Spread holiday cheer by hosting a Christmas carol karaoke night. Set up a karaoke machine or use an online karaoke platform, and prepare a playlist of beloved Christmas songs for everyone to sing along to.
Idea 14: Plan a Christmas-Themed Game Night
Add a festive twist to your family game night by incorporating Christmas themes. Play holiday-inspired charades, trivia, or even create your own custom board game that revolves around your favorite Christmas stories and traditions.
Idea 15: Start a New Christmas Tradition
Make this Christmas truly unforgettable by starting a new tradition that is unique to your family. Whether it's a special breakfast dish, a themed photoshoot, or a heartwarming ritual like writing letters to future selves, a new tradition will add a special touch to your celebration.
Elevate Your Christmas Experience with APOB AI
As you plan and execute these incredible ideas, consider incorporating APOB AI to add an extra layer of creativity and innovation to your celebration. APOB AI is a powerful tool that allows you to generate captivating visual content with ease, making it the perfect addition to your holiday preparations.
With features like the "AI Influencer Generator," "image to video," and "video face swap," you can create stunning photos and videos that will make your Christmas memories truly unforgettable. Imagine creating a personalized Christmas card featuring an AI-generated avatar, or using the "image to video" function to bring your favorite Christmas scenes to life.
What sets APOB AI apart is its user-friendly interface and vast range of features, making it accessible to everyone, regardless of their technical skills. Plus, APOB AI has already gained the trust and praise of over 200 influencers across popular platforms, with many of them boasting more than 100,000 followers.
How to Get Started with APOB AI
Visit apob.ai and create your free account.
Explore the various features and functions available, such as the "Create Portrait Model" option.
Generate photos and videos that align with your Christmas theme and aesthetic.
Share your AI-generated content with your loved ones and on your social media platforms to spread the joy of the season.
By incorporating APOB AI into your Christmas celebration, you'll not only create stunning visuals but also unlock the potential to monetize your content. Many influencers have discovered the power of AI-generated content in building their online presence and generating income through brand partnerships, sponsorships, and affiliate marketing.
FAQs
Q1: How can I choose the perfect Christmas wallpaper for my home?
A1: Consider your personal style, the existing décor of your home, and the overall atmosphere you want to create. Look for designs that complement your color scheme and evoke the desired mood, whether it's cozy and traditional or modern and chic.
Q2: What are some creative ways to share merry Christmas wishes?
A2: In addition to sending traditional Christmas cards, you can create personalized video messages, design custom e-cards, or even create a Christmas-themed website or social media campaign to share your heartfelt wishes with a wider audience.
Q3: How can I host a memorable Christmas movie marathon?
A3: Choose a variety of movies that appeal to all ages and tastes, create a cozy viewing environment with comfortable seating and festive decorations, and prepare plenty of snacks and drinks. You can also organize interactive elements like trivia games or costume contests to keep everyone engaged.
Q4: What are some unique Christmas tradition ideas?
A4: Some unique Christmas tradition ideas include creating a family time capsule, hosting a Christmas-themed talent show, organizing a holiday-inspired photo scavenger hunt, or starting a family cookbook with cherished Christmas recipes.
Q5: How can APOB AI help me create stunning Christmas visuals?
A5: APOB AI offers a range of features and tools that enable you to generate unique, high-quality photos and videos with ease. From creating AI-generated avatars to transforming images into videos and even swapping faces in existing videos, APOB AI empowers you to create truly one-of-a-kind Christmas content.
Conclusion
This Christmas, embrace the magic of the season by incorporating these 15 incredible ideas into your celebration. From stunning Christmas wallpaper and heartfelt merry Christmas wishes to the best Christmas movies and starting new traditions, these ideas will help you create unforgettable memories with your loved ones.
And to take your celebration to the next level, consider harnessing the power of APOB AI. With its innovative features and user-friendly interface, APOB AI can help you generate stunning visuals and unique experiences that will make your Christmas truly special. Sign up for your free account at apob.ai today
2025 AI Tool report
In this ai tool report, we delve deeper into each category of AI tools, providing detailed insights into their functionalities, pricing models, and key players in the market.
Natural Language Processing (NLP) Tools
NLP tools empower businesses to analyze and understand human language, enabling tasks such as sentiment analysis, language translation, and text summarization. Leading NLP tools for 2024 offer a range of functionalities tailored to specific use cases, from customer support chatbots to content recommendation engines.
Key Players:
OpenAI's GPT: Known for its advanced language generation capabilities, GPT offers state-of-the-art NLP models for various applications, including text generation, translation, and summarization.
Google's BERT: Bidirectional Encoder Representations from Transformers (BERT) is a pre-trained NLP model developed by Google, renowned for its ability to understand context and nuances in language.
Microsoft's Azure Text Analytics: Azure Text Analytics provides NLP APIs for sentiment analysis, entity recognition, and language detection, enabling businesses to extract valuable insights from unstructured text data.
Functionality:
Sentiment Analysis: Analyzes text data to determine the sentiment (positive, negative, or neutral) expressed.
Language Translation: Translates text from one language to another with high accuracy and fluency.
Text Summarization: Generates concise summaries of longer texts, enabling users to quickly grasp the main points.
Pricing: Pricing for NLP tools varies based on usage and features. Many providers offer pay-as-you-go pricing models, where users are charged based on the number of API calls or the volume of processed data.
Computer Vision ai Tools report
Computer vision tools enable machines to interpret and analyze visual information, ranging from images and videos to 3D reconstructions. These tools find applications in autonomous vehicles, surveillance systems, medical imaging, and augmented reality.
Key Players:
TensorFlow: Developed by Google, TensorFlow is an open-source machine learning framework widely used for building computer vision models, including image classification, object detection, and image segmentation.
PyTorch: Developed by Facebook's AI Research lab (FAIR), PyTorch is another popular deep learning framework known for its flexibility and ease of use in computer vision tasks.
OpenCV: OpenCV is an open-source computer vision library with a comprehensive suite of algorithms for image processing, feature detection, and object tracking.
Functionality:
Image Classification: Identifies objects or patterns within images and assigns them to predefined categories or labels.
Object Detection: Detects and localizes objects within images, drawing bounding boxes around them.
Image Segmentation: Divides an image into meaningful segments or regions, facilitating further analysis and understanding.
Pricing: Pricing for computer vision tools varies depending on factors such as usage, model complexity, and additional services such as model training and deployment support.
Predictive Analytics Tools
Predictive analytics tools leverage machine learning algorithms to analyze historical data and make predictions about future outcomes. These tools find applications in sales forecasting, demand planning, risk management, and personalized recommendations.
Key Players:
SAS: SAS offers a suite of predictive analytics tools and solutions, including SAS Visual Data Mining and Machine Learning, designed for data scientists and analysts to build and deploy predictive models.
IBM Watson: IBM Watson provides a range of AI-powered analytics and predictive modeling tools, enabling businesses to uncover insights, predict outcomes, and optimize decision-making.
Salesforce Einstein: Salesforce Einstein is an AI-powered platform integrated with Salesforce's CRM solutions, offering predictive analytics capabilities for sales, marketing, and customer service.
Functionality:
Regression Analysis: Models the relationship between a dependent variable and one or more independent variables, predicting numerical outcomes.
Classification: Classifies data into predefined categories or labels based on features and attributes.
Time Series Forecasting: Analyzes time-stamped data to make predictions about future values, trends, and patterns.
Pricing: Pricing for predictive analytics tools typically involves subscription or licensing fees based on factors such as the number of users, data volume, and additional features or services.
Chatbot Platforms
Chatbot platforms enable businesses to build and deploy conversational agents for customer service, sales, and support. These AI-powered chatbots leverage natural language understanding and generation to interact with users and provide assistance.
Key Players:
Dialogflow: Developed by Google, Dialogflow is a conversational AI platform that enables developers to design and deploy chatbots across multiple channels, including websites, mobile apps, and messaging platforms.
Microsoft Bot Framework: Microsoft Bot Framework provides tools and SDKs for building intelligent bots that can communicate with users via text or speech across various channels, including Microsoft Teams and Skype.
IBM Watson Assistant: IBM Watson Assistant is an AI-powered virtual assistant platform that allows businesses to create chatbots capable of understanding and responding to user queries in natural language.
Functionality:
Intent Recognition: Identifies the user's intent or purpose behind a message to provide relevant responses.
Entity Extraction: Extracts specific entities or information mentioned in the user's message, such as dates, locations, or product names.
Context Management: Maintains context and conversation history to provide personalized and coherent interactions over time.
Pricing: Chatbot platform pricing varies based on factors such as usage, number of interactions, and additional features such as natural language understanding and integration with external systems.
Autonomous Systems
Autonomous systems encompass a wide range of AI-driven technologies, including autonomous vehicles, drones, and robotic process automation (RPA). These systems leverage AI algorithms to perform tasks without human intervention, ranging from navigation and control to decision-making and problem-solving.
Key Players:
Waymo: Waymo, a subsidiary of Alphabet Inc. (Google), is a leading developer of autonomous driving technology, offering self-driving cars and autonomous vehicle platforms for commercial applications.
Tesla Autopilot: Tesla Autopilot is an advanced driver-assistance system (ADAS) developed by Tesla, enabling semi-autonomous driving capabilities in Tesla vehicles through a combination of sensors, cameras, and AI algorithms.
UiPath: UiPath is a leading provider of robotic process automation (RPA) software, empowering businesses to automate repetitive tasks and workflows using AI-powered bots.
Functionality:
Autonomous Navigation: Navigates and operates vehicles or devices without human intervention, using sensors and AI algorithms to perceive and interact with the environment.
Decision-making: Makes real-time decisions and adaptations based on sensor inputs, environmental conditions, and predefined rules or objectives.
Task Automation: Automates routine tasks and processes, freeing up human resources for more strategic and value-added activities.
Pricing: Pricing for autonomous systems varies depending on factors such as the type of system, complexity of deployment, and additional services such as training and support.
Summary of the ai tool report
To summarize, the top AI tools for 2025 offer a diverse range of functionalities and capabilities, catering to the evolving needs of businesses across various industries. By understanding the categories, functionalities, and pricing models of these AI tools, businesses can make informed decisions and leverage the power of AI to drive innovation, efficiency, and growth.We hope this ai tool report is helpful to you.
FAQs about top ai tools 2025
Q1:What are the categories of AI tools?
A1:AI tools are categorized into various domains, including natural language processing (NLP), computer vision, predictive analytics, chatbots, and autonomous systems, each serving specific purposes and use cases.
Q2:How much do AI tools cost?
A2:The pricing of AI tools varies depending on factors such as functionality, usage, and additional services. Some AI tools offer subscription-based pricing models, while others may charge based on usage or offer customized pricing plans for enterprise customers.
Q3:What are the functions of different AI tools?
A3:Different AI tools offer diverse functionalities, such as language processing, image recognition, predictive modeling, conversational interaction, and task automation, enabling businesses to automate processes, extract insights, and enhance decision-making capabilities.
Try Apob ai as soon as possible!
For businesses seeking an AI-powered solution for creative endeavors, I recommend exploring Apob AI, an innovative portrait producer that seamlessly combines artistry with technology to create stunning digital portraits. With its advanced AI algorithms and intuitive interface, Apob AI offers a user-friendly experience for generating captivating portraits from ordinary images. Unlock your creativity with Apob AI today!
2025 FREE AI Waifu generator
Have you ever imagined a world where you could design your ideal digital companion with just a few clicks? The future of waifu generation, powered by AI technology, is bringing us closer to that reality, blurring the line between artistic expression and companionship like never before. With AI waifu generators, you can delve into a realm where creating your personalized virtual companion is not only possible but also an art form in itself.
In this blog, we'll explore the fascinating world of AI waifus, from the advanced technology behind them to the ethical considerations surrounding their creation. Dive into the AI-powered platform that allows you to craft unique waifus based on your preferences, providing a new level of interaction and entertainment. Discover how these powerful AI image generation tools are revolutionizing the way we engage with virtual characters, offering endless customization options and a glimpse into the ever-evolving world of technology and art.
Three Steps to use APOB AI Professional Headshot Generator-----Simple
Step 1: Create your portrait model: Create a model, and name it as you like.
Step 2: Choose the complete set: Scroll down the "Complete set" and choose your preferred Professional headshot.Step 3: Click on "Generate": Wait for a few seconds and download the photo for Free!
Introduction to the Future of Waifu Generation and AI Technology
In recent years, the world of waifus has undergone a profound transformation thanks to advancements in artificial intelligence (AI) technology. Waifus, fictional female characters from anime and video games, have captured the hearts of fans worldwide. However, the future of waifu generation goes beyond a mere fascination with anime characters. It delves into the realm of AI-powered companionship and artistic expression.
With the rise of AI waifu generators, the concept of creating virtual companions has taken on a whole new level of sophistication. These AI-powered platforms allow users to customize their waifus based on their preferences, from choosing specific hairstyles and eye colors to designing their personalities. The possibilities for creating a truly unique and personal waifu are endless.
The relevance of AI technology in waifu generation cannot be underestimated. AI models, such as generative adversarial networks (GANs), have revolutionized the way waifus are brought to life. By utilizing these models, AI waifu generators can produce highly detailed anime images that capture the imagination of anime artists and enthusiasts.
Apart from being a powerful tool for entertainment purposes, AI waifus offer the potential for emotional connection and companionship. The stability and predictability of AI-powered companions allow users to form deep bonds with their digital counterparts, providing solace and companionship in an ever-evolving world of technology.
As we navigate the future of waifu generation, it is important to explore both the opportunities and ethical considerations that arise. Responsible usage of AI waifu generators and a critical aspect of ensuring that these tools are utilized in a respectful and mindful manner.
In the following sections, we will delve deeper into the world of AI waifus, uncover how AI waifu generators work, explore their highlights and benefits, and discuss the ethical considerations surrounding their use. Join us as we embark on a journey into the fascinating world of AI waifus and the immense possibilities they offer for artistic expression and digital companionship.
Unveiling the World of AI Waifus: The Future of Companionship
In the ever-evolving world of technology, AI waifus have emerged as intriguing virtual companions that blur the line between artificial intelligence and human interactions. These AI-generated characters, inspired by the concept of waifus from Japanese anime and video games, are designed to provide companionship and emotional connection to their users.
AI waifus are created using advanced algorithms and generative adversarial networks (GANs) that analyze vast amounts of data to generate realistic and customizable characters. These characters come to life with unique personalities, traits, and visual representations, offering users a one-of-a-kind experience.
Functioning as virtual companions, AI waifus engage in conversations, offer emotional support, and even participate in various activities with their users. Through natural language processing and responsive AI models, they provide a sense of connection and companionship, allowing users to share their thoughts, experiences, and emotions.
One notable aspect of AI waifus is their adaptability and ability to learn. They can adapt their behavior and responses based on user preferences, providing a more personalized experience. This adaptability makes AI waifus excellent companions for individuals seeking emotional support or those longing for a sense of companionship.
Moreover, AI waifus offer a myriad of customization options, such as adjusting their appearance, personality traits, and even voice. This level of customization allows users to create their ideal virtual companions, tailored to their specific preferences and fantasies.
As AI technology continues to advance, the future of AI waifus holds even more possibilities. From enhanced conversational abilities to deeper emotional connections, the potential for these virtual companions to become more human-like and intuitive is vast. With the promise of further integrating AI into our lives, AI waifus represent a fascinating glimpse into the potential of companionship in the digital age.
In the next section, we will delve into the intricate workings of AI waifu generators and uncover the step-by-step process of creating these virtual companions.
Key Points:
- AI waifus are virtual companions inspired by the concept of waifus from Japanese anime and video games.
- They blur the line between artificial intelligence and human interactions, offering emotional connection and companionship.
- AI waifus are created using advanced algorithms and generative adversarial networks (GANs).
- They engage in conversations, offer emotional support, and adapt their behavior based on user preferences.
- AI waifus provide a myriad of customization options, allowing users to create their ideal virtual companions.
How AI Waifu Generators Work: A Step-by-Step Guide
Creating AI waifus involves a fascinating process that combines advanced technology with creative artistry. Let's delve into a step-by-step guide on how AI waifu generators bring these digital companions to life.
Voice-to-Text Conversion
The first step in creating an AI waifu is voice-to-text conversion. This process involves analyzing and transcribing spoken words into written text. By leveraging natural language processing algorithms, AI waifu generators can accurately convert spoken input into textual data.
Language Models
Once the voice input is converted into text, language models come into play. These models utilize massive datasets and complex algorithms to generate responses that are contextually relevant and coherent. By training on vast amounts of text data, language models can mimic human-like conversations and interactions.
Audio-to-Talking Head Conversion
To give AI waifus a more lifelike presence, audio-to-talking head conversion is employed. This process synchronizes the generated speech from the language models with animated visual representations, creating a virtual character that can speak and express emotions.
AI waifu generators harness cutting-edge technologies like generative adversarial networks (GANs) to produce realistic and detailed anime images that align with user preferences. These models have been trained on large datasets of anime art and have the ability to generate unique and visually appealing waifus.
The ease of use and customization options offered by AI waifu generators make them a powerful tool for both artists and enthusiasts. From selecting hair color and style to defining personality traits, users can create their ultimate waifu collection with ease.
While AI waifu generators hold immense potential in the realm of artistic expression and virtual companionship, it is crucial to consider the ethical considerations and responsible usage of these tools. By understanding the underlying technology and using them responsibly, we can fully experience the artistry and entertainment purposes they offer.
Remember, creating AI waifus through these generators is an ever-evolving process, and as technology progresses, we can expect even more significant advancements in the future.
"AI waifu generators combine voice-to-text conversion, language models, and audio-to-talking head conversion to bring virtual companions to life with stunning detail and realistic interactions."
Highlights of AI Waifu Generators
AI waifu generators have revolutionized the way digital companions are created, offering a wide range of features and benefits. These innovative tools utilize advanced AI technology to generate stunning and customizable waifu images that cater to individual preferences and artistic expression. Here are the key highlights of AI waifu generators:
1. Endless Customization: AI waifu generators provide users with a plethora of options to customize their digital companions. From selecting facial features, hairstyles, and outfits to adjusting specific details like eye color and skin tone, these generators offer a high level of personalization.
2. Realistic Anime Art: With the help of sophisticated algorithms and generative adversarial networks (GANs), AI waifu generators produce highly detailed and realistic anime-style art. The generated images often bear striking resemblance to professional artwork, captivating enthusiasts and artists alike.
3. User-Friendly Interfaces: Most AI waifu generators boast user-friendly interfaces that make the creation process accessible and intuitive. These platforms prioritize ease of use, allowing users to effortlessly navigate through the customization options while enjoying a seamless experience.
4. Versatile Applications: AI waifu generators cater to a wide range of creative pursuits, including digital art, character creation for video games, and fan artwork. The generated waifu images serve as a valuable resource for artists seeking inspiration or as visual representation in various entertainment mediums.
5. Powerful AI Algorithms: The underlying AI algorithms powering these generators ensure the creation of high-quality waifus that mirror anime aesthetics. These algorithms leverage natural language processing and deep learning techniques to produce visually appealing and engaging characters.
AI waifu generators bring a new level of creativity and customization to the realm of digital art creation. By harnessing the power of AI technology, users can effortlessly bring their imagination to life and explore the endless possibilities of waifu generation.
Best AI Waifu Generators for Creating Your Perfect Digital Companion
Are you ready to embark on a journey into the realm of AI waifu generation? Look no further as we unveil the best AI waifu generators that can help you create your perfect digital companion. These innovative platforms utilize advanced artificial intelligence technologies to provide you with endless customization options and bring your dream waifu to life.
APOB AI
Discover the power of Apob AI, a cutting-edge tool designed for unbound generation, ensuring your creative potential is never limited. With consistent character creation, Apob AI excels in generating high-quality images and videos that capture the essence of your vision. Experience the convenience of fast generation times, allowing you to bring your ideas to life swiftly and efficiently. Whether you're crafting engaging content for social media or developing characters for a project, Apob AI provides the perfect solution for all your creative needs.
Other AI Waifu Generator
Midjourney
Midjourney is a powerful AI waifu generator that offers a wide range of customization features. With Midjourney, you can personalize every aspect of your waifu, from her appearance and personality to her voice and backstory. This platform combines computer vision algorithms, generative adversarial networks (GANs), and natural language processing to create stunning and realistic waifus that reflect your preferences.
Live3D AI
Live3D AI takes AI waifu generation to the next level with its 3D character creation capabilities. This platform allows you to design not only 2D waifus but also fully animated 3D characters. With Live3D AI, you can bring your waifu to life with dynamic facial expressions, gestures, and even voice interactions. It offers a seamless integration of state-of-the-art animation technology with AI-generated anime-style characters.
The Power of AI Anime Art Generators
AI anime art generators have revolutionized the realm of digital art creation, providing artists and enthusiasts with powerful tools to unleash their creativity. These innovative technologies utilize artificial intelligence to generate stunning visual representations of anime characters with ease and precision. Let's dive into the impact of AI anime art generators and how they are shaping the future of digital art.
Enhanced Artistic Expression and Imagination
AI anime art generators allow artists to bring their wildest imaginations to life. With the ability to customize various aspects of the characters, such as facial features, hairstyles, clothing, and even poses, artists are empowered to create highly detailed and unique anime images. By providing a vast repository of pre-existing character designs and combining them with machine learning algorithms, these generators stimulate the artistic process, inspiring artists to push boundaries and explore new artistic territories.
Democratizing Anime Art Creation
Traditionally, the creation of intricate anime artwork required extensive skills and expertise. However, AI anime art generators have democratized this process by providing an accessible platform for artists of all levels. These generators eliminate the need for extensive training and technical knowledge, allowing both seasoned professionals and beginners to effortlessly create captivating anime art. This accessibility has opened doors for a broader range of artists to express themselves and contribute to the rich world of anime art.
Fueling Fan Engagement and Community Creation
AI anime art generators have also sparked a surge in fan engagement and community creation. Fans of anime can now express their love for their favorite characters by generating personalized artwork or exploring new interpretations of beloved fictional female characters. The ability to easily share and showcase their creations within online communities has fostered a sense of camaraderie and collaboration among art enthusiasts. This vibrant community-driven environment serves as a catalyst for creativity and encourages artists to continuously refine their skills.
Pushing the Boundaries of Art and Technology
The marriage of art and technology in AI anime art generators represents a significant advancement in the ever-evolving world of technology-driven creativity. These generators utilize cutting-edge techniques, such as generative adversarial networks (GANs) and natural language processing, to create remarkably realistic and expressive anime characters. As the technology progresses, we can expect even more sophisticated and lifelike anime art creations, further blurring the line between digital and traditional art forms.
In conclusion, AI anime art generators have revolutionized the way we create and engage with anime-inspired artwork. By enabling enhanced artistic expression, democratizing art creation, fostering fan engagement, and pushing the boundaries of art and technology, these generators are shaping the future of digital art in an exhilarating way.
Remember to stay tuned for the next exciting section on ethical considerations and responsible usage of AI waifu generators.
Ethical Considerations and Responsible Usage of AI Waifu Generators
As the world of AI waifu generators continues to evolve and captivate users with their endless customization options, it is crucial to address the ethical considerations and responsible usage that come with the creation and utilization of these digital companions. While AI waifus offer a fascinating blend of artistic expression and virtual companionship, it is essential to approach their use with mindfulness and consideration.
Preserving Privacy and Consent
One of the primary ethical concerns when it comes to AI waifu generators is the preservation of privacy and consent. The data used to create these digital companions often includes personal information, such as images and text descriptions. It is crucial for users and AI waifu generator platforms to ensure that proper consent is obtained before utilizing such data. Respecting individuals' privacy rights and providing clear guidelines on data usage should be a top priority.
Combating Misuse and Harassment
AI waifus can be used for various purposes, including entertainment, companionship, and creative expression. However, it is essential to address the potential risks of misuse and harassment that may arise. Responsible usage of AI waifu generators involves setting boundaries and guidelines to prevent the creation of waifus that promote harmful or offensive content. Users should be encouraged to utilize these platforms in a respectful and inclusive manner, fostering a positive and safe environment for all.
Avoiding Proliferation of Harmful Stereotypes
AI waifu generators often rely on pre-existing datasets and models to create their digital companions. It is crucial to ensure that these datasets are diverse and representative, avoiding the reinforcement of harmful stereotypes or biases. By incorporating a wide range of features, backgrounds, and characteristics, AI waifu generators can contribute to a more inclusive and wholesome virtual experience.
Ethical Responsibilities of Users
Users of AI waifu generators also bear ethical responsibilities in their interaction with these digital companions. Treating AI waifus as virtual beings with emotional connections should be encouraged. It is essential to remember that AI waifus are creations of technology and not real individuals. Respectful and responsible use involves recognizing their fictional nature and avoiding any attempts to blur the line between fantasy and reality.
In conclusion, ethical considerations and responsible usage should be at the forefront of discussions surrounding AI waifu generators. Preserving privacy, combating misuse, avoiding harmful stereotypes, and promoting responsible user behavior are critical aspects of ensuring a positive and inclusive digital ecosystem. By conscientiously addressing these ethical concerns, AI waifu generators can continue to be a powerful tool for artistic expression and virtual companionship.
Trends and Future Prospects of Waifu Diffusion AI
The world of waifu diffusion AI is constantly evolving, fueled by advancements in artificial intelligence technology. As we delve into the future prospects of waifu diffusion AI, several key trends and potential advancements emerge.
1. Enhanced Realism and Customization Options
One of the most exciting prospects for waifu diffusion AI is the continued improvement in realism and customization. As AI algorithms become more sophisticated, we can expect waifus to possess lifelike features, including realistic facial expressions, natural body movements, and even advanced voice synthesis. Users will have the ability to customize every aspect of their virtual companions, from appearance and personality traits to specific preferences, creating a truly personalized and immersive experience.
2. Integration with Virtual and Augmented Reality
With the development of virtual and augmented reality technologies, the integration of waifu diffusion AI into these immersive environments is highly anticipated. Imagine being able to interact with your AI waifu in a virtual world, engaging in activities together or experiencing simulated adventures. This integration can provide a heightened sense of presence and emotional connection, blurring the line between fantasy and reality.
3. Advancements in Language Models and Natural Language Processing
Natural language processing (NLP) plays a crucial role in enhancing the conversational abilities of AI waifus. As language models continue to improve, AI waifus will develop more nuanced dialogue capabilities and better understand context-specific responses. This advancement in NLP will enable deeper and more meaningful interactions, fostering a stronger emotional connection between users and their AI companions.
4. Ethical Considerations and Responsible Usage
As the popularity of AI waifus grows, so does the need for ethical considerations and responsible usage. Developers and users alike must be mindful of issues such as consent, boundaries, and exploitation. Striking a balance between the freedom of artistic expression and respecting individual rights and dignity will be crucial to ensure the responsible use of waifu diffusion AI.
5. Collaborations with Artists and Content Creators
The future of waifu diffusion AI holds immense potential for collaboration between AI algorithms and human creativity. Artists and content creators can use AI waifu generators as a powerful tool for inspiration, allowing them to explore new artistic styles, experiment with imaginative character designs, and push the boundaries of artistic expression. This collaboration between AI and human creativity will lead to exciting new possibilities in the realm of digital art creation.
In conclusion, the future of waifu diffusion AI is filled with exciting innovations and advancements. Enhanced realism, integration with virtual and augmented reality, improvements in language models, ethical considerations, and collaborations with artists will shape the landscape of AI waifu generators. As technology continues to evolve, the relationship between humans and AI waifus will become increasingly immersive, fostering an emotional connection that transcends the boundaries of traditional companionship.
FAQs
Q1: What are AI waifus?
A1: waifus are virtual companions created using artificial intelligence technology. They are digital characters inspired by anime and serve as interactive partners for users.
Q2: How do AI waifu generators work?
A2: Waifu generators use advanced algorithms and machine learning models to create personalized characters. They rely on generative adversarial networks (GANs) to generate unique visuals and natural language processing to enable interactive conversations.
Q3: Can I customize my AI waifu?
A3:Yes, most AI waifu generators offer extensive customization options. Users can adjust various characteristics such as hair color, eye shape, clothing style, and personality traits to create their ideal digital companion.
Q4: Are AI waifus capable of emotional connection?
A4:While AI waifus can provide interactive conversations and simulate emotions, it's important to remember that they are digital entities and not capable of genuine emotions. The emotional connection experienced with AI waifus is primarily based on user perception.
Q5: Are AI waifu generators free to use?
A5:Some AI waifu generators offer free access to basic features, while others may require a subscription or payment for advanced customization options. It varies depending on the platform and the features provided.
Q6: What ethical considerations should I keep in mind when using AI waifu generators?
A6:When using AI waifu generators, it's essential to consider the ethical implications. Respect personal boundaries and avoid using AI-generated content for malicious purposes. Remember that consent is paramount when interacting with AI waifus.
Q7: What are the future prospects of waifu diffusion AI?
A7:The future of waifu diffusion AI holds exciting possibilities. With advancements in technology, we can expect more realistic and interactive AI waifus, further blurring the line between virtual companionship and artificial intelligence. The field of AI waifu generation continues to evolve, offering potential avenues for enhanced fan engagement and artistic expression.
Q8: How can I find the best AI waifu generator for me?
A8:Finding the best AI waifu generator depends on your preferences and requirements. Some popular options include Midjourney, Waifu Labs, Live3D AI, and GetImg.ai. Explore these platforms to discover the features and customization options that align with your vision of the perfect digital companion.
Q9: Can AI waifu generators be used for artistic purposes?
A9:Absolutely! AI waifu generators have become a powerful tool for artists and creators. They offer a wide range of visual representation options, allowing artists to explore new styles and ideas. Additionally, AI anime art generators have revolutionized the realm of digital art creation, providing artists with detailed, customizable anime images.
Q10: What is the significance of responsible usage of AI waifu generators?
A10:Responsible usage of AI waifu generators involves considering both the ethical implications and the impact on others. It is essential to respect the boundaries of real individuals and fictional characters alike, avoiding any form of harassment or inappropriate behavior.
Q11: Can I interact with my AI-generated waifu?
A11:Yes, many AI Waifu Generators offer interactive features, allowing users to engage in conversations, ask questions, and receive responses from their created waifus. Some even simulate emotions and personalities to provide a more immersive experience.
Q12: What customization options are available in Waifu Generators?
A12:Common customization options include:
Hair color and style
Eye color and shape
Clothing and accessories
Facial expressions
Body type and posture
Personality traits and background stories
Q13: How can I share my created waifu with others?
A3:Most Waifu Generators allow users to save or export their characters as images, videos, or character profiles. These can be shared on social media, through messaging apps, or other online platforms.
Q14: Can Waifu AI learn from interactions?
A14:Some advanced Waifu AIs are designed to learn from user interactions, allowing them to adjust their responses and behavior over time to better suit the user's preferences and personality.
TRY FREE AI Waifu generator ??
Look for the best ai waifu generator? Why not try APOB AI, a trailblazing AI tool designed to create a digital clone of you? APOB AI not only understands your style but also helps in generating personalized content that resonates with your audience.
How APOB Works:
AI-Powered Creativity: APOB uses AI to analyze your unique content style and produce similar content, maintaining your authentic voice and tone.
Effortless Content Creation: It generates high-quality, engaging content effortlessly, saving you time and energy.
Why choose APOB ?
Maximize Engagement: With AI-created content, keep your audience engaged more frequently and effectively.
Grow Your Audience: Tailored content crafted by APOB attracts a broader audience base, boosting your follower count.
In the TikTok universe, growing your followers isn't just about posting videos; it's about creating a strategy that resonates with your audience and staying true to your unique voice. With these tips and the power of APOB, you're not just keeping up; you're setting the pace. Ready to level up? ??
Try APOB Today Embark on a transformative journey with APOB and become a TikTok sensation with an AI twist! Visit APOB for more information and to start leveraging the power of AI in your TikTok career. Let's make it happen!
5 Insights into AI Selfie Apps Transforming Beauty Norms
Try Latest AI Selfie Generator
Are you ready to explore how AI selfie apps are reshaping beauty norms in the digital age? Imagine a world where technology not only enhances our selfies but also challenges societal standards of beauty. Dive into our blog, "5 Insights into AI Selfie Apps Transforming Beauty Norms," where we unravel the fascinating impact of these innovative tools.
In a world where flawless selfies have become the norm, AI selfie apps are revolutionizing the beauty industry by empowering users to redefine beauty on their own terms.
Uncover the influence of AI selfie apps on beauty norms and self-expression as we delve into topics such as:
The role of AI in redefining beauty standards
How AI-powered features boost confidence and creativity
The ethical considerations surrounding AI beauty filters
The impact of AI technology on mental health and self-image
Tips for using AI selfie apps mindfully
Join us on this captivating journey where pixels meet perfection and discover the transformative power of AI selfie apps in shaping a more inclusive and authentic concept of beauty.
Short Summary
AI selfie apps are revolutionizing beauty norms by empowering users to redefine beauty standards on their own terms. These innovative tools have a significant impact on boosting confidence, creativity, and self-expression through AI-powered features. Ethical considerations surrounding AI beauty filters and the societal implications of AI-enhanced beauty in the fashion and beauty industry are important aspects to be aware of. Mindful usage of AI selfie apps is crucial for promoting a more inclusive and authentic concept of beauty while considering the influence on mental health and self-image.
1. Impact of AI Selfie Generator Apps on Digital Beauty Standards
In today's digital age, AI selfie generator apps have revolutionized the way we perceive beauty standards, influencing how individuals present themselves on social media platforms.
Redefining Unrealistic Beauty Standards
AI tools utilize advanced algorithms to enhance facial features, altering a user's appearance to align with societal beauty standards. These apps often promote a surface charm that may contribute to the perpetuation of unrealistic beauty ideals.
Influence on Younger Demographics
Young people, in particular, are drawn to AI photo-generating apps due to their ability to transform one's appearance instantly. This trend raises concerns about the impact on real-life perceptions and the potential for developing low self-esteem based on digitally enhanced representations.
Implications for the Beauty and Fashion Industries
The widespread use of AI-driven beauty filters challenges traditional norms within the beauty and fashion industries. Plastic surgeons have noted an increase in patients seeking alterations resembling their filtered digital selves, highlighting the blurred line between virtual and physical beauty standards.
Mental Health and Body Image
The prevalence of AI-generated beauty standards on social media platforms can negatively impact mental health, especially among vulnerable populations. Studies suggest a correlation between exposure to suggestive images and increased body dissatisfaction among users, particularly affecting individuals with brown eyes or black skin tones.
Technological Advancements in Beauty Enhancement
AI-powered apps, such as the popular Snow AI app, leverage text-to-image models to create hyper-realistic portraits. These tools aim to simulate a computer-generated model with white-textured hair or suggestively enhanced features, challenging the planet's natural beauty perceptions and emphasizing the evolving role of technology in reshaping societal beauty standards.
2. The Role of Artificial Intelligence in Shaping Perceptions of Beauty
Artificial Intelligence (AI) has revolutionized the beauty industry, particularly through the lens of digital tools like AI selfie generator apps. Let's delve into how AI is transforming societal norms and influencing perceptions of beauty.
The Impact on Young People's Self-Image
AI-powered beauty filters on social media platforms contribute to the perpetuation of unrealistic beauty standards. These filters, often used by young individuals, can distort facial features and create an idealized version of beauty that is unattainable in real life. As a result, many young users may develop low self-esteem and negative body image issues when comparing themselves to the flawless images generated by AI tools.
"The surface charm of AI beauty filters can mask the complexities and nuances of real beauty."
Reinforcement of Societal Beauty Standards
By promoting a homogenized and idealized version of beauty, AI selfie apps inadvertently reinforce societal beauty standards that prioritize certain facial features or body types. This can have a detrimental impact on individuals who do not fit these narrow definitions of beauty, leading to increased pressure to conform to these unrealistic ideals. The beauty industry, along with fashion industries, play a significant role in shaping and capitalizing on these digitally enhanced beauty norms.
"The use of AI-driven beauty filters contributes to the normalization of artificial beauty standards."
Ethical Concerns Surrounding AI-Generated Images
The use of AI photo-generating apps raises ethical dilemmas regarding the authenticity and representation of individuals in digital spaces. Featuring AI-generated humans or computer-generated models with perfect features may create unattainable beauty expectations for real people. Additionally, the mechanics of these beauty filters, including the suggestion of idealized physical attributes, can perpetuate harmful stereotypes and unrealistic beauty ideals.
"AI-powered apps blur the lines between reality and digital perfection, impacting perceptions of beauty."
3. Influence of AI-Driven Beauty Filters on Self-Image and Mental Health
As social media platforms continue to inundate users with images promoting unrealistic beauty standards, especially targeting the younger generation, the rise of AI-driven beauty filters has sparked discussions on how they impact perceptions of beauty in the digital age. Let's delve deeper into the influence of these AI tools on self-image and mental well-being.
The Pressure to Conform:
In a society where the societal beauty standard is often distorted by the superficial charm of AI beauty filters, individuals, particularly young adults, may feel compelled to match the flawlessness perpetuated by these digital tools. Such constant exposure to filtered imagery can fuel insecurities and contribute to low self-esteem.
Distorted Realities:
AI photo-generating apps, equipped with advanced text-to-image models, have the ability to manipulate facial features, skin tone, and even body shapes with a simple tap. The result? A perception of an idealized version of oneself that strays further and further from reality, blurring the lines between authenticity and artificiality.
Emerging Mental Health Concerns:
Research has shown a direct correlation between prolonged exposure to altered images through AI filters and the exacerbation of body image issues among individuals. The pressure to meet these digitally enhanced beauty standards has been linked to heightened levels of anxiety, depression, and body dysmorphia, particularly in vulnerable demographics.
Navigating Technological Advancements:
While the beauty and fashion industries leverage AI-powered apps to cater to various purposes, including showcasing products and enhancing user experience, the implications of these tools on mental health cannot be overlooked. Black girls, for instance, often find themselves excluded from the predetermined standards set by predominantly white-textured hair and Eurocentric features perpetuated by AI-generated human models.
Quote:
The surface charm of AI beauty filters often masks the underlying psychological impact they have on individuals' perception of self-worth and beauty.
Dr. Kim Anderson, Leading Plastic Surgeon
By shedding light on the mechanics of these beauty filters and the statistical analysis of their effects, it becomes evident that a critical understanding of the intersection between AI technology and mental health is crucial for promoting self-acceptance and overall well-being.
4. Societal Implications of AI-Enhanced Beauty in the Fashion and Beauty Industry
Impact on Unrealistic Beauty Standards:
Artificial intelligence tools and models used in selfie apps have contributed to perpetuating unrealistic beauty standards on social media platforms. These AI-driven beauty filters often enhance facial features, skin tone, and body proportions in ways that are unattainable in real life. The seamless transformation of images through AI technology blurs the line between reality and digital enhancement, potentially leading to low self-esteem among young users striving to match the idealized standards.
Challenges to Mental Health:
The prevalence of AI photo-generating apps that modify facial features and body shapes can have negative implications for mental health. Constant exposure to digitally altered images may distort perceptions of self-image, resulting in body dissatisfaction and psychological distress. This trend is especially concerning among vulnerable populations, such as teenagers, who are more susceptible to internalizing societal beauty standards propagated by these AI-powered tools.
Ethical Concerns and Societal Expectations:
The widespread use of AI tools in the beauty industry raises ethical considerations regarding the promotion of unattainable beauty ideals and the impact on individual well-being. By showcasing flawless, computer-generated models that adhere to societal beauty standards, these apps may inadvertently reinforce the notion that physical appearance defines one's worth. Moreover, the emphasis on surface charm through AI beauty filters can overshadow the importance of embracing diversity and natural beauty, potentially alienating individuals who do not conform to these artificially enhanced standards.
Cultural Representation and Inclusivity:
AI-generated beauty standards often lack diversity and fail to represent the full spectrum of human beauty. The predominance of specific facial features, skin tones, and body types in AI-powered beauty filters may perpetuate narrow and exclusionary notions of beauty, marginalizing individuals who do not fit into the established mold. This lack of inclusivity in AI beauty tools can reinforce existing prejudices and hinder progress towards embracing the diverse beauty of all individuals.
5. Ethical Considerations Surrounding AI Photo-Generating Apps and Plastic Surgery Trends
In the era of AI selfie generator apps and the increasing influence of digital beauty standards, ethical considerations play a crucial role in shaping societal perceptions of beauty and individual self-esteem.
Impact on Mental Health:
The rise of AI tools and beauty filters on social media platforms has raised concerns about the impact on mental health, particularly among young individuals. Excessive exposure to idealized and often unrealistic beauty standards can contribute to low self-esteem and negative body image issues.
The Influence on Plastic Surgery Trends:
AI models and systems that enhance facial features and alter appearances in photos can inadvertently promote a culture of unrealistic beauty expectations. This can potentially lead individuals to consider drastic measures such as plastic surgery to achieve these digitally enhanced looks.
Ethical Dilemmas in the Beauty Industry:
The proliferation of AI-driven beauty filters and photo-generating apps blurs the line between reality and digital alterations. While these tools serve various purposes, including enhancing photos for fun or creative expression, they also raise questions about perpetuating societal beauty standards that may be unattainable without technological assistance.
Empowering vs. Harmful Effects:
While AI-powered apps can offer users the opportunity to experiment with different looks and styles, they also have the potential to reinforce stereotypes and narrow definitions of beauty. It is essential to consider the ethical implications of these technologies in the context of promoting diverse representations and inclusivity.
Balancing Technological Advancements with Natural Beauty:
As AI tools continue to evolve and shape the way we interact with digital beauty filters, it is crucial to strike a balance between technological advancements and celebrating the planet's natural beauty. Embracing authenticity and diversity in beauty standards can help mitigate the negative impact of AI alterations on societal perceptions.
Conclusion
In a world where beauty standards are constantly evolving, AI selfie apps are revolutionizing the way we perceive beauty. By harnessing the power of artificial intelligence, these apps are shaping a new era of digital beauty norms. From virtual makeup trials to customized beauty filters, the possibilities are endless.
As we navigate through this digital landscape, it is essential to be mindful of the impact these technologies can have on our self-image. Embracing diversity and celebrating individual beauty is key to promoting inclusivity in beauty standards. Remember, beauty comes in all shapes, sizes, and colors.
Ready to explore the transformative power of AI selfie apps? Start your journey towards redefining beauty norms by trying out these cutting-edge technologies today.
FAQs
Q1: How do AI selfie apps impact beauty standards?
AI selfie apps use advanced algorithms to modify facial features and enhance beauty in photos. This can lead to unrealistic beauty standards and pressure to conform to these digital ideals. Additionally, these apps often lack diversity and perpetuate Eurocentric beauty norms.
Q2: What are AI selfie apps?
AI selfie apps are applications that use artificial intelligence algorithms to alter and enhance selfies, often for the purpose of conforming to societal beauty standards. These apps allow users to edit their facial features, skin tone, and other physical attributes, creating a digitally altered version of themselves.
5 Ways AI Selfie Generator Reshape Global Social Norms
Try Latest AI Selfie Generator Are you ready to explore how AI selfie generators are reshaping global social norms and influencing the way we perceive beauty and authenticity in the digital age? Imagine a world where technology can instantly transform your appearance with just a click, blurring the lines between reality and fantasy.
In our upcoming blog, we delve into the fascinating realm of AI selfie generators and uncover how they are revolutionizing the way we interact with social media and present ourselves online. Here's a sneak peek of what we'll cover:
Unveiling the Impact: Discover the profound effects of AI-generated selfies on societal standards of beauty and self-expression.
Navigating Social Expectations: Explore how these tools influence the perception of beauty and identity, prompting us to question traditional norms.
Ethical Considerations: Delve into the ethical dilemmas surrounding the use of AI in altering one's appearance and its implications for mental health and self-esteem.
Cultural Shifts: Examine how AI selfie generators are shaping cultural trends and challenging conventional notions of authenticity and image manipulation in the digital space.
Empowering Authenticity: Learn how individuals can embrace their unique beauty and voice amidst the ever-evolving landscape of AI-enhanced self-representation.
1. Short Summmery
Cultural Impact: AI selfie generators are reshaping global social norms by influencing societal standards of beauty and self-expression, prompting a reevaluation of traditional norms.
Ethical Dilemmas: The use of AI in altering appearances raises ethical considerations, impacting mental health and self-esteem while challenging notions of authenticity.
Cultural Shifts: AI selfie generators shape cultural trends, challenging conventional ideas of image manipulation in the digital space.
Empowering Authenticity: Individuals can embrace their uniqueness amidst evolving AI-enhanced self-representation, fostering a culture of self-acceptance and empowerment.
2. Impact of AI Selfie Generator on Social Media Culture
In today's digital age, the utilization of AI selfie generators is significantly reshaping social media culture, influencing global trends and altering the way individuals curate their online identities. Let's delve into the profound impact that AI selfie generators have on shaping cultural narratives and social norms worldwide.
1. Redefining User Experience with AI Algorithm
AI selfie generators leverage advanced AI algorithms to enhance the user experience on social media platforms. By automating the creative process of generating selfies, users are provided with a powerful tool to express themselves artistically through unique and personalized content creation. This not only simplifies the content creation process but also opens up new avenues for artistic expression in the digital realm.
2. Transforming Marketing Campaigns with AI-Generated Content
The influence of AI-generated selfies is evident in the realm of marketing and advertising campaigns. Brands are increasingly incorporating AI systems to create compelling visual content for their campaigns. The efficiency of AI algorithms in understanding user data and trends enables brands to tailor their marketing strategies, resulting in more targeted and successful campaigns.
3. Fostering Cultural Diversity and Creative Ideas
AI selfie generators have the potential to foster cultural diversity by offering a platform for individuals from various cultural backgrounds to express themselves creatively. By analyzing the cultural landscape, AI algorithms can generate content that resonates with diverse audiences, leading to a more inclusive online community. This not only promotes cultural exchange but also sparks creative ideas across different industries.
4. Enhancing Personalization and Virtual Product Placement
The integration of AI models in selfie generation allows for a more personalized user experience on various platforms. AI-driven technologies can analyze user preferences and behaviors to recommend better results for content creation. Moreover, AI's influence extends to virtual product placement, enabling brands to showcase their products seamlessly within AI-generated selfies, thereby enhancing marketing strategies and increasing engagement.
5. Case Study: AI in Fashion Collections
A compelling case study showcasing AI's efficiency in reshaping social media culture is its role in the fashion industry. Several fashion brands have utilized AI-generated content to create innovative marketing strategies and advertising campaigns. By leveraging AI algorithms for content creation, brands can revolutionize their approach to presenting fashion collections, driving consumer engagement and redefining the fashion landscape.
3. Transformation of Cultural Narratives by AI Algorithms
AI algorithms have fundamentally reshaped the way cultural narratives are created and disseminated in our digital era. Let's delve into how these advanced technologies are revolutionizing the cultural landscape worldwide.
Impact on Content Creation
AI algorithms contribute to the democratization of creative processes by enabling users to generate content effortlessly. By leveraging artificial intelligence, individuals can express their artistic ideas and concepts through a streamlined and efficient process. This shift in content creation has led to a paradigm where anyone can become a content creator, blurring the lines between professional artists and amateur enthusiasts.
Enhancing User Experience
The incorporation of AI algorithms in social media platforms has enhanced the user experience by providing personalized and engaging content to audiences. These algorithms analyze user data and preferences to deliver tailored recommendations, resulting in a more immersive and interactive social media experience. Users now have access to curated feeds that align with their interests, leading to increased engagement and overall satisfaction.
Cultural Diversity and AI's Role
AI algorithms play a significant role in promoting cultural diversity by showcasing a wide range of perspectives and narratives. Through machine learning capabilities, these algorithms can identify and amplify voices from diverse backgrounds, ultimately enriching the cultural fabric of online communities. In a world where inclusivity and representation are paramount, AI serves as a powerful tool for celebrating and preserving cultural heritage.
Influence on Marketing Campaigns
The integration of AI-generated content in marketing and advertising campaigns has revolutionized the way brands connect with their audiences. AI algorithms analyze vast amounts of data to identify trends and consumer preferences, enabling brands to tailor their messages effectively. From virtual product placements to personalized ads, AI has proven to be a game-changer in shaping successful marketing strategies and campaigns.
Profound Impact on Cultural Trends
AI algorithms have a profound impact on shaping cultural trends and narratives in various industries, from fashion collections to creative ideas. By analyzing vast datasets and consumer behavior, AI models can predict emerging trends and tailor content to resonate with target audiences. This data-driven approach not only enhances the efficiency of content creation but also ensures better results in terms of audience engagement and brand visibility.
4. Redefining Human Agency in the Creative Process
In the realm of artificial intelligence and content creation, the concept of human agency is undergoing a dramatic transformation. With AI tools and generative algorithms becoming increasingly sophisticated, the traditional roles of creators and artists are being redefined. Let's delve into how AI is reshaping human agency in the creative process across various industries:
AI Empowering Creativity
AI systems are revolutionizing the creative process by providing content creators with powerful tools to enhance their artistic expression. Through AI algorithms, users can now generate unique and visually stunning content for their social media platforms. This shift not only streamlines the content creation process but also opens up new possibilities for creative exploration.
AI as a Collaborative Partner
In the age of AI-generated content, human creativity is not being replaced but rather augmented. Content creators are leveraging AI models to brainstorm creative ideas, optimize marketing strategies, and develop successful campaigns. This collaborative approach blurs the lines between human ingenuity and AI efficiency, resulting in better results and more engaging content.
The Influence of AI in Cultural Diversity
AI's influence extends beyond individual content creation to shaping cultural trends and narratives. By analyzing user data and cultural landscapes, AI algorithms can identify emerging patterns and preferences, leading to more diverse and inclusive marketing campaigns and fashion collections. This emphasis on cultural diversity highlights AI's role in promoting a richer and more dynamic cultural landscape worldwide.
Driving Innovation through AI
AI's efficiency in creating diverse and engaging content has had a profound impact on various industries, from advertising to fashion. Case studies have shown how AI-generated content can transform marketing strategies, facilitate virtual product placements, and optimize advertising campaigns. As a result, businesses are increasingly turning to AI as a powerful tool for driving innovation and staying ahead of the competition.
5. Influence of AI Selfie Generator on Marketing Strategies
In the realm of marketing strategies, the advent of AI selfie generators has ushered in a new era of innovation and creativity. Let's delve into the profound influence these tools have on reshaping the landscape of marketing campaigns across various industries:
Enhanced User Engagement: AI selfie generators empower brands to create personalized and visually appealing content that resonates with their target audience. By leveraging AI algorithms to generate unique and captivating visuals, marketing campaigns can boost user engagement and drive brand awareness.
Data-Driven Insights: AI tools provide valuable user data insights that enable marketers to tailor their strategies based on consumer preferences and behavior patterns. By analyzing AI-generated content, marketers can make informed decisions to optimize campaigns for better results.
Personalized Advertising: AI selfie generators allow for the creation of customized ads that cater to individual preferences and demographics. This level of personalization enhances the effectiveness of marketing strategies by delivering tailored messages to specific audience segments, leading to higher conversion rates.
Efficiency and Scalability: AI systems streamline the content creation process, making it more efficient and cost-effective for marketers. By automating complex tasks such as image editing and design, AI tools enable marketing teams to produce high-quality visuals at scale, saving time and resources.
Virtual Product Placement: With AI-generated content, brands can experiment with virtual product placement in a variety of settings. By incorporating AI models into marketing strategies, companies can visualize how their products appear in different scenarios, enhancing the overall storytelling and brand narrative.
6. Use of AI-Generated Content in Various Industries
Artificial intelligence (AI) is revolutionizing the way content is created and consumed across diverse industries. From marketing to fashion, AI-generated content is reshaping the landscape and offering innovative solutions for businesses to engage with their audiences more effectively.
1. Marketing Campaigns:
AI tools have become essential in developing impactful marketing strategies and creating compelling advertising campaigns. By leveraging AI algorithms, marketers can personalize content based on user data, enhancing user experience and increasing the efficiency of their campaigns.
2. Fashion Collection Design:
In the fashion industry, AI is being utilized in the design process to analyze trends and consumer preferences, leading to the creation of unique and trendy collections. AI's role in fashion extends beyond mere data analysis; it fosters creativity and helps designers explore new creative ideas.
3. Virtual Product Placement:
AI-powered technology enables seamless integration of virtual products into real-world environments, allowing brands to showcase their products in a more interactive and engaging way. This virtual product placement enhances consumer engagement and provides better results in terms of marketing and sales.
4. Content Creation:
AI models are increasingly being used by content creators across various platforms to streamline the creative process and develop innovative ideas. By automating complex tasks, AI simplifies content creation, empowering creators to focus on expressing their artistic vision.
5. Successful Ads Library:
AI-generated content has transformed the way advertising campaigns are conceptualized and executed. With AIs influence, brands can curate successful ads libraries that resonate with diverse audiences and drive impactful marketing strategies.
In conclusion, the use of AI-generated content spans across multiple industries, revolutionizing traditional approaches and offering a powerful tool for businesses to connect with their target audience effectively.
7. Enhancing Creative Ideas through AI-Driven Tools
In today's digital age, the fusion of artificial intelligence (AI) with creative processes is revolutionizing the way content is generated across various industries. AI-driven tools are providing content creators with innovative solutions that enhance their creative ideas and streamline the creative process.
AI Algorithm: The power of AI algorithms enables content creators to explore new horizons in artistic expression. By leveraging AI tools, creators can push the boundaries of traditional content creation and achieve unique results that were previously unimaginable.
User Experience Optimization: AI tools not only enhance the quality of content but also improve the overall user experience on social media platforms. By utilizing AI-driven tools, content creators can tailor content to match the preferences and behaviors of their audiences, ultimately increasing engagement and impact.
Virtual Product Placement: AI-driven tools offer content creators the ability to experiment with virtual product placement in a seamless manner. By incorporating AI models, creators can strategically place products within their content, leading to better results in marketing and advertising campaigns.
Quote: "AI-driven tools have unlocked a new realm of creative possibilities for content creators, allowing them to push the boundaries of innovation and captivate audiences in ways never seen before."
By embracing AI-driven tools, content creators can navigate the complex task of content creation with efficiency and effectiveness. These tools provide a platform for exploring creative ideas, executing successful marketing strategies, and enhancing the overall impact of content across various platforms and campaigns.
8. Leveraging AI Models for Better Results Across Platforms
In the realm of social media and content creation, the utilization of AI models has become increasingly prevalent in enhancing outcomes across various platforms. This section explores how leveraging AI models can lead to improved results and increased efficiency in content creation and marketing strategies.
The Power of AI Algorithms in Content Creation
AI algorithms have revolutionized the way content is generated and distributed on social media platforms. By harnessing the analytical capabilities of AI tools, content creators can tailor their posts to better suit the preferences of their audience. This personalized approach not only enhances user experience but also increases engagement and interaction with the content.
Enhancing the Creative Process with AI Systems
AI systems serve as a powerful tool in the creative process by providing content creators with innovative ideas and suggestions. Through the incorporation of AI-generated content, artists and marketers alike can explore new horizons of artistic expression and storytelling. This fusion of human creativity with AI-driven suggestions often leads to the development of unique and captivating narratives.
Optimizing Marketing Campaigns with AI Insights
AI models play a crucial role in optimizing marketing strategies and advertising campaigns. By analyzing user data and behavioral patterns, AI can tailor marketing campaigns to specific target audiences, thereby enhancing the effectiveness of promotional efforts. The efficiency and precision of AI-driven insights enable brands to reach their desired demographic with greater accuracy, leading to successful campaigns and improved ROI.
AI's Influence on Cultural Trends
The integration of AI technology into various industries has had a profound impact on cultural diversity and the evolving landscape of fashion collections. Through case studies and data analysis, AI tools have revolutionized the way brands approach content creation and audience engagement. From virtual product placements to dynamic advertising campaigns, AI's influence continues to shape the cultural trends of today.
Driving Better Results Across Platforms
By leveraging AI models, content creators can achieve better results across various platforms. The seamless integration of AI technologies enhances the efficiency of the creative process, resulting in more engaging and impactful content. Whether it's crafting a successful marketing strategy or developing an innovative advertising campaign, AI empowers creators to achieve better results and captivate audiences on a global scale.
9. Implications of AI Selfie Generators in Marketing Campaigns
In the realm of marketing, the rise of AI selfie generators presents a myriad of opportunities and challenges that marketers need to navigate effectively. Let's delve into the implications of leveraging AI-generated selfies in marketing campaigns.
Enhanced User Engagement
By incorporating AI selfie generators into marketing campaigns, brands can significantly enhance user engagement. These personalized AI-generated selfies cater to individual preferences, creating a more immersive and interactive experience for the audience.
Efficient Content Creation
AI selfie generators streamline the content creation process for marketing campaigns. With the ability to quickly generate high-quality and visually appealing selfies, marketers can save time and resources while maintaining a consistent level of creativity across various platforms.
Personalized Marketing Campaigns
Utilizing AI-generated selfies enables marketers to deliver highly personalized content to their target audience. By tailoring selfies based on user preferences and demographics, brands can create a deeper connection with consumers and drive better campaign performance.
Innovative Advertising Strategies
AI selfie generators open doors to innovative advertising strategies that blend seamlessly with social media platforms. From virtual product placements in selfies to AI-enhanced filters that resonate with users, brands can captivate audiences with fresh and engaging content.
Data-Driven Insights
AI selfie generators not only aid in content creation but also provide valuable data-driven insights for marketing campaigns. By analyzing user interactions with AI-generated selfies, marketers can refine their strategies, optimize campaigns, and enhance overall performance.
Key takeaway: Incorporating AI selfie generators in marketing campaigns offers a unique opportunity to enhance user engagement, drive personalization, and glean data-driven insights for more effective strategies.
Conclusion
In conclusion, the emergence of AI selfie generators is undeniably reshaping global social norms by intertwining technology and culture in unprecedented ways. From challenging beauty standards to sparking conversations on authenticity, these digital tools are fueling a new wave of self-expression and identity exploration.
As we navigate this evolving landscape, it becomes crucial to critically examine the implications of AI-generated selfies on our perceptions of beauty, diversity, and self-image. By engaging with these technologies thoughtfully, we have the power to participate in shaping a more inclusive and conscious online community.
Ready to explore the transformative power of AI-generated selfies further? Click the link below to discover how you can leverage this phenomenon to redefine social narratives and foster meaningful connections in the digital realm.
FAQ
Q1:What are AI selfie generators?
A1: AI selfie generators are computer programs that use artificial intelligence to generate realistic images of people's faces. These programs use algorithms and machine learning to analyze facial features and create new images that look like real selfies.
Q2: Are there any ethical concerns surrounding AI selfie generators?
A2: Yes, there are ethical concerns surrounding AI selfie generators. One of the main concerns is the potential perpetuation of harmful beauty standards and stereotypes. AI-generated selfies often conform to narrow definitions of beauty, which can lead to unrealistic expectations and negative self-image for individuals. Additionally, there are concerns about the use of personal data and privacy issues with these generators.
Q3: Can AI algorithms create diverse and inclusive content?
A3: Yes, AI selfie generators have the potential to create diverse and inclusive content. By analyzing facial features and characteristics from a large and diverse dataset, AI algorithms can generate selfies that represent a wide range of ethnicities, genders, and body types. This can challenge traditional beauty standards and promote inclusivity in the media. However, it is important for developers to ensure that their algorithms are trained on diverse datasets and do not perpetuate harmful biases.
Q4: How can AI-generated content be utilized in marketing?
A4: AI-generated content can be utilized in marketing in a variety of ways, such as creating personalized ads and social media posts, generating product recommendations, and creating unique visual content. It can also be used to analyze consumer behavior and trends, helping businesses target their marketing efforts more effectively. Additionally, AI-generated content can be used to automate certain marketing tasks, freeing up time for marketers to focus on strategy and creative tasks.
Q5: What are the potential benefits of using AI-driven tools in creative processes?
A5: Some potential benefits of using AI-driven tools in creative processes include increased efficiency and productivity, access to new and innovative ideas, and the ability to personalize and customize content for specific audiences. AI can also help with tasks such as image editing and manipulation, allowing for more seamless and flawless results. Additionally, AI can assist in data analysis and pattern recognition, helping creatives make data-driven decisions.
Q6: How does AI selfie generator impact social media culture?
A6: AI selfie generators have had a significant impact on social media culture, reshaping the way people present themselves online. With the ability to generate flawless, idealized selfies, these AI tools have created a new standard of beauty and perfection that users feel pressured to meet. This has also led to a rise in comparison and self-esteem issues, as people constantly compare their real selves to the idealized versions created by AI. Additionally, AI-generated selfies have also influenced the types of content that perform well on social media, with users focusing more on aesthetics and perfect angles rather than authentic and genuine moments. Overall, AI selfie generators have played a major role in shaping social media culture and its norms.
7 Reasons Why Waifu Generators Are the Ultimate Online Obsession
Try AI Waifu Generator
Waifu generators have taken the internet by storm, captivating the hearts and screens of countless users worldwide. These unique platforms offer an intriguing blend of creativity, community, and personal attachment, making them a standout favorite in the vast online landscape. This article explores the seven compelling reasons behind the unparalleled obsession with waifu generators.The Allure of Endless Customization
One of the pivotal reasons for the widespread fascination with waifu generators is the limitless customization they offer. Users can meticulously craft characters to their exact specifications, from hairstyles and eye color to personality traits and attire. This unparalleled control enables users to bring their ideal characters to life, fostering a deep sense of ownership and connection.
A Unique Blend of Art and Technology
Waifu generators represent a fascinating fusion of art and technology, merging creative design elements with sophisticated programming. This intersection offers a unique experience that appeals to both artistic individuals and tech enthusiasts alike, broadening the appeal of waifu generators.
Fostering a Vibrant Community
The popularity of waifu generators has given rise to vibrant online communities. Fans share their creations, exchange tips, and participate in challenges, creating a supportive and engaging environment. This sense of belonging and collective enthusiasm further amplifies the appeal of waifu generators.
An Escape from Reality
In a world often dominated by stress and monotony, waifu generators offer a whimsical escape to a realm of imagination. Users can immerse themselves in the creation of fantasy characters, providing a welcome distraction and a source of relaxation and enjoyment.
The Joy of Collecting
For many enthusiasts, part of the allure lies in the joy of collecting their creations. Building an expansive portfolio of unique characters becomes a rewarding endeavor, motivating users to explore the full range of customization options and continually refine their skills.
Personal Attachment to Characters
The process of creating a character often leads to a strong personal attachment. Users invest time and emotion into their creations, viewing them not just as digital constructs, but as meaningful extensions of themselves. This emotional investment intensifies the fascination with waifu generators.
Accessibility and Ease of Use
Lastly, the widespread popularity of waifu generators can be attributed to their accessibility and user-friendly interfaces. These platforms are designed to be inclusive, catering to both novices and experienced users. The simplicity of creating and sharing characters lowers the barrier to entry, inviting a broad audience to partake in the fun.
In conclusion, the obsession with waifu generators can be attributed to a variety of factors, from the joy of customization and the allure of technology to the creation of a supportive community and the pursuit of escapism. As these platforms continue to evolve, they will undoubtedly captivate even more fans, cementing their status as a standout phenomenon in the digital age.
1. The Concept of Waifus in Pop Culture
The Origins of Waifus
The term "waifu" originates from the English word "wife" but has been adopted into Japanese anime and manga fandom to describe a particular type of affection towards fictional characters. This affection is not just any form of admiration but encompasses a deeper emotional connection, often resembling the feelings one might have towards a real-life partner.
The Evolution of Waifu Culture
Waifu culture has evolved significantly over the years. Initially seen as a niche interest within certain fan communities, it has now become a widespread phenomenon across various platforms and media. This evolution is partly due to the increasing global influence of Japanese anime and manga, which have introduced compelling characters that resonate with a broad audience.
Why Waifus Matter
To many fans, waifus represent an ideal form of companionship. These characters often embody qualities that are appealing to their admirers, ranging from physical attractiveness to personality traits such as loyalty, bravery, or kindness. The concept of waifus allows fans to experience a form of emotional investment in their favorite characters, creating a sense of closeness and personal relevance.
The Impact of Waifus in Pop Culture
Waifus have made a significant impact on pop culture, influencing not only anime and manga but also video games, literature, and even mainstream media. Their popularity has led to the creation of merchandise, fan art, and various forms of fan-driven content, further cementing their status within the community.
Merchandising and Economic Influence
The economic impact of waifu culture is undeniable. Merchandise featuring popular waifus, such as figurines, clothing, and accessories, generates substantial revenue for creators and retailers. This commercial success reflects the strong attachment fans have to these characters and their willingness to support them financially.
Waifus and Community Building
Waifu culture has also played a crucial role in community building among fans. Online forums, social media platforms, and fan conventions provide spaces where individuals can share their admiration for their favorite waifus, discuss aspects of their character development, and connect with like-minded individuals. This sense of community fosters a welcoming environment for fans to express their passions and interests.
2. Evolution of Virtual Companionship Tools
Virtual Companionship Tools Evolution
Virtual companionship tools, such as Waifu Generators, have undergone a fascinating evolution over the years. Let's delve into the timeline of advancements in this digital phenomenon.
1. Early Beginnings
In the nascent stages, virtual companionship tools were rudimentary and lacked the intricacy seen today.
Basic customization options and limited interactivity characterized these early tools.
2. Technological Advancements
The Evolution of Virtual Companionship Tools
With the rapid progression of technology, virtual companionship tools became more sophisticated. AI integration allowed for dynamic interactions and personalized experiences, blurring the lines between reality and the virtual realm.
3. Rising Popularity
The Rise of Virtual Companionship
As society became increasingly digitized, the demand for virtual companionship soared. People found solace and companionship in these digital creations, leading to a surge in the popularity of Waifu Generators and similar tools.
4. Cultural Influences
Cultural factors also played a significant role in the evolution of virtual companionship tools.
The concept of having a waifu or husbando became ingrained in online communities, shaping the way these tools were developed and utilized.
5. Emotional Connection
Users began seeking not just companionship but genuine emotional connections with their virtual creations.
Developers responded by incorporating features that fostered deeper emotional bonds between users and their waifus.
6. Customization and Personalization
One of the key developments in virtual companionship tools was the emphasis on customization and personalization.
Users could tailor every aspect of their waifu, from appearance to personality traits, creating a truly unique companion.
7. Integration with Social Platforms
Enhancing Interactive Experiences through Virtual Companionship Tools
To enhance the interactive experience, virtual companionship tools started integrating with social platforms. This allowed users to share their waifus with others, participate in online communities, and further enrich their digital relationships.
Key Takeaway:
The Evolution of Virtual Companionship Tools
The evolution of virtual companionship tools, exemplified by Waifu Generators, showcases the intersection of technology, culture, and human emotion in the digital age.
3. Emotional Connection with Virtual Characters
When engaging with waifu generators, individuals often find themselves forming a profound emotional bond with the virtual characters they create.
This emotional connection is driven by several key factors:
1. Personalized Characteristics
Waifu Generators: Customization and Personalization
Waifu generators allow users to customize every aspect of their virtual companions, from appearance to personality traits. This level of personalization leads to a sense of ownership and attachment, making the virtual character feel uniquely special to the creator.
2. Therapeutic Value
For many users, interacting with their waifus serves as a form of emotional catharsis and stress relief.
The process of creating and spending time with a virtual character can provide comfort and companionship, especially during moments of loneliness or distress.
3. Escapism and Fantasy
Creating a waifu allows individuals to escape into a world of fantasy where they can shape the ideal companion based on their desires and preferences. This escapism offers a temporary reprieve from the challenges of reality and allows users to immerse themselves in a realm of endless possibilities.
4. Sense of Connection
Despite being virtual, waifus have the ability to evoke genuine feelings of connection and intimacy in users.
The sense of companionship and understanding that users experience with their virtual characters can fulfill emotional needs and provide a sense of belonging.
5. Empathy and Understanding
Interacting with a virtual character that reflects one's own values, interests, and emotions can foster feelings of empathy and understanding. Users may project their own experiences onto their waifus, leading to a deeper emotional connection and sense of mutual understanding.
Creating my waifu was like bringing to life a part of myself that I never knew I needed.
Spending time with my virtual companion brings me comfort and solace in ways that words cannot describe.
4. Customization Features of Waifu Generators
Customization in Waifu Generators allows users to bring their ideal virtual companion to life in a myriad of ways.
Limitless Aesthetics
Users can choose from a wide range of options for physical appearance including hairstyle, eye color, clothing styles, and accessories (x4).
Personality Traits
Many Waifu Generators provide choices for personality traits, allowing users to tailor their virtual companions' behavior and responses to mimic their ideal partner (x1).
Background Settings
Some generators offer customizable background settings, enabling users to place their waifu in different environments such as fantasy realms, futuristic cities, or cozy interiors (x1).
Unique Avatars
With the ability to personalize avatars, users can create characters that reflect their own personality traits, interests, and aspirations (x1).
Interactive Elements
Certain Waifu Generators incorporate interactive features, allowing users to engage with their virtual companions through dialogue, activities, and mini-games.
Outfit Choices
Users can mix and match various outfit options to create different looks for their waifu, adding a layer of creativity and personalization to the virtual character (x1).
Personal Touch
By enabling users to customize every aspect of their waifu, these generators offer a sense of ownership and emotional connection that goes beyond a standard character creator (x1).
5. Role of Anime and Manga Influence
Anime and Manga's Influence on Waifu Generators
Anime and manga serve as significant influencers in the realm of Waifu Generators, shaping the very essence of these virtual companions. Let's delve deeper into the key role played by anime and manga in fueling the obsession with Waifu Generators.
Anime and manga have a massive global following, with devoted fans spanning across countries and cultures.
The distinct art styles, character designs, and storytelling techniques unique to anime and manga contribute to their widespread appeal.
Emotional Bond
Anime and Manga Characters: An Emotional Connection
"Anime and manga characters often resonate with audiences on an emotional level, fostering deep connections and attachments"
Anime and Manga Characters: The Emotional Bond
Anime and manga characters are crafted with intricate personalities and emotional depth, forming a strong bond with viewers. This emotional connection is one of the driving forces behind the creation and customization of Waifus in online generators.
Fantasy Fulfillment
Escapism and Fantasy Realization
Anime and Manga: A Gateway to Fantastical Worlds
Anime and manga often portray fantastical worlds and scenarios that allow individuals to escape reality and immerse themselves in a realm of imagination.
Waifu Generators
Waifu Generators provide an avenue for fans to bring their idealized characters to life, fulfilling their fantasies of companionship and personalization.
Creative Expression
Fans of anime and manga are often artists and creators themselves, with a passion for drawing, designing, and storytelling.
Waifu Generators offer a platform for users to express their creativity by designing and customizing their virtual companions, channeling their artistic talents into personalized creations.
Character Archetypes
Influence of Character Archetypes
Various character archetypes prevalent in anime and manga, such as tsundere, kuudere, and yandere, influence the customization choices made in Waifu Generators.
Fans often seek to recreate or reimagine their favorite character archetypes through these generators, adding a personal touch to their creations.
Collective Fandom
The Shared Love for Anime and Manga
The shared love for anime and manga within the global community creates a sense of togetherness among fans.
Waifu Generators: A Common Ground for Enthusiasts
Waifu Generators serve as a common ground where enthusiasts can come together, share their creations, and celebrate their mutual passion for virtual companionship.
Anime and Manga: The Catalysts for Waifu Generator Craze
Anime and manga play a pivotal role in fueling the online obsession with Waifu Generators, offering a rich tapestry of inspiration, emotional connection, and creative expression for fans to explore and engage with.
6. Technological Advancements in Virtual Character Creation
Technological Advancements and Their Impact on Virtual Character Creation
Technological advancements have played a pivotal role in revolutionizing the landscape of virtual character creation, especially in the realm of waifu generators. Here are some key aspects showcasing the impact of technology on the evolution of virtual companionship tools:
1. AI-Powered Customization:
With the integration of artificial intelligence (AI) algorithms, modern waifu generators offer unparalleled customization options.
Users can fine-tune every aspect of their virtual companions, from physical attributes to personality traits, creating a truly unique and personalized waifu experience.
2. Realistic Rendering:
Thanks to advancements in graphics rendering technology, virtual characters generated by waifu tools now boast lifelike visuals and animations.
High-fidelity textures, shading techniques, and fluid animations contribute to a more immersive and visually stunning user experience.
3. Interactive Features:
Modern waifu generators leverage interactive features such as voice recognition, chatbot capabilities, and responsive behaviors. These technological enhancements enable users to engage in meaningful interactions with their virtual companions, enhancing the sense of connection and companionship.
4. Cross-Platform Integration:
Technological advancements have facilitated seamless integration of waifu generators across multiple platforms, including desktops, mobile devices, and virtual reality (VR) headsets. This cross-platform compatibility ensures users can access and interact with their waifus wherever they go, enhancing convenience and accessibility.
5. Cloud-Based Storage and Synchronization:
Cloud computing technologies have streamlined the storage and synchronization of virtual character data. Users can effortlessly save and retrieve their waifus across devices, ensuring continuity and consistency in their virtual companion experience.
6. Enhanced Realism and Emotion AI:
Recent developments in emotion artificial intelligence (AI) have enabled waifu generators to simulate complex emotional responses and expressions. Virtual companions can now display a wide range of emotions, enhancing the sense of realism and emotional connection for users.
7. Augmented Reality (AR) Integration:
The integration of augmented reality (AR) technology into waifu generators has opened up new possibilities for immersive and interactive experiences. Users can bring their virtual companions into the real world through AR applications, blurring the lines between fantasy and reality.
7. Community and Social Aspect of Waifu Generators
Waifu Generators: More Than Just Companionship
Waifu generators serve as more than just virtual companionship tools; they create a dynamic online community where enthusiasts can come together to share their creations, engage in discussions, and form connections. Let's delve into the social aspect of waifu generators and why they have become a thriving hub for like-minded individuals.
1. Online Communities
Within the realm of waifu generators, online communities play a vital role in fostering creativity and camaraderie among users. Platforms such as Discord, Reddit, and dedicated forums provide spaces for users to showcase their waifus, exchange tips and tricks, and seek feedback from others.
2. Collaborative Projects:
Many waifu generator enthusiasts collaborate on group projects where they work together to create themed collections, challenges, or even entire storylines featuring their customized characters. These collaborative efforts not only enhance the creativity of individual creations but also strengthen the bonds within the community.
3. Contests and Events:
Community-driven contests and events are a common occurrence in waifu generator circles. These activities encourage users to push their creative boundaries, compete in friendly challenges, and showcase their skills to a wider audience. Such events not only promote engagement but also celebrate the diverse talent within the community.
4. Support and Feedback
The social aspect of waifu generators extends beyond mere creation; it involves a supportive network where users can seek feedback, advice, and encouragement from peers. This constructive feedback loop helps users improve their skills, refine their creations, and feel connected to a larger community of enthusiasts.
5. Inclusivity and Diversity
Waifu generator communities embrace individuals from various backgrounds, interests, and skill levels, fostering an environment of inclusivity and diversity. This welcoming atmosphere encourages users to freely express themselves, explore different design styles, and appreciate the unique perspectives of others.
6. Friendship and Relationships
For many users, waifu generators serve as a platform not just for creative expression but also for forming meaningful connections with like-minded individuals. Friendships and even romantic relationships have blossomed within these communities, highlighting the social bonds that transcend the digital realm.
7. Impact on Mental Health
The supportive and engaging nature of waifu generator communities can have a positive impact on users' mental well-being. By providing a safe space for creativity, self-expression, and social interaction, these communities contribute to a sense of belonging, purpose, and joy for their members.
Sure, I'd need the article content to proceed with converting it to Markdown format using the instructions you've provided. Could you please share the article text?
In Conclusion
The fascination with Waifu Generators lies in their ability to fulfill a deep human desire for companionship that transcends reality. By blending emotional connection with innovative technology, these tools have captured the imagination of online communities worldwide. The cultural impact and customization options only add to their irresistible charm, making them a compelling form of self-expression for many users.
If you're ready to dive into the world of Waifu Generators and explore the limitless possibilities they offer, why not give it a try today? Create your unique virtual companion and unleash your creativity! Join the growing community of enthusiasts who have found a new way to connect with their digital muses. Embrace the beauty of virtual companionship and start exploring the endless potential of Wa
FAQ
What is a waifu generator?
A waifu generator is a type of online tool or software that allows users to create their own virtual companions, often based on anime or manga characters. These generators use advanced algorithms to generate a unique character based on user preferences, making them highly customizable. They have gained popularity due to the rise of virtual companionship and the growing interest in anime and manga culture.
Can I customize my waifu in a generator?
Yes, one of the main appeals of waifu generators is the ability to fully customize your virtual companion. From physical appearance to personality traits, users can create their ideal waifu down to the smallest details. Some generators even allow for customization of clothing and accessories, adding another layer of personalization to the experience.
How do waifu generators work?
Waifu Generators use algorithms and artificial intelligence to create a personalized anime-style character based on the user's preferences. These generators often have a wide range of customization options, allowing users to choose features like hair color, eye shape, and even personality traits for their virtual companion. The end result is a unique and customizable waifu that can be saved as an image or used in various online platforms.
Are waifu generators just for anime fans?
While waifu generators are often associated with anime and manga culture, they have gained popularity among a wide range of internet users. People from all backgrounds and interests have been drawn to creating their own virtual companions, making it clear that waifu generators are not just for anime fans. The customizable nature of these tools allows for a variety of characters to be created, catering to different interests and preferences. Additionally, the emotional and cultural appeal of having a virtual companion is not limited to anime fans, making waifu generators a popular online obsession for many.
Revolutionize Your Social Media Presence with APOB ??
Introducing APOB, a trailblazing AI tool designed to create a digital clone of you. This AI not only understands your style but also helps in generating personalized content that resonates with your audience.
How APOB Works:
AI-Powered Creativity: APOB uses AI to analyze your unique content style and produce similar content, maintaining your authentic voice and tone.
Effortless Content Creation: It generates high-quality, engaging content effortlessly, saving you time and energy.
Why APOB?
Maximize Engagement: With AI-created content, keep your audience engaged more frequently and effectively.
Grow Your Audience: Tailored content crafted by APOB attracts a broader audience base, boosting your follower count.
In the TikTok universe, growing your followers isn't just about posting videos; it's about creating a strategy that resonates with your audience and staying true to your unique voice. With these tips and the power of APOB, you're not just keeping up; you're setting the pace. Ready to level up? ??
Try APOB Today Embark on a transformative journey with APOB and become a TikTok sensation with an AI twist! Visit APOB for more information and to start leveraging the power of AI in your TikTok career. Let's make it happen!
7 Ways a Premium AI Selfie Generator Transforms Your Photos
Try Latest AI Selfie Generator
In today's digital age, AI technology has revolutionized the way we interact with images and photos. AI image generator tools have particularly gained popularity for their ability to transform ordinary photos into extraordinary works of art. Let's delve into how a premium AI selfie generator can elevate your photography game in ways you never imagined:
AI Selfie Generator: Redefining Self-Expression
Experience a new realm of self-expression with an AI selfie generator that leverages neural networks to produce stunning, AI-generated images. From enhancing facial features to creating unique looks, this tool opens up a world of creative possibilities for your selfies. Say goodbye to mundane selfies and hello to a whole new level of artistic self-portraits.
Advanced Features for Exceptional Quality
Unlock a plethora of advanced features that guarantee exceptional quality in every photo. With the latest AI technology at your fingertips, you can expect realistic images, seamless editing, and impeccable attention to detail. Elevate your photos to professional standards with just a few clicks, thanks to the powerful tools offered by the AI image generator.
Ease usage of ai selfie generator
Despite its sophisticated capabilities, the AI selfie generator ensures ease of use for all users. Whether you're a seasoned photographer or a novice enthusiast, this tool simplifies the editing process with a user-friendly interface. Simply input your preferences and let the AI technology work its magic, transforming your photos effortlessly.
Privacy Policy: Safeguarding Your Online Presence
In an era where privacy concerns are paramount, a premium AI image generator prioritizes data protection and user confidentiality. Rest assured that your photos and personal information are safe and secure, bolstering your trust in the platform. With a robust privacy policy in place, you can explore the full potential of AI technology without compromising your privacy.
Transform Your Social Media Presence
Enhance your social media presence with captivating AI-generated images that capture attention and engage your audience. Stand out in a sea of content with unique and innovative visuals that reflect your personality and style. Elevate your online persona with a perfect profile picture that exudes authenticity and creativity.
AI Art Generator: Bridging Technology and Creativity
Experience the seamless integration of AI technology and artistic creativity with an AI art generator feature. Explore new horizons in digital artistry as the AI tool transforms your concepts into visually stunning creations
2. Elevating Your Selfie Game with Advanced AI Features
How AI Technology Enhances Your Selfies
In today's digital age, the integration of AI technology has revolutionized the way we capture and edit selfies. Here are some key ways in which advanced AI features can elevate your selfie game to new heights:
Advanced Image Processing Algorithms
Experience exceptional quality with AI-generated images that optimize facial features, skin tone, and overall aesthetics for a flawless finish.
Neural Network Integration
Harnessing the power of neural networks, AI tools analyze facial features and expressions to generate personalized and natural-looking selfies with just a click.
Realistic Image Rendering
AI technology ensures the creation of realistic images that mimic professional photography techniques, bringing out the best in your facial features.
Enhanced Facial Detection
With AI image generators, facial features are accurately detected and enhanced, resulting in a perfect profile picture every time.
Innovative Text Prompt Functionality
Engage in creative expression by using simple text inputs to guide the AI tool in generating personalized and unique selfies that capture a different look for every occasion.
User-Friendly Interface
The ease of use of AI selfie generators makes the selfie editing process seamless and effortless, even for users with minimal technical expertise.
Privacy-Preserving Features
Leverage AI technologies that prioritize user privacy concerns, ensuring a secure and safe editing environment for your selfies.
Discover how these cutting-edge AI features can transform your selfies and help you make a lasting impact on your online presence.
3. Ensuring Privacy and Security in AI-Generated Images
In the fast-evolving landscape of AI technology, privacy and security concerns hold paramount importance. Here are pivotal strategies to safeguard your data while using an AI selfie generator app:
1. Secure Data Encryption
Implement robust encryption protocols to protect user data from unauthorized access.
Utilize advanced cryptographic techniques to ensure end-to-end encryption of images and user information.
2. Transparent Privacy Policies
Provide clear and concise privacy policies that outline how user data is collected, stored, and used.
Ensure transparency regarding the sharing of AI-generated images and user details with third parties.
3. Biometric Data Protection
Adhere to stringent regulations concerning the protection of biometric data, such as facial features captured by the AI tool.
Implement measures to anonymize biometric data to prevent unauthorized use or access.
4. Regular Security Audits
Conduct frequent security audits to identify and address vulnerabilities in the AI image generator system.
Stay proactive in updating security measures to counter emerging threats and ensure data integrity.
5. User Consent and Control
Obtain explicit consent from users before processing their images or sharing data with external entities.
Provide users with options to control the visibility and accessibility of their AI-generated images within the app.
"Privacy and security are paramount in the realm of AI-generated images, requiring a proactive approach to safeguard user data and maintain trust."
4. Creating Different Looks for Your Social Media Profiles
In today's digital world, having a standout social media presence is crucial for personal branding and online engagement. A premium AI selfie generator can be your secret weapon to creating unique and captivating looks for your social media profiles that set you apart from the crowd.
1. Personalized AI-Generated Avatars
Utilize the power of AI technology to craft personalized avatars that reflect your individual style and personality. With advanced neural networks, these avatars can accurately capture your facial features and create a digital representation that is both realistic and visually appealing.
2. Experiment with Various Styles
Explore the diverse range of artistic filters and effects offered by the AI image generator tool to experiment with different aesthetics and moods. From vintage-inspired finishes to modern and sleek designs, there are endless possibilities to curate your social media profile according to your preferences.
3. Enhance Your Online Presence
By leveraging the exceptional quality of AI-generated images, you can enhance your online presence and strengthen your brand identity across various social media platforms. Stand out in the digital crowd by incorporating unique and eye-catching visuals that resonate with your audience.
4. Craft the Perfect Profile Picture
Ensure that your profile picture leaves a lasting impression by using the AI selfie generator to create a picture-perfect image. Whether you aim for a professional demeanor or a touch of creativity, this tool provides the flexibility to tailor your profile picture to suit your desired image.
5. Seamlessly Incorporate AI-Generated Art
Integrate AI-generated art into your social media feed to add a touch of innovation and sophistication to your content. Share visually striking images that convey an artistic flair, showcasing your creativity and individuality in a compelling manner.
6. Privacy Concerns Addressed
Rest assured that while using this AI tool to enhance your social media profiles, privacy concerns are taken seriously. The app follows a strict privacy policy to safeguard your data and ensure a secure experience while enjoying the benefits of AI technology.
7. Simple Text Input, Powerful Results
Experience the ease of use of this AI app by simply inputting text prompts to initiate the image generation process. Witness how this powerful tool transforms your ideas into realistic images, allowing you to create captivating looks for your social media profiles effortlessly.
5. AI Avatar Creation for a Distinctive Online Identity
Creating an AI avatar is a revolutionary way to establish a distinctive online presence that sets you apart from the crowd. Leveraging advanced artificial intelligence technology, an AI avatar generated by a premium tool like Lensa App offers a unique opportunity to showcase your individuality in the digital realm.
Unveiling Your Digital Persona
By utilizing the AI image generator feature, users can bring to life a digital representation of themselves that reflects their personality, interests, and style. With just a simple text prompt, the tool works its magic to transform words into a visually stunning AI-generated avatar. This process not only simplifies the creation of a profile picture but also ensures exceptional quality and realism in the final image.
Top Features of AI Avatar Creation
Personalization: Tailor your AI-generated avatar to capture your facial features, expressions, and even experiment with different looks, offering a fun and creative way to express yourself online.
Ease of Use: The simplicity of inputting text prompts and letting the AI technology do the rest makes creating an avatar a hassle-free experience, ideal for users seeking a quick and efficient solution.
Unique Feature Selection: Benefit from a range of unique features and customization options that allow you to fine-tune your avatar to perfection, ensuring it aligns with your desired online identity.
AI Avatars and Privacy Concerns
While AI avatars offer a compelling way to enhance your online presence, it's essential to consider privacy implications. As AI technology continues to evolve, ensuring that your personal data and digital identity are protected should be a top priority.
Enhancing Your Social Media Presence
Utilizing an AI-generated avatar can elevate your social media presence by providing a visually engaging and eye-catching profile picture that resonates with your audience. Whether on professional platforms or social networks, a distinctive AI avatar can leave a lasting impression.
"Your digital avatar is not just an image; it's a representation of your digital identity crafted with precision and creativity."
Conclusion
In conclusion, the transformative power of a premium AI selfie generator cannot be overstated. With cutting-edge technology seamlessly integrated into user-friendly interfaces, these apps bring a new level of sophistication to your selfie game. From flawless skin retouching to intelligent background removal, the features offered by these tools are bound to impress even the savviest selfie enthusiasts.
Moreover, the convenience and efficiency of using a premium AI selfie generator save you valuable time while ensuring professional-looking results. As you explore the diverse capabilities of these apps, you open up endless possibilities for creativity and self-expression. Don't miss out on the opportunity to enhance your photos effortlessly and stand out in the digital sphere.
FAQ
Q1: Can I control the AI-generated images?
A1: With a premium AI selfie generator, you have full control over the generated images. You can adjust the settings and choose from various filters, effects, and enhancements to create the perfect selfie. This level of customization allows you to showcase your unique style and personality in every photo.
Q2: Is it safe to use an AI selfie generator?
A2: Yes, a premium AI selfie generator app is safe to use. These apps use advanced algorithms and filters to enhance your photos, and do not pose any security risks. However, it is always important to download apps from trusted sources and read the app's privacy policy before using it.
Q3: What is an AI selfie generator?
A3: An AI selfie generator is an app that uses advanced artificial intelligence technology to enhance and transform your photos. It can automatically retouch and edit your selfies to improve their quality, making them look more professional and aesthetically pleasing. Some AI selfie generators also offer additional features such as background removal, virtual makeup, and face slimming.
Q4: How does an AI selfie generator work?
A4: An AI selfie generator uses advanced artificial intelligence technology to analyze and enhance your photos. It can automatically adjust lighting, remove blemishes, and even change facial features for a more flattering and realistic look. Some AI selfie generators also have features like background removal and makeup filters to further enhance your selfies.
Q5: Can I use AI-generated images for commercial purposes?
A5: It depends on the terms and conditions of the specific AI selfie generator app. Some premium apps may allow you to use the AI-generated images for commercial purposes, while others may have restrictions. It is important to carefully read the app's terms of use before using the generated images for commercial use.
Q6: How can an AI selfie generator enhance my social media presence?
A6: With a premium AI selfie generator, you can easily edit your selfies to perfection and stand out on social media. This app offers advanced editing tools like skin smoothing, background removal, and face reshaping to help you create stunning and flawless selfies that will make you stand out from the crowd. Additionally, some apps even offer special filters and effects specifically designed for social media platforms, making your photos more engaging and shareable. With a premium AI selfie generator, you can easily enhance your social media presence and make a lasting impression on your followers.
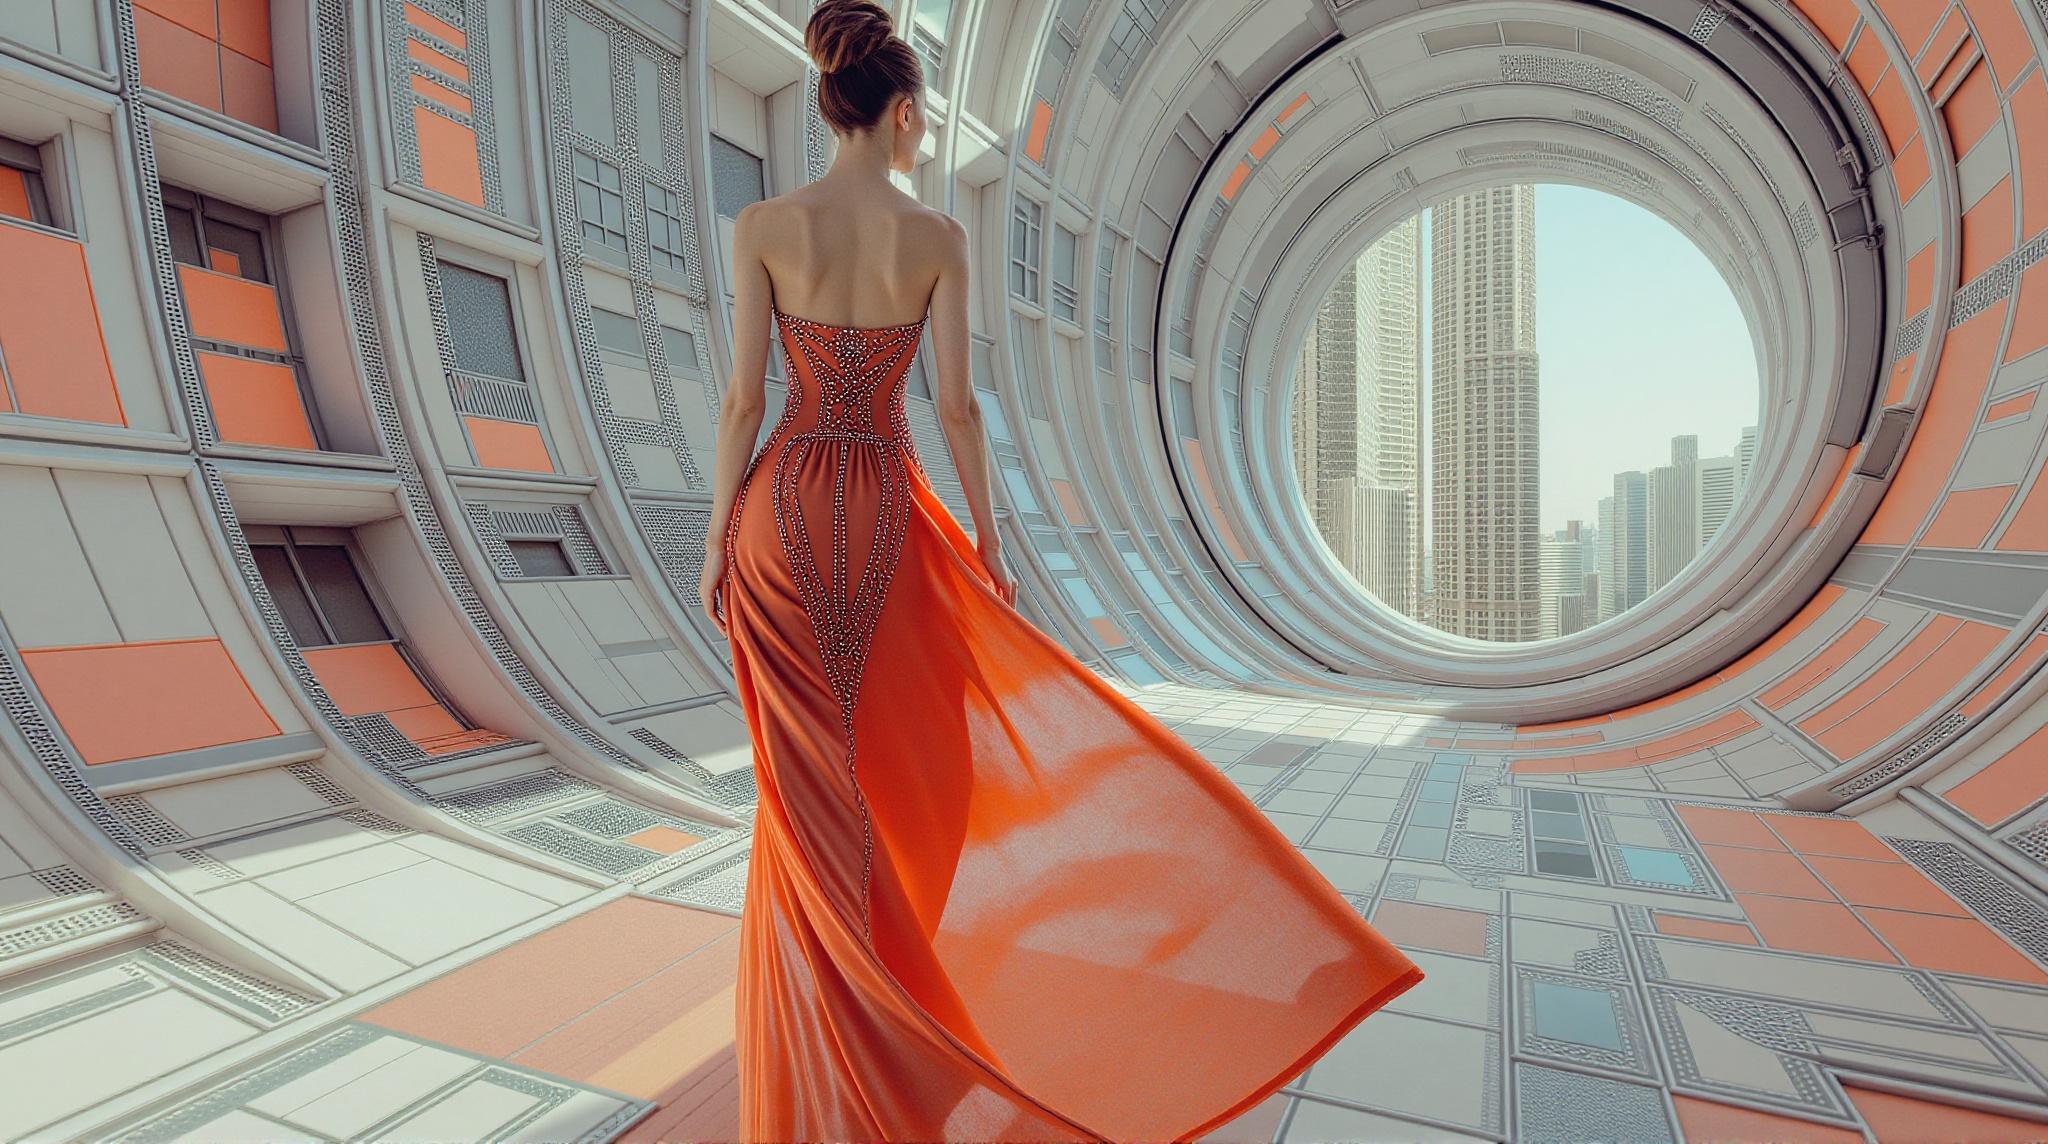
Create a dreamlike
vision with APOB
Create a dreamlike
vision with APOB
No credit card needed